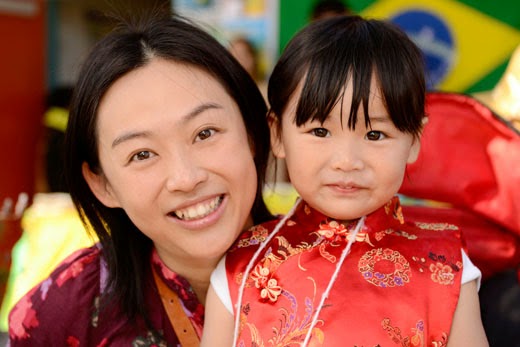
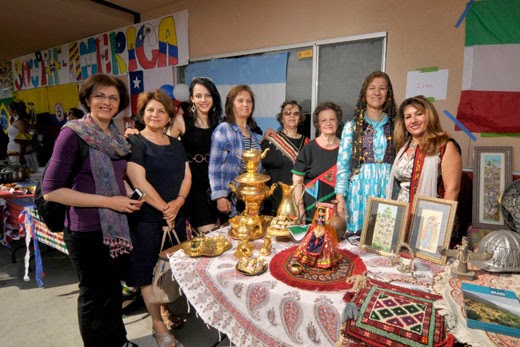
Sunday, June 29, 2014

International Day 2014

Photo #1
International Day at the San Mateo Adult School is a big event. Normally, students are grouped by ability, but for this event, students form planning groups based on their countries of origin. Along with cultural displays and an international buffet of food from around the world, there is a program of traditional songs and dances. For a photographer, it's a target rich environment, with many opportunities to experiment with different lighting techniques. I had Cissie to assist me, so she became my "Voice Actuated Lightstand". This gave me the freedom to position my light wherever I wanted, within reason.

I used a single Nikon SB-800 as a light source, but added an SD-8 supplementary battery pack modified to work with the SB-800 and SB-900 speedlights. This gave me a shorter recycle time, a helpful addition when multiple shots are necessary. For Photo #1, #2, and #3 I used a Lastolite 15" EZBox on the end of a paint pole. I rotated the SB-800 so the sensor cell faced to the rear. So long as the camera was slightly behind the EZbox, I could easily maintain line-of-site communication between the on-camera commander and the remote SB-800. In Photo #1, the EZBox is held just above the camera. You can see that the lighting on background is mixed: While most is in the shadow, there is a yellow "hot spot" created by direct sunlight. You can tell the subject is completely in shadow by the absence of highlights in her hair.
Photo #2
The subject in Photo #2 was standing with her back to the late morning sun.The sunlight was strong enough to provide highlights for the hair but from an angle low enough to not light any portion of her face.  The background exposure was an average of the darker shadow regions and the reflect light from the concrete sidewalk. My personal takeaway is a reminder to carefully check the subject in the LCD before moving on. Had I done this, I might have noticed that the top of her head gets a little lost in the background sky. It would have been very easy to have my subject take a few steps backward, had I noticed the problem earlier.

Photo #3
Photo #3 was a simple shot with the subject and the background completely in the shade. Not particularly interesting, but a good record of an enthusiastic guest at the party.
Photo #4
Photos #4 and #5 were pretty much "light on a stick" photos. They were made with using direct flash (no modifier) triggered by a no-name radio flash trigger. This setup was originally for a digital camera that didn't support Nikon's iTTL (intelligent Through The Lens) flash metering, but at the last minute it was used on a Nikon DSLR. Here, the speedlight provided some fill light for the shadows. Flash output was set manually, but I don't remember to what level. I often set the output manually when my light-to-subject distance remains fairly constant or when there is a chance that a light colored background like the sky might confuse the iTTL metering. 

If you look closely at the Photo #4, you'll see the shadow cast by the flash beneath the subject's chin. I suspect that these shadows are only annoying to people like myself, but the elevated position of the flash prevents over exposure of the subject's lower body, something I'd find much more troubling that the double shadow.
Photo #5
Photo #5 demonstrates how much one can get from a single speedlight, providing you have a wide-angle lens on your camera. The short working distances for the camera and the flash can give you access to small apertures to keep your shutter speed within the limits set by your maximum synchronization speed. The brightness levels of the shadows and the highlights are very close.
Photo #6
On camera flash fill still has a place (Photo #6). If you're using a wide angle lens and can keep the subject's plane of interest parallel to the sensor, you can minimize distortion at the corners. It also helps to keep the subjects as close to the center of the image as possible. Remember that the fill light from your flash adds to the existing fill from the concrete, so one wouldn't want to overdo it. In this case, the fill is so subtle that you might not notice it. But if you examine the boy's jawline, you can see from the relative brightness of the shadow that there is a fair mount of ambient fill light coming from below. As with all things, don't overdo it.

Sunday, June 22, 2014

Judge's Night 2014

Because my editor was a local attorney, I have photographed a number of events unique to the legal community in San Mateo County, where Redwood City is the county seat. I photographed a number of events in the picturesque historic county courthouse, and have done some "behind the scenes" shots that most people don't get to see.

My father told me that whenever there is a group to be photographed, start looking for a staircase.This is still good advise. It allows you to get better separation top and bottom separation in the subject's faces than you'd get by using the standard, "Tall people in back, less tall people in front". These particular stairs allowed passage to a sort of sunken living room, which in this case, was where the real party was happening.

Photo #1


Since I expected to be photographing a fairly large group, I brought my longest lightstand, and mounted 2 Nikon SB-800s in a mount I made that put the two flash heads side by side (Photo #1).The device is simply a piece of aluminum channel stock with three 1/4" holes: one for the brass spigot for attachment to an umbrella bracket, and two to hold, in this case, two Nikon AS-10 knockoff mounting shoes held in place with a 1/4 X 20 socket head screw. The distance between the mounting holes is equal to the width of the flash head (the widest point in the SB-800) plus an extra 1/4" in case I needed some additional width to accommodate any attachments. I purposely mounted the shoes so that the speedlight sensor eyes both faced forward. If my speedlights are position in front of me, I'll the sensors will face rearward. If my speedlights are behind me, the sensors will face forward. In most cases, I'll default to the sensor forward position, as shown. If I'm using a shoot-through umbrella, the sensors can usually detect the flash pulse if it's reflected from or passing through the fabric, depending on where the light is placed.

Photo #2
On suggestion: If you have the time to adjust your exposure manually, you can use the optical SU-4 sensor built into the SB-800, SB-900, and SB-910 speedlights. Used in this mode, the speedlights are much more responsive, so it didn't surprise me that the they "see" through a shoot-through umbrella. This is how I triggered the speedlights.
In this extreme closeup (Photo #2), you can see the double shadow from the chandelier created by the side by side mounting arrangement. This is more prominent when the distance from the object to its shadow increases, although I doubt that most viewer would notice. But if you're shooting against the sky, you're golden.

Photo #3
I rearranged some of the furniture to make room for my light stand, which for this shot placed the speedlights nearly 10 feet in the air. Once everything was set I stood by it, warning people away, and hoping it wouldn't get bumped, or worse, tipped. But the height was necessary to eliminate the "billiard ball" glare you often see on the tip of the nose. The extreme high also narrowed the distance between the front and rear row subjects, resulting in even lighting from front to back.

This preliminary shot shows the staircase as seen from my shooting position (Photo #3). One thing that is very obvious: The sun is shining through windows just behind me. It would have been nice if there were blinds I could close, but that was not to be. And another thing: because the sun was setting, the "hot spot" would move higher and higher. I really needed to get the shot done as soon as possible.

I knew that there would be problem with the dappled lighting effect, but this couldn't be helped. I wasn't going to scout out a better location, since to took no small amount of cajoling just to get my subjects to gather in one place. In arranging my subjects, I applied some quick, basic rules:
  • Taller subjects in the back, less tall subjects in front.
  • Subjects wearing glasses were moved to camera left, the same side as my speedlights. On close examination, I missed one.
  • Front row subjects would stand on the first step to make sure that everybody's face was out of the sun.
  • Ladies on camera right. This would give them slightly better lighting than their male counterparts, something that was noticed by some of the men.
Photo #4
In the pre-cropped sample (Photo #4), you can see that everybody's face is lit only by the speedlights. By setting both SB-800s to full power and giving each one its own SD-8a battery pack, I got the power I needed without the long re-cycle times. A bit more effort, but when faced with 17 current and former judges, you really don't want to keep them waiting.
Photo #5
The final cropped version (Photo #5) removed the carpet as a reference point. Next time, I'll remember to ask that all of the men button their jackets. I did see the one judge without a coat, and moved him to the second level. But I missed the judge in the front row with the open coat. But the time between the first shot and the last shot was less than four minutes, and the results perfectly acceptable under the circumstances. And I managed to keep everyone's face properly lit, which is really all that matters.

Sunday, June 15, 2014

The "See" Change: Posing Then And Now

Photo #1
Then. It funny how we "see" things changes over the years. So far as photography goes, many of the images taken during the 1960's were influenced by the limitations of the available equipment,  or the tastes and preferences of the day.

Peggy was my classmate at the Twin Peaks Elementary School (Class of '63). Recently, her name came up in a conversation with some friends and  when I Googled her name, this photo, dated September 30, 1968, appeared (Photo #1). I have no idea what the two are either holding, or pulling apart. Peggy's arm band is a nice touch. A little heavy on the "context", I would say. I'm sure if I were to compare it the other photos from the time, they'd all look about the same.
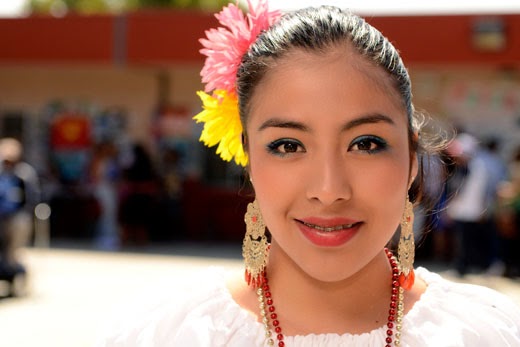
Photo #2
On May 23, 1973, my first photo (Photo #2) was published. It has a similar bounce-flash look (soft shadows, top lighting) because that's how I made it. Since my I didn't own a Honeywell, I had to calculate/guestimate a workable exposure. A few years later, I read Techniques of Photojournalism: Available Light and the 35mm Camera by Milton Feinberg, and his approach to photographing people included portraying them as animated and involved subjects interacting with each other, or doing something interesting. Looking back, I tried to do this with all my photos, and have come to believe that I was on the right track.

I probably had much more fun photographing a cooking class than an award winning high school senior, since there was lots of action at the former, and almost none at the later. Still, I have to wonder if something couldn't have been done to make the first shot more interesting. I'm obviously not above Monday morning quarterbacking.
 
Now. I was asked to photography a handgun safety class being sponsored by a local shooting club. When they took a break, I introduced myself to the entire group and explained what I was doing, and that I wanted to make a photograph showing that women, often ignored in the shooting sports, could learn to handle firearms in a safe and relaxed environment. When class resumed, I went outside looking for a suitable background.

Since there would be no live fire that day, I had to approach the photo from a safety, rather than a marksmanship, angle. After finding a suitable location, I had these three students bring their safety equipment (hearing and eye protection) to the firing line. When the arrived, they brought some Blue Guns, non-firing plastic replicas made to look and feel like actual handguns. When they brought them to the firing line they were already demonstrating safe gun handling practices: muzzles up and fingers off the trigger. This photo is starting to come together.

Arranging Subjects. Due to restrictions on space, I had to use a my widest angle lens, which makes the women in the background appear smaller. I had arranged for the smallest woman to stand nearest to me. As for the other two, I purposely placed the second woman slightly behind the first to make her appear a bit slimmer. The third student was tall and slender, so her standing by herself wasn't an issue. Now all I needed was an instructor. I went back into the classroom and grabbed a female instructor and asked her if she would join us outside. Thankfully, she agreed.
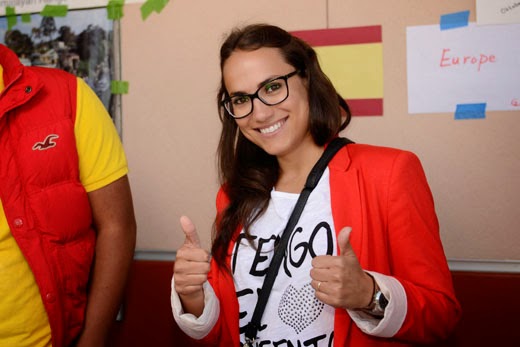
 
Photo #3

To expand on the safety aspect, I had the instructor hold a pair of ear muffs and re-explain the advantage of "muffs" over "plugs" (Photo #3). Although this was covered in the classroom, they didn't seem to mind the review. One thing I noticed: The instructor allowed her left arm to fall to her side. So as she spoke, I gently guided her arm to an elevated position. She continued her talk, not missing a beat.
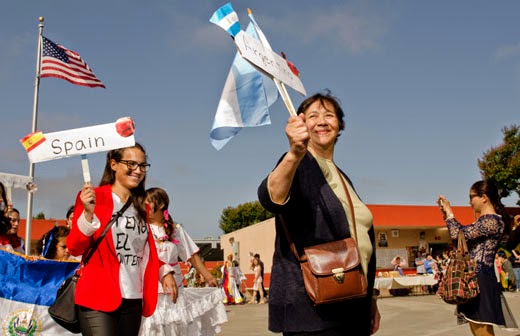
Photo #4
You can see that my simple redirection of her arm helps to keep the viewer's interest inside the photo. At one point, her left hand opened, she made a joke, and everyone chuckled. I had my shot (Photo #4).

A purist might argue that this is a posed shot, and therefore not "real". I believe it is a managed shot, as they were actually in the process of reviewing material covered in class. I believe the image both tells a story and engages the viewer with some interesting visual elements. It doesn't shout "posed". By combining words (the caption) with the image, we help the viewer understand the situation better than either could have done alone.

And it's much more interesting than the shot of Peggy and Mrs. Wilson. 

I am well aware that from a documentary standpoint, my interaction with my subjects invalidated this photo's journalistic integrity. However, I would argue that as a photographer submitting a shot for the Community Section, pages full of smiling "picket fence" photos, one is entitled to a bit more leeway so far how much a photo has been managed. If this was considered hard news I should never do what I did. 

Sunday, June 8, 2014

Memorial Day 2014

During the Memorial Day weekend, over 100,000 flags are placed at the graves in the Golden Gate National Cemetery in San Bruno, California.Cub and Scout Troops from the area, along with Veteran's Groups, are assigned flags and a specific zone where the flags are to be placed. It is a time for remembrance, and these young men and women perform this task with respect befitting the occasion.

Photo #1
When I arrived, there were dozens of scouts milling around, eating donuts and drinking hot chocolate, waiting for the ceremony to officially begin. I noticed this young man looking over the cemetery, the headstones appearing to go on forever (Photo #1). While I would have preferred somebody in uniform, I took a sketch shot to see if the shot had any potential. I abandoned the idea because I need a point of reference to the planting of the flags, which was the reason I was there in the first place.

Photo #2
Just before the actual ceremony started, I looked for a suitable place to shoot from. I generally try to take a position and stay put, since moving about would probably be a distraction. There were several other photographers who didn't share this view, and some actually moved up by the stage to photograph the scouts as they stood at attention and saluted the colors. Getting a great position is often a matter of luck, and in this case, it was bad. The American flag is barely visible in the background (Photo #2).

Photo #3
One thing that I've discovered about flags: They change with the wind. The gust brought the near flag into a rather awkward resting place (Photo #3). 

Photo #4
While all this was going on, I too was looking for that "Saluting Scout" that might be interesting. This young man was just a few feet from me, so I thought I'd make a few shots of him (Photo #4). Since his father was standing behind him, I made eye contact, held up my Press Pass for him to see, and pointed to my camera. When he nodded, I started shooting. I try to be particularly careful about photographing children, and while I technically have the "right" to photograph anyone or anything in a public venue, it's easier when I have permission. Also, I don't have to explain why I'm taking so many shots, which always seems to happen when I'm trying to get "the" shot.

Photo #5

This Coast Guardsman was planting flags with the help of these two scouts. Again, I introduced myself quickly, and started shooting. This was one of over a dozen shots taken from this vantage point. I chose this one because there was an implied front to back motion as the near scout handed a flag to the other so it could be placed in the hole being made by the special tool you see at the left (Photo #5).  I actually used a shoe-mounted flash at reduced power to lighten up the shadows. It has a subtle effect on the flesh tones, since the color temperature of the flash is "warmer" that the Cloudy Bright white balance setting of the camera. The results are more saturated colors and warmer flesh tones. The slight shadow on the near scout's arm is about the only clue that flash had been used.
This was the shot I would submit.


Photo #6
There is one lens that I always carry when I shot at the Golden Gate National Cemetery: My seldom used, 150-500 Sigma. I bought the lens based on some favorable test reports, but to this point I was never felt confident in its performance. But its 500mm maximum focal length would give me the front to back compression that results from longer than normal shooting distances. I liked the concept of the shot, but the people in the background and the scout's position didn't add to the context (Photo #6). I decided the shot wasn't going were I wanted, so after several tries, I started looking for something else.


Photo #7
I noticed this lone scout standing on the hill, and when I zoomed in to refine the composition, saw that I had the compression I was looking for. He was also holding a bundle of flags, which gave the viewer a clue as to why he was there. When he looked up, I made the shot (Photo #7). And I knew that this shot would also be worth considering, so I sent it too.

The Editor In Chief must have liked them both, as he printed #7 on the Front Page and #5 on Page 2.

Now I think I can trust the Sigma.


Sunday, June 1, 2014

Carnaval 2014

The approach of Carnaval 2014 was a pleasant surprise. There had been doubts that funding would be available to finance this iconic San Francisco experience. A little bit of the Caribbean, Latin American, and Chicano all mixed together with music, dance, and universal good times for a bright, shiny day in May. So once again, I went into the San Francisco's Mission District to photograph the participants, all expecting to be photographed. Many, it seemed, were truly at ease in the uninhibited personas they chose for themselves.

In The Bag: I went with two Nikon D70 bodies and my three must have lenses: A wide angel 12-24 F4.0 Tokina (slower, heavier, but sharper than my 10-24 Tamron), a 28-70 F2.8 Tamron, and my 70-300 Nikkor. I carried only one flash, a non-automatic Yong Nuo 560. I chose it over my usual SB-800 because it has one special feature: Its simplified triggering electronics allow it to synchronize at all shutter speeds, and it will work on Canon bodies too. When set to 1/4 power, it will discharge completely at1/1000 of a second when used with a Nikon D70. This is pretty much the practical performance ceiling because a shorter shutter speed or a more powerful flash setting will result in clipping (the loss of flash power at the back end of the discharge curve. Trust me). I decided to not carry a monopod for extended off-camera lighting. Instead, I attached the Yong Nuo to the camera with a Nikon SC-17 partially disabled for full synchronization (see this earlier post) and would hand hold the flash. 

Photographing In The Shadows: One can get some dramatic images by placing your subject completely in shadow and allowing the background to be fully lit by direct sunlight. Here, your flash provides the only effective key light on your foreground subject. If no fill is added, the shadows will be dark and dramatic. The edge on the shadow will be fairly sharp, but this really can't be helped, considering the limitations of the equipment and the amount of flash energy available for the shot.
Photo #1
In the photo (Photo #1), I held the light away from the camera and aligned with the young lady's nose. And while the light won't win any awards, her face is gently rendered, considering that this is hard, direct light source. It's all in the angle of approach, and the facial essentials, the eyes and the smile, are well rendered. More on this later.

With a subject like this Aztec headdress (Photo #2), the vivid colors alone could carry the image. Again, had I the luxury of better lighting, this image could have really hummed, but for a shot made on the fly with no preparation time, the results are pleasing, and potentially publishable.
Photo #2
Working up close and at eye level also made my arms "longer" and better able to properly align the light  with my subject's nose. The original shot was about one full stop over-exposed, probably because my camera was set the properly expose at a distance of about seven feet, the the shot made much closer than that. RAW processing brought the image into line, and some judicious dodging and burning brought some "pop" back to the image.

Backlit Subjects:"Backlit Photographs" are those where the main light source is coming from behind the subject. Assuming that your a photographing outdoors, the light will "halo" your subject, usually resulting in some overexposed highlights. When photographing without supplementary lighting (flash or reflector), the subject and the background receive the exact same amount of light, usually from the blue sky above, which tends to run on the cool side. If you need to maintain detail in the highlights, you'll need to adjust your exposure downward, underexposing both your subject and the background. The addition of a flash will only effect your foreground subject, leaving the background "in the dark" (Photo #3).
Photo #3
In the inset on the left you can see the positive effects of the sun backlighting my foreground subjects. The exposure kept the details in the pineapple fronds, while the flash gave me facial details. In the inset to the left, you can see that all of the essential detail was maintained.

One important caveat: If you try to lighten the background to increasing your exposure time, you will also lighten your subject by the same amount. The additional light provided by your flash will potentially overexpose your image.

Compositional elements aside, I rather like the photo, primarily for the abundance of yellow and green. I find the children in the foreground a little distracting, but you have to laugh at the juxtaposition of the inflatable bananas and the Carmen Miranda headpiece. Those bananas, by the way, were used by the "Banana Drill Team", another concept you have to laugh at. But humor is a big part of Carnaval, and you have to chuckle when you find it hidden in plain sight.


Photo #4
I included this backlit shot (Photo #4) for comparison purposes. The placement of the flash does make a difference in how the face is rendered, and it's pretty obvious once you know what to look for.
This shot was made from a low camera angle, with the flash held as high above as my arms would allow. If you compare the nose shadows in the left and right samples in Photo #5, you can see that there are fewer highlights (bright spots) on the left sample than on the right. This is because I was able to get my flash slightly above the nose on the left shot, but not on the right. This is an important difference, and worth remembering when you use you flash outdoors. I'm sure that if my flash was mounted on-camera, the results would have been much worse.
Photo #5
Photo #6
Flash Fill For Side Lighting. In all of the previous examples, the flash provided all of the light to illuminate the subject. While not the case here, the ambient light level may contribute to the overall exposure. But when photographing subjects with a strong amount of side lighting, you may want to consider the effects the sun will have on the final photography. You can see the amount of side lighting effects the dancers in different ways (Photo #6). The two from the left have are lit from the side, while the two on the right the sun has little effect. For the rightmost pair the fill lighting renders them as "normally" exposed, while those on the left show some overexposure where the sunlight adds to the flash fill. In the end, the left were overexposed by the additional sunlight, while the rightmost pair are enjoying a colorful accent light.

If possible, consider how much you want the side lighting to contribute to the shot, and how much fill you'll want to add. Full-on flash fill works for the two on the right, but adds a bit too much light to the dances on the left. This is not to say that you can always predict exactly how such images will finally turn out, but anticipating the possible consequences is one half of the battle.

Photo #7
Flash Fill For Front Lighting. You can tell by the length and direction of the shadows (Photo #7)  that this pair of dancers is lit from the front, and fairly early in the morning. To properly expose a shot like this, you must balance the sun's exposure with you flash output. When confronting a front lit subject, a quick rule of thumb is to underexpose the ambient by 1/2 stop, and adjust your flash to provide 1/2 of the output you would normally need to expose your subject. Now your highlights will get full exposure (1/2 from the flash and 1/2 from the sun), and the shadows will 1/2 of the proper exposure value, or a tad more if photographing on a lighter concrete surface as opposed to darker asphalt. These are not hard and fast rules, but from a mathematical point of view, illustrate the cumulative nature of mixing artificial and natural light.

Photo #8
High Noon Fill. At noon, the sun will be in it highest possible position. I applied the 1/2 + 1/2 rule to this shot (Photo #8). You can clearly see that this technique gives a proper amount of exposure contrast to the highlight and shadow areas. Since I knew my flash would be acting as a fill, I mounted it on the camera's hotshot to get it closer to the lens' axis. This gave me some great catchlights in my subject's eyes, another plus. Don't get me wrong. Photographing in direct sunlight at high noon is the pits, and so long as the sun is provides the main light source, you'll get less than spectacular results. But when you have to make a photo under these circumstances, you can at least deliver a properly exposed image with lots of shadow detail. Just don't overexpose the highlights.

Now for the record I default to exposure settings that tend to underexpose my images, simply because I usually try to include some portion of the sky as a background and I want it rendered somewhat darker than normal. My go-to lens is usually a wide angle, which allows me to photograph at shorter distances, allowing the output from my underpowered flash to have a greater impact on the shadow exposure.

I have said in earlier posts that Carnaval offers photographers a chance to experiment with composition, lighting, and a variety of other people photography skills. Just remember to smile a lot, and enjoy both the joy and humor that are all around if you just keep your eyes, and ears, wide open.