 |
| Carlota Zuniga, Kira Man, Angela Taylor, and Stefanie Wright |
I've been retired for three years now, and I haven't spent much time at the school. I did commit to helping out with the graduation ceremony in 2019, the last one since the start of the pandemic. The years away from the posing routine left me a little rusty in 2021, and as a result, I missed some details in some of the images. This posting is really an After Action Report as a reminder to my older self that mistakes should be made only once.
To my defense, I was working with a variety of limitations. First off, we were still masking indoors, so my subjects removed theirs only after I had stepped back to a safer shooting distance of eight feet. Trying to communicate with hand signals was trying, so the diplomas may have been slightly tilted. Lastly, having sold off my super 800 WS Norman flashes, I was forced to shoot with smaller light modifiers used at much shorter distances.
From the subject's perspective, you can see I used a simple two-light butterfly setup. The key light was a 24" collapsible softbox with a 200 WS bare-bulb flash mounted inside. The fill light was a standard shoot-through umbrella on the floor with a 60 WS optically-triggered speedlight mounted near the umbrella shaft. During the setup, I mistakenly calibrated the key light first. This made the effect of the fill light harder to evaluate. Next time I'll set the output of the fill light first, and fine-tune the key light output later.
With this setup, I normally stand beside the light stand to give myself a consistent exposure on my subject.
Viewed from the camera position, you can see that a collapsible 5' x 7' Botero background held up by two light stands and arranged to provide a landscape orientation. If you look closely, you can also see a tiny, boom-mounted flash position just above my subject's head to provide some separation from the background.
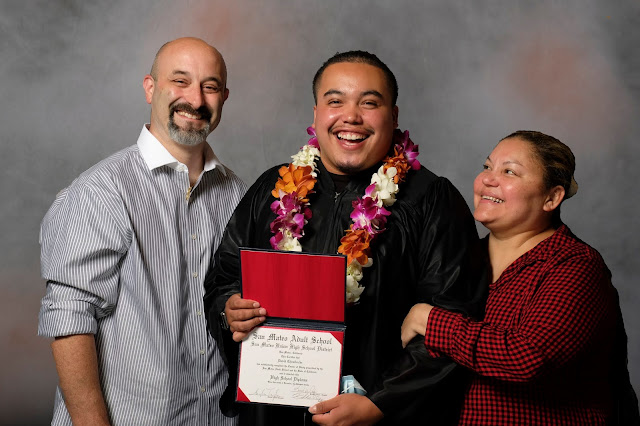
The collapsible background, while convenient, would prove too narrow if I had more than three subjects. I initially wanted to include only the graduate's parents, but had to adapt quickly when spouses and children get involved. I should have brought a full-width background but wasn't confident there would be enough floorspace to accommodate it.Oh No! In this Right Out Of Camera shot, you can see that I initially misjudged how much background I really needed. I was working to a tight schedule, so I held my breath and started shooting. This final photo had the expression I really wanted, but I knew I'd have a lot of retouching to do before it could be presented as finished.
I remember that a well-known Denver photographer named Sandy Puc suggested that one should always make a photo of the backdrop using the same exposure settings, just in case one needed it to clean up a cluttered background. This I dutifully did.
The background photo can be seen at the right. Next, I created a second layer above it, then copied and pasted the group photo onto it. Next, I alternately used the Magic Wand and the Eraser tools to select, then erase, the background clutter from the group photo, allowing the clean background layer beneath it to show through. By using a background photo made with the same exposure settings as the group, you can get a very close color/exposure match when blending the two images. When it was all done, the layers were flattened, and some minor retouching done to blend the edges. You may need to selectively blur the edges if you need to soften the edges where the two images meet.
I want to think that a photo like this will find their way to a family Facebook page, or be made into a small print and given to a very proud grandmother. There are many posing corrections I could have made, but doubt they would have made a better photograph.


