 |
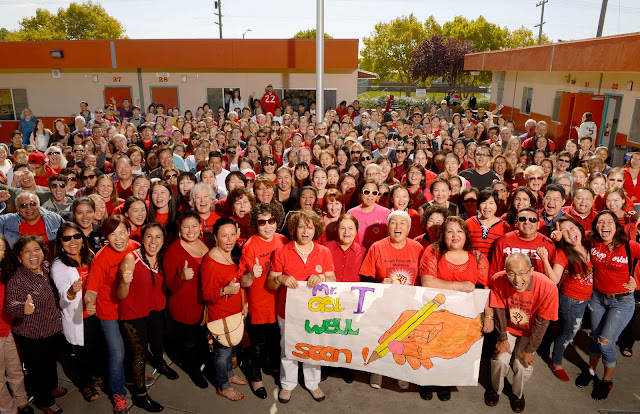
| Photo #1 |
Get Well Soon! The entire student body of the San Mateo Adult School got together for a "Get Well" photo for the school's Director (Photo #1). Despite the difficulty of directing nearly 300 students, the shot was made with twenty minutes of preparation and about five minutes of actual photography. The difficulty of a group shot of this size increases logarithmically with the number of subjects, and is further complicated by the fact that nearly all were non-native speakers of English. In spite of my best efforts, some people flowed past the edges of the frame, which goes unnoticed, for the part.
The approach was relatively simple: Stand on a step ladder while holding a Nikon D600 with a Nikkor 2.8 24-70mm lens. A Norman 800D flash was used with a 12 foot tall light stand just to my right. I had enough light from this monster flash to shoot at 1/200th of a second, F 13.0, and an ISO of 125. Slam Dunk.
 |
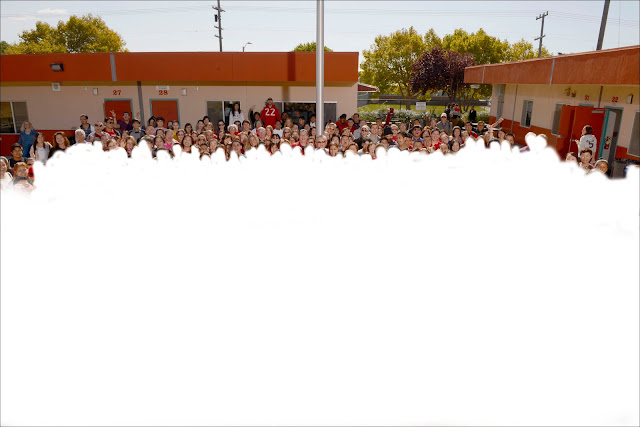
Photo #2
|
Yikes! When I viewed the image (Photo #2), my heart sank. You can see that the flash had fallen in intensity, leaving the more distance subjects in the dark. I had just exceeded the limits of my flash, and now I was stuck.
How could this be? I was using a Norman 800D powerpack with a single flash head had plenty of power, but apparently not enough to reach back to the last rows of well-wishers. Put simply, I was caught by a simple maxim: The greater the distance from the light source to the subject, the less intense the illumination.
Layers To The Rescue:
In an effort to brighten up my most distant subjects, I used the Layers
command to create two duplicates of my original image. When the layers are created, they will be perfectly aligned, one on top of the other. Each layer can be manipulated
individually.On the topmost duplicate, I did the
following:
- Adjusted the exposure to a more "natural" level, and
- Erased all of the students who were now too bright as a result of the adjustment (Photo #3).
 |
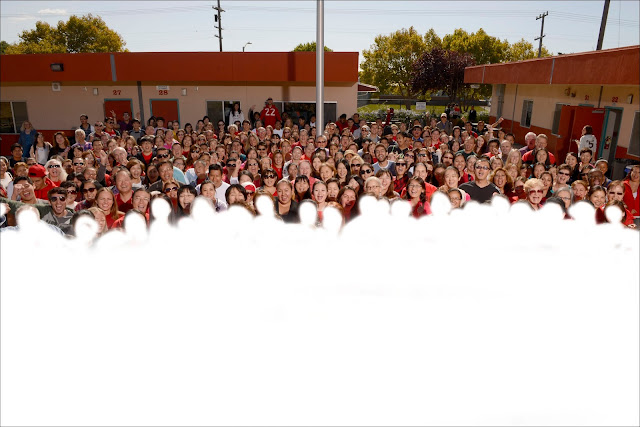
| Photo #3 |
Erasures: One thing to remember: When you erase a portion of a layer, you are not "painting" it. While the region appears white, it is actually transparent which allows the layer image beneath it to show through.
In this composite, you can see that the top layer (most distant subjects) was rendered in color, while the middle and foreground layers had been rendered in black and white.
 |
| Photo #4 |
I follow the same procedure with the middle layer (Photo #4), adjusting the exposure the the next closest line of students. When the top layer is placed above the middle layer, the net effect will be a brightening only in the back rows, while the middle rows show through the erased areas on Photo #3.
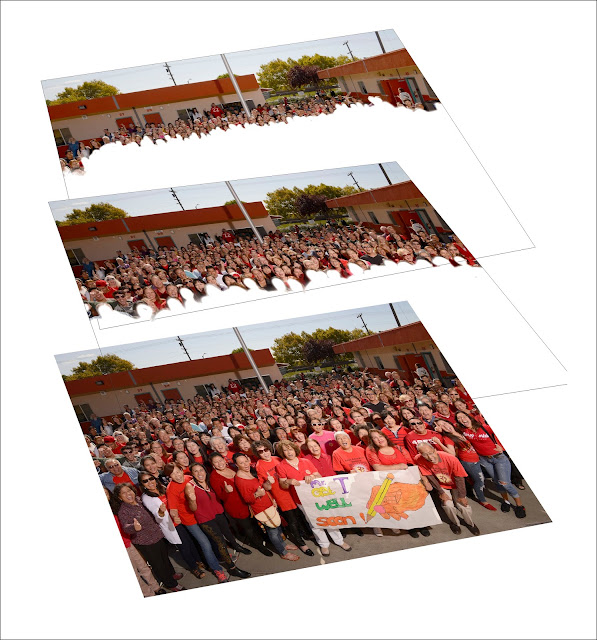 |
| Photo #5 |
Here you can see a simulated layer sequence for the three exposure-adjusted images (Photo #5). Notice that the background layer is above the middle layer, and the two sit atop the base image. Since they are all duplicates from the same image, registration should be perfect. You can see that a "trace" outline is visible on the background and middle ground layers.
Close Enough For Jazz: Careful examination of the background subjects shows a lack of contrast between the highlight and shadow areas. I believe the explanation lies in the relative weakness of the flash illumination when it travels to those faces in the back. In reality, the light hitting the farthest faces isn't that much brighter than the ambient light, so there is less shadow-to-highlight contrast. Boosting the brightness brings the tonal levels closer, but the "snap" seen in the front row is lost. I suspect that all such exposure manipulations will display this tell-tale lack of contrast, but under the circumstances, the overall quality of the final image was much more than I had a right to expect.


