Sunday, May 8, 2022

Maybe We Need To See Less Of Each Other

Photo from Wikipedia.
I was at Seawood Camera in San Rafael a few weeks ago, and even though I had no business doing so, I checked to see if there were any pre-owned Fuji digital cameras for sale. I purchased 2 Fujis there, an X-Pro2 and my second X-Pro1, and was actually hoping to see an X-E2 body. Instead, I saw a used X-Pro1 with one of the newer WR prime lenses. Much to my surprise, I didn't give a second thought to owning a 4th X-Pro body. I looked at its $1000.00 price tag and moved on.

Why the change of heart? Having three X-Pros in my collection wasn't it. Heck, its never stopped me from buying duplicates, triplicates, or quadruplicates of things I really liked. It's just that after using one almost daily for over a month, I can say that the shortcomings of this first-of-its-kind cameras have become a bit harder to accept, considering that faster, more modern Fujis are in my collection.

For the record, my X-Pros had all of the proper firmware upgrades, so they're all on their best game. But I've experienced some subtle difficulties that might be overlooked by a younger pair of eyes.

The Optical Viewfinder: Much of the X-Pro mystique is built around the Optical View Finder (OVF). As a feature, it offers a shooting experience similar to using a Leica rangefinder camera. In fact, the introduction of an adapter that would mate the Fuji body to an M-mount Leica lens was available at the time of the camera's introduction. Clearly the camera was meant to capture and retain Leicaphiles and turn them into Fujphiles. In short, the OFV was the gateway drug.

In practice, you still needed to revert to the Electronic Viewfinder (EVF) when you needed to establish critical focus. I say "critical", because many seasoned street photographers learned to "zone focus" their cameras, which is no more than guessing the distance, manually transferring that guess to the distance scale on the lens, and hoping that the depth of field for the selected shooting aperture would keep everything sharp. With the X-Pro1 in OVF, you pressing the Command Dial (white arrow) which toggles you into the magnified EVF when you are in the Manual Focus mode. Here Focus Peaking, plus the magnified image, certainly help. Pressing the Command Dial again returns you to the OVF mode. Using the bright line outlines, you'll need to re-compose your image before you shoot, just as you would have done with a Leica rangefinder (or Bessa, or Nikon, or Contax, ad nauseum). True to purpose, the X-Pro1 gave user the Leica experience particularly the focus-reframe-shoot process.

Lack Of Eyepiece Corrections (X-Pro1): When first introduced, I believe Fuji brought to market a digital camera that were trying to duplicate the look and field of the classic Leica rangefinder camera. Like so many cameras of the time, it was probably assumed that the user had 20/20 vision. If a user needed correction, it came in the form of small, screw-in eyepieces which came with several different strengths of diopter correction.  Even so, eyeglass wearers were bound to have more difficulty focusing, especially when confronted with bifocal lenses.

As I mentioned, critical focusing requires that the user revert to an iteration of the EVF. For me, I need the diopter adjustments that the X-Pro1 didn't have. The problem lies in my eyeglass correction. When using the viewfinder in either OVG or EVF, my eye is looking through the transitioning portion of my progressive lens, a never-never land of everything seems slightly out of focus. Diopter adjustments would be very helpful in establishing a compromise focusing distance. For now, I may ask my optometrist if the transition portion of the lens is more towards the lower third of the lens to give my eye better acuity when looking through the viewfinder straight on.

I may switch out to the X-Pro2 body, or even my older X-E1, just to see if I'm right. In the meantime, I stand by my contention that the Optical View Finder is best left to the purists with young, sharp eyes capable of rapid focus acquisition.

Saturday, May 7, 2022

Woodside Store Day


The Photo I Had To Make: The first of the requisite Four Bs of a good newspaper photograph (Babies, Babes, Beasts, or Blood) was represented in this photo, although in my world, "babies" and "cute kids" are one in the same. The context to link it to Woodside Store Days, the old fashion washing machine and clothes wringer, were there too. The focal point (where the subjects are looking) was apparent. With all of the boxes checked, I submitted the photo as soon as the caption was written, well before 7:00 pm deadline. The photo was destined for the front page, so with the photo "in the can", the pressure was off.

Woodside Store Day 2019
Past Efforts: I've photographed the Woodside Store Day event several times in the PP (Pre-Pandemic) years, and two photographs stick out in my mind. The one of the 2019 Pie Eating contest wasn't submitted because it consisted of two kids, their lips covered with berry pie filling. The young lady was smiling at her apparent victory, while the little boy beside her seems to be staring  disbelief. Since it really didn't have any visuals relating the event, it wasn't summited. 

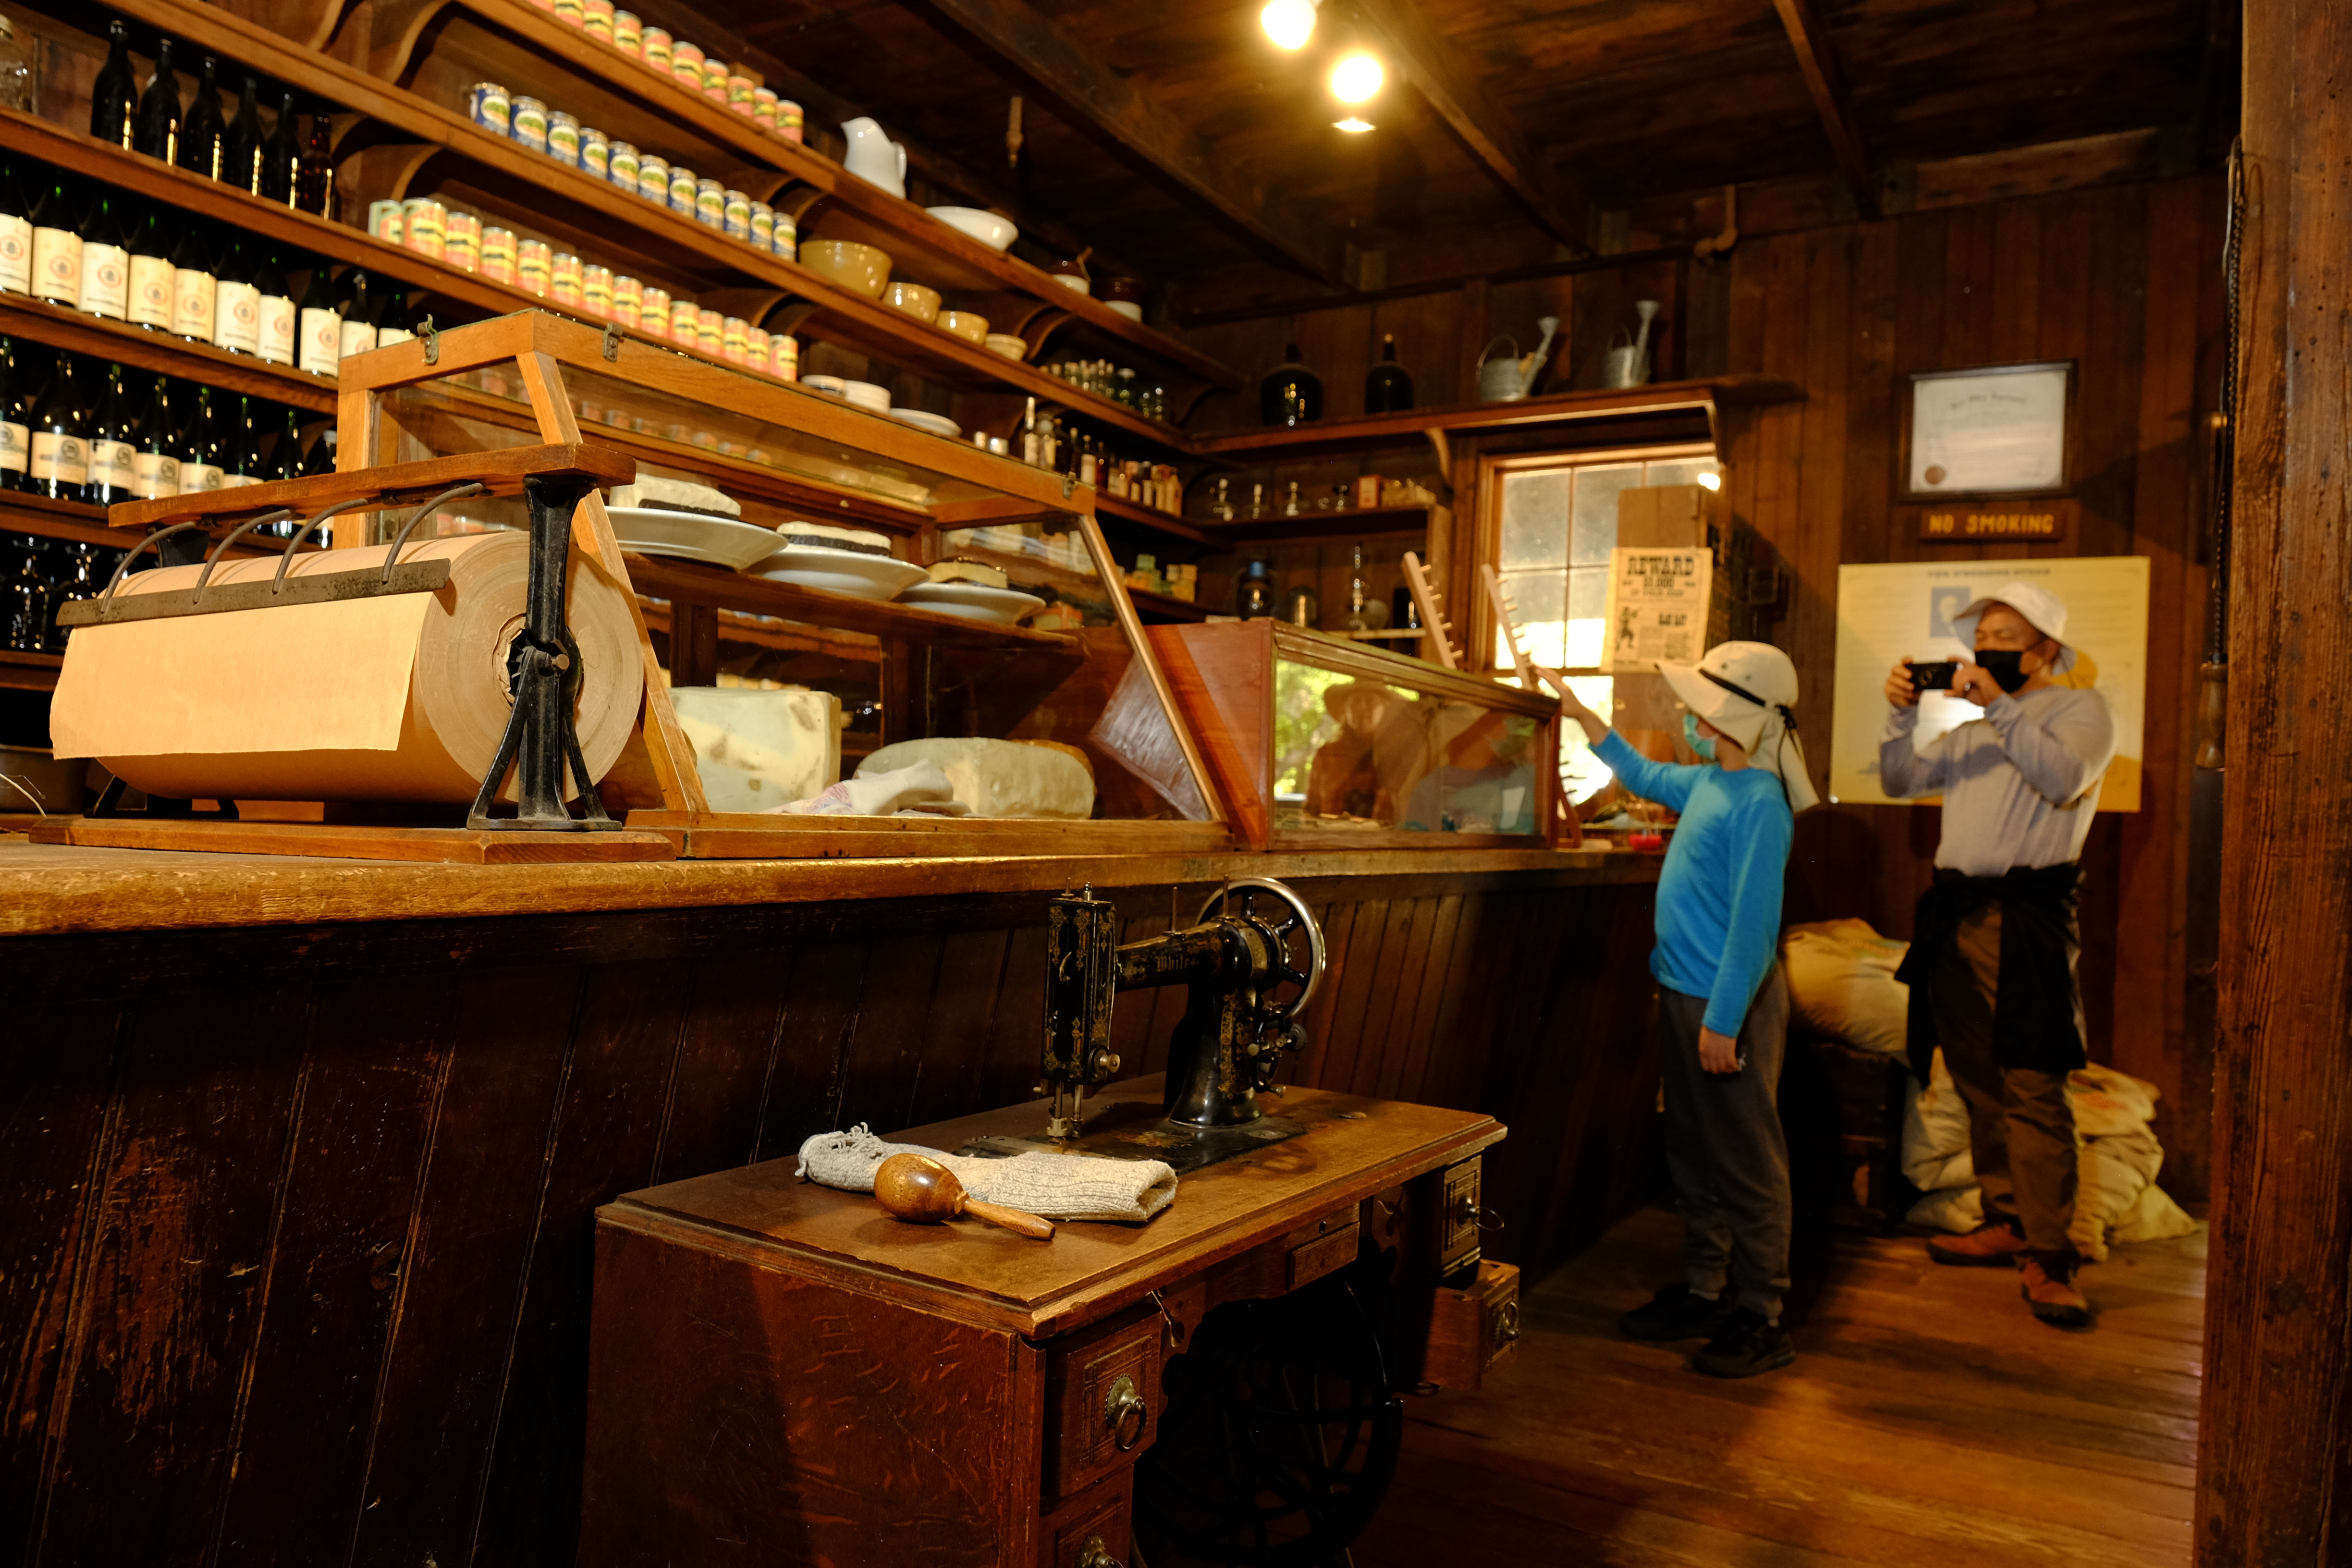
The second shot, made in 2017, showed the interior of the store with rows of canned goods and farm supplies lining the shelves. One of the docents, dressed in a period costume, was in the foreground. The shot went over well at the office because, unbeknownst to me, the paper's Editor in Chief was standing in the doorway.

Woodside Store Day 2017
There were some things I would improve if given the chance. For one thing, the quality of the lighting on my subject was much broader than that on the background. The shadows on her face are extremely soft when compared to the harsh lighting from the incandescent accent lights mounted in the ceiling.
Second, the lighting appears a bit cool in contrast to the incandescent background lights. Lastly, the exposure was adjusted to so that details from the exterior would be recognizable. This underexposed the store's interior.

Five years hence, I thought I'd explore ways to improve the image. First, I decided to reframe the image to eliminate the door and give myself more exposure leeway for choosing the interior exposure.

This test exposure was based on what would properly exposes the merchandise on the shelves. By excluding the doorway from the frame, I didn't have to worry about blown  highlights.  Also, I went to some lengths to level the camera to prevent "stretch face" distortion in the corners, the so-called "wide angle distortion". This framing was achieved by holding the camera at waist level. Some slight convergence (vertical lines appearing to merge in the distance) exists, but it whispers instead of shouts.

1/35 second, F 4.0, ISO 1000

I was able to convince my subject to stand by the sewing machine and to pretend to study it. To simulate the high top lighting, I installed a diffusion dome on the flash and held it at arm's length high above my head. This gave me a medium hard shadow similar to those created by the ambient accent lighting. I did not gel the flash, so the lighting on my subject's face is close to true daylight.

Final Notes: When working with a shot where the background framing is critical, I have the subject move left and right, fore and aft, until his/her position is exactly where I want it. For this recent re-make, I just assumed the sewing machine was the subject to simplify any instructions I would be giving to my young subject.