Sunday, December 10, 2023

The Holiday Train

Dashing: Cal Train schedules a special Holiday Train to  make the run from San Francisco to Mountain View and Menlo Park. The train makes its first run on Saturday and stops at several stations along the way. On Sunday the train makes a second run to visit the stops it missed the day before. I would have preferred to photograph the train on Sunday, as the stops include three cities in the center of the Journal's readership area, but could only attend the Saturday run where the only "local" stop would be Redwood City.

As it turned out, the Redwood City Holiday Parade was scheduled for the same evening, so the assignment was a welcomed "twofer". The Parade started at 4:00 pm, well before the Train's 6:10 arrival, so I knew that I would have plenty of time to make the Money Shot. After some desperate minutes spent securing a parking space, I went to find the parade. Luckily for me, I spotted the staging area with dozens of marchers, so it was easy to find them after my car was secure. Since the Parade wasn't part of the assignment, I spent some time experimenting with my flash held off camera and triggered by a shoe-mounted radio controller.  The Fuji TTL metering system has always been iffy at best, so I opted to determine the exposure manually.

This photo was sent to me by Jay Minares, a photographer who I know from the annual Bethlehem 
Christmas recreations in Redwood City. During the parade, I used this off-camera flash technique using a radio controller mounted on my Fuji X-T2. It was the technique used for the two parade photos, In the first example, the flash was properly directed towards the subjects, giving me even illumination right down to the marcher's shoes. The second shot shows the flash pointed slightly upward, a happy accident that emphasized the closer marcher without overexposing her legs. It can be difficult aiming both the camera and the flash at the exact same spot, and near-misses are common.
1/30, F 6.4, ISO 6400

I am pleased with these two marching shots. You can see from the exposure that I was stretching the capability of the camera, as the ISO setting was the highest value available to me. 1/30 of a second was obviously not enough to prevent the motion blur of one marcher's waving hand.
1/60, F 8.0, ISO 6400
When this second group of marchers appeared, I knew that I would have to cut back on the flash output. If memory serves, I was running at 1/128 power, so I opted to stop down one stop. Coincidentally, I decreased the exposure time by a full stop in an attempt to recover the lettering on the theater marque in the background. This might have been an interesting photo to submit, although it was heavy on context and light on content.

Exposure Considerations: As ordinary as these two photos appear, there was a lot of exposure juggling behind them. First, there is the foreground, whose exposure is determined by the flash output and the aperture. The second and third exposure settings are the Fox marque and the sky, which are controlled by the exposure time. Underexposure can correct the overexposure of the marque, but will consequently darken the sky. In the second shot, the sky/marque exposure were reduced by 1 2/3 stops, a combination of a reduced aperture size to compensate for the decreased subject/flash distance, and the decrease in exposure time. The balancing act was made more arduous by the difficulty in adjusting the flash output using the on-camera flash commander. More on that in a later post.

Parade Chasing: Parades are moving targets, and the photographer is confronted with a choice. One can stay in one spot and wait for the perfect image to appear, or one can find a suitable subject and move along with it, photographing it whenever an opportunity presents itself. I chose the former approach when I found that the Fox Theater made a great backdrop, and the my wide angle lens could accommodate the evening sky, and my subjects in the foreground. 

The Train Station was a short walk away from the  parade route. I arrived with plenty of time to prepare for the train's arrival. 

The decorated Holiday Train arrived right on time. Barricades were arranged on the boarding platform to provide an unobstructed path for Mr. and Mrs. Claus,  Rodolph, Frosty, and Victorian Era Carolers to parade before the audience, This was my first Holiday Train photo assignment, and I was surprised to see how popular the event was. Nearly all of the photos were made from the "Hail Mary" technique, the one where the camera is held high overhead. 
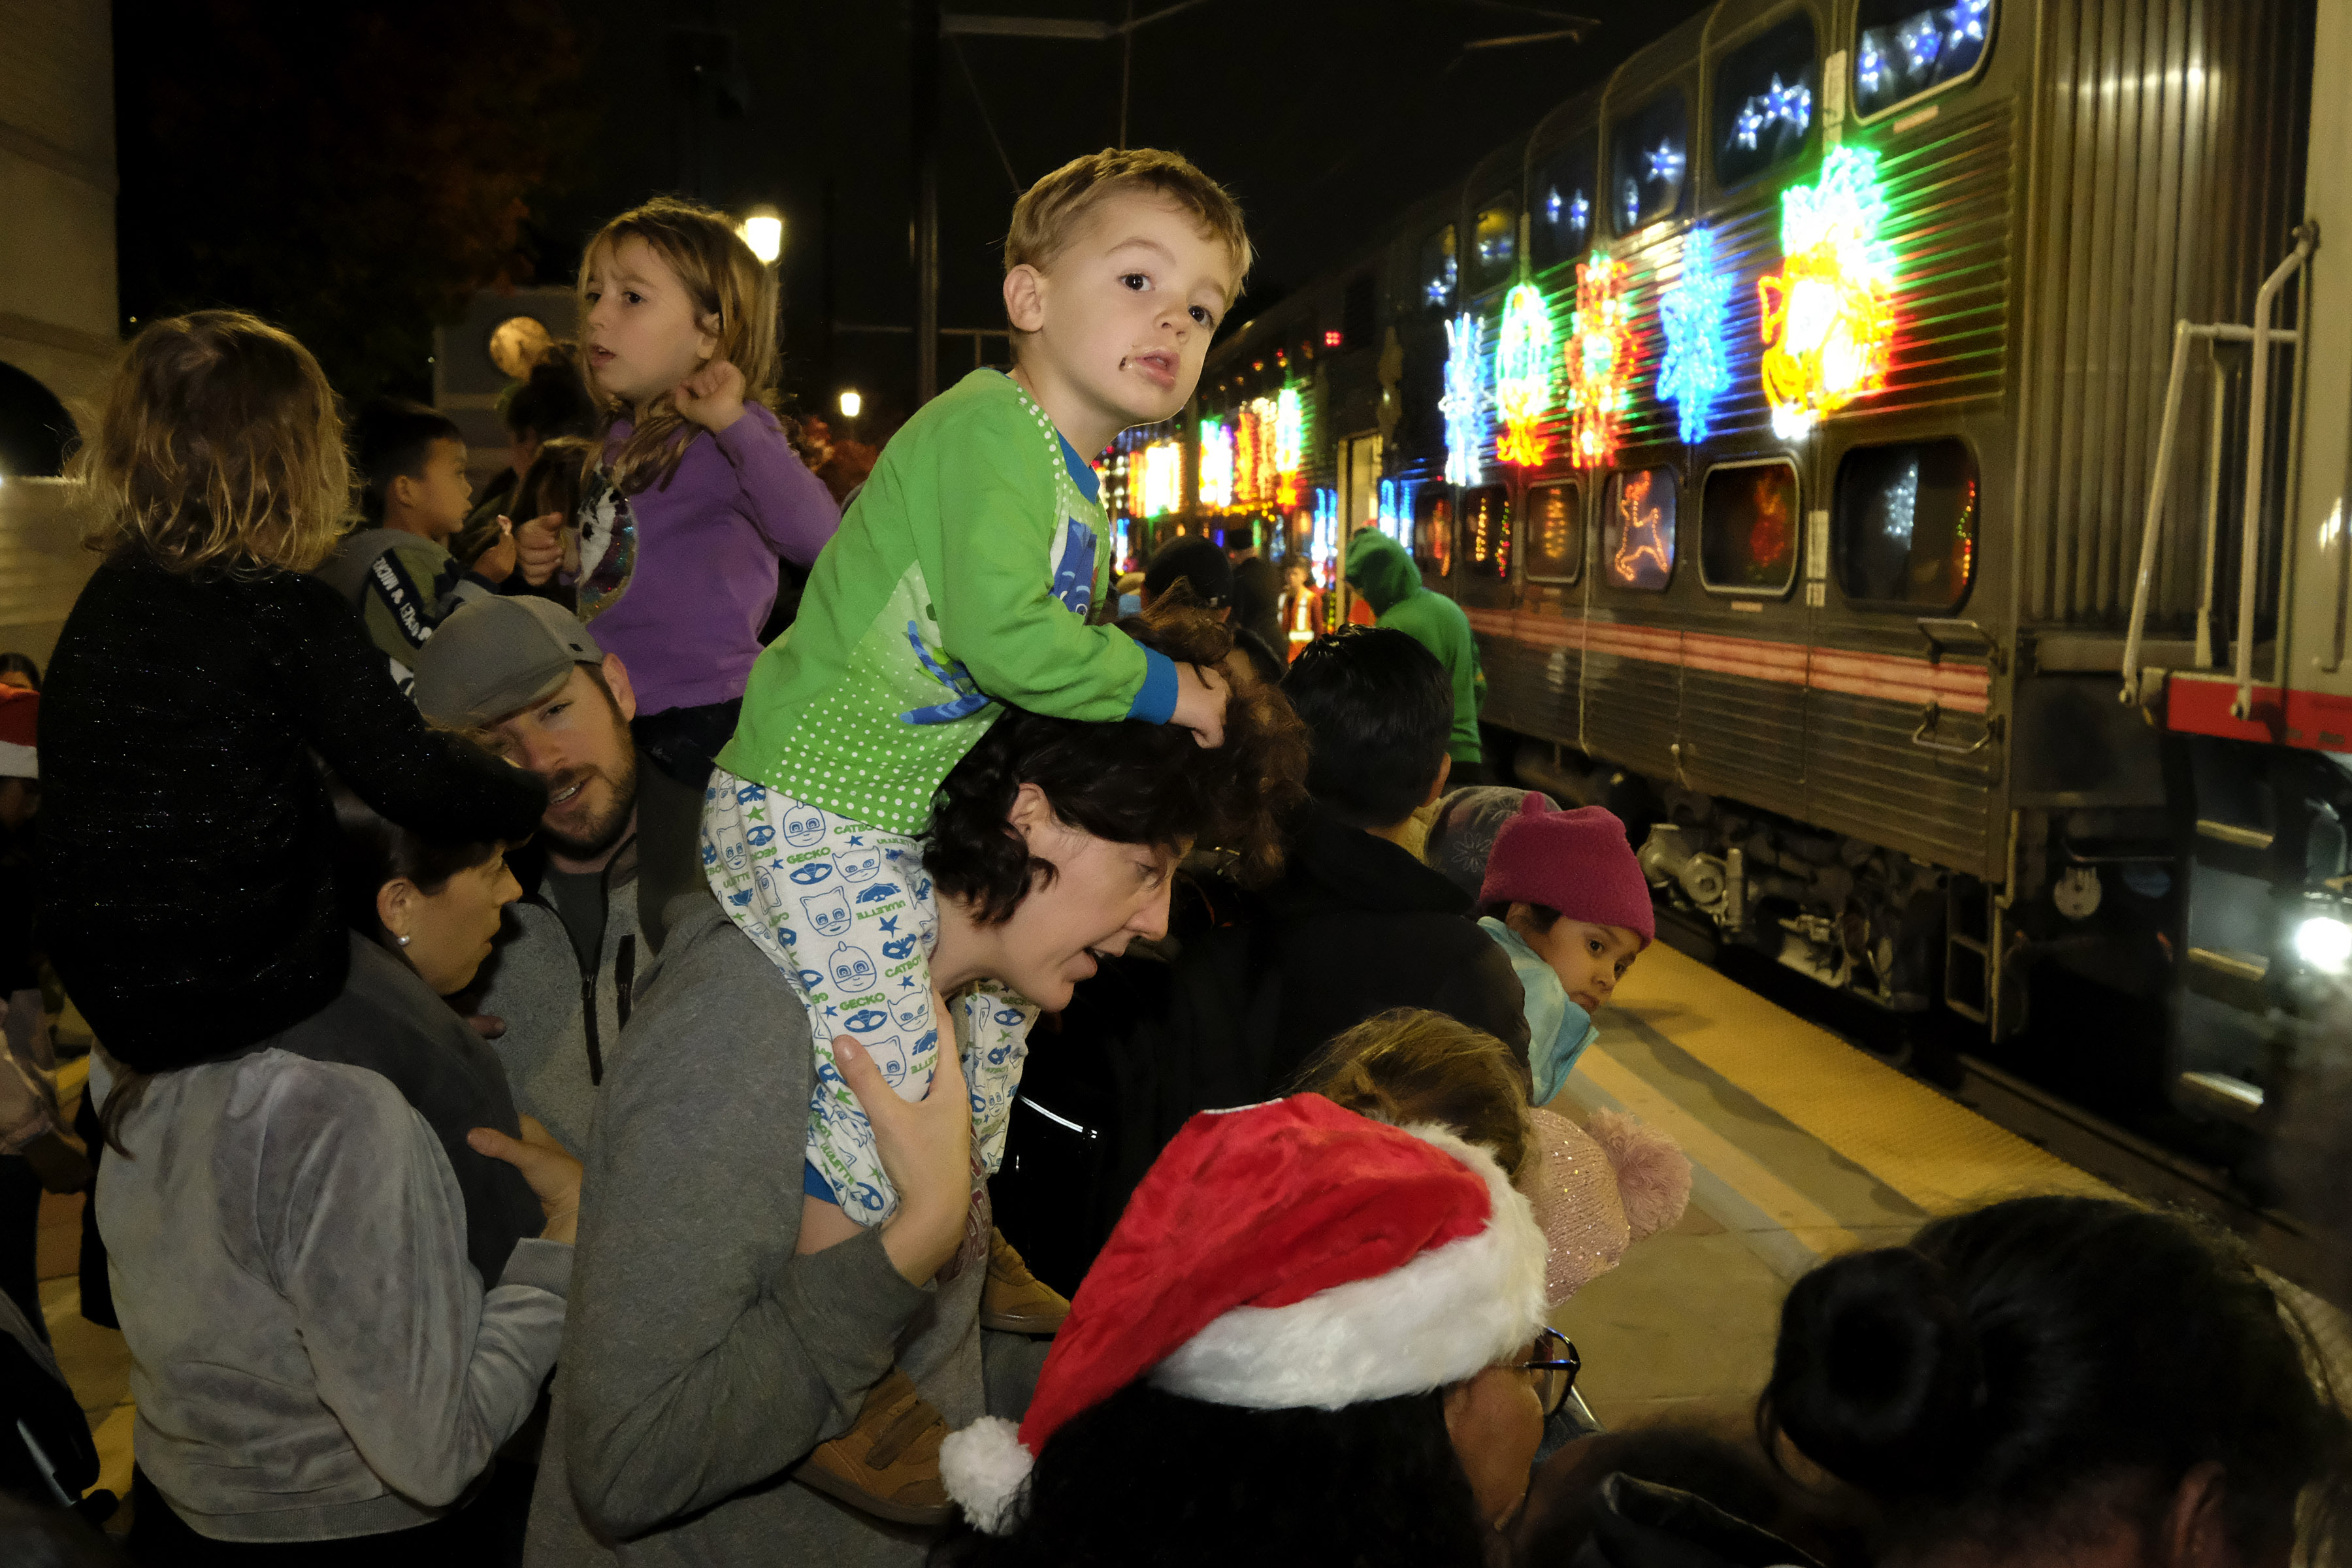
Children of all ages stood behind the barricade. Wherever I went I was in danger of accidentally stepping on some small munchkin, so I did my best to keep a safe distance and go for the high-overhead shot. The flash technique was changed from my earlier off-camera technique to simply mounting the flash on the camera, adding a diffusion dome and adjusting the flash head to about 45 degrees to maximize the flash coverage and raise the flash's height just a smidge.

Rat-Tat-Tat: Because the flash output was so low, I was able to set the camera to the Continues Low Speed Burst mode. This allowed me to fire bursts of three to five shots before the flash was exhausted. This is a manual-exposure-only technique that can help capture those fleeting moments as the entertainers walked back and forth only the barricade in an effort to give a smile to every spectator.
If you examine the four-shot sequence, you can see that the Polar Bear is giving Low-Fives to members of the audience. Only in the last shot is the paw (more) clearly delineated against the background. Had I not made a Santa photo, this shot would have my first choice.

When photographing at relatively short distances (I was using a 10-24 F 4.0 zoom lens) the relatively modest elevation of the shoe-mounted flash can provide just enough height to provide some modeling on my subject's face. But when working in such cramped quarters as I did this evening, a shoe-mounted flash with an angled diffuser dome is the best you can do. I did have a Gary Fong Light Sphere in my bag, but was afraid that it would be easily knocked off of the flash head and lend where it couldn't be retrieved. However, the burst-firing of my camera coupled with the high ISO setting and minimal output of the flash worked out well on this assignment. Not particularly creative, but it gets the job done.

Sunday, November 19, 2023

7Artisans 35mm Pancake Lens

Buy yours here.
There have been a number of manually focused lenses introduced that are compatible with the venerable Leica M bayonet. This has been something of a windfall for those of us who are experimenting with vintage lenses and the new generation of full-framed mirrorless camera bodies from the Big Three makers. To the good, they follow the compact form factor of the traditional lenses designed for rangefinder film cameras bodies. You see, without the moving mirror of the traditional single lens reflex body, the lenses can be built much closer to the sensor plane. 

Chicken Or Egg: While I am not a photo historian, I have my opinions on how we got here, and why I hold the Fuji X-Pro 1 to blame. When it was introduced in 2012, it was marketed as a way for rangefinder diehards to make the transition to digital by providing a familiar form factor, optical viewfinder, and in-camera monochrome simulations. Fujifilm wisely introduced an accessory M-mount adapter to facilitate the transplant. The idea caught on, although the crop factor essentially increased the focal length of these lenses by a factor of 1.5 X, a serious drawback to wide lens aficionados.

The Chinese Connection: Right around the start of the Pandemic, several Chinese companies began making inexpensive, manual focus lenses for use with a variety of mirrorless cameras. Photographers using Fuji and Micro Four Thirds bodies were given a veritable cornucopia of inexpensive lenses to play with, and with many available for less than $100.00, it was an easy vice to indulge in. These lenses were designed for the half-frame equivalent format, and slowly but surely, the selection of new lenses got wider and wider, and I bought a number of them.

Enter The Dragon: Unbeknownst to me, Sony made a major breakthrough when in introduced its A7 mirrorless in 2013. It was the first of its kind: A full framed mirrorless camera. The camera slipped under my radar as I was a Nikon DSLR fan, and my mirrorless camera interest centered on the Fuji X-100 series of cameras. And without my noticing, Canon and Nikon would introduce their own full-framed camera bodies. I watched from afar as Nikon introduced its Z series of full framed bodies, but did not act because my D700 and two D600 bodies were more than up to the task. Besides, I had the necessary lenses to my full-framed bodies, so no further action was deemed necessary. I was, by now, committed to the Fuji X system. But the sea was rapidly changing, and I was facing away from the coast.

Savvy lens designers saw another window of opportunity opening. While engineers with the Big Three (Canon, Nikon, and Sony) were busy designing high end optics, others were exploring the possibilities of resurrecting older lens formulas. Since there was no longer a need to accommodate a moving mirror, older rangefinder designs could be copied in lenses with mounts for these new cameras. And while we're at it, how about some Leica M compatible models? Surely, there must be whole generations of photographers with Leica M bodies who would love to acquire usable lenses at a fraction of the price of a Leitz OEM offering. This could be done by adding the necessary rangefinder cam to the focusing mechanism. It adds to the cost, but it's necessary for any non-digital application.
This composite shows the Leitz Sumarron-M 28mm F 5.6 (left) compared to the TTartisan clone (right). You have to give TTartisan credit for capturing the esthetic feel of the more expensive Leitz lens. Price? $3,095.00  vs. $326.00, respectively. Performance? Satisfactory, from what I've heard. What more important is the demand for the lens, proving there is a market for photographers wanting to use there film (or digital) Leicas without going into debt to acquire lenses. The similarities are more than skin deep. These lenses a constructed from brass and glass, giving them both a heftiness from at time when aluminum was necessary to reduce weight. But I digress. Let's get back to the lens at hand, the 7Artisans pancake.

Aperture:
The lens has a sincle aperture permanently set to 5.6. When shooting outdoors during the day, exposure is not a problem if you're shooting in Aperture Priority mode at a modest ISO setting. When working indoors, you'll need to boost the ISO to a level that insures a sufficiently fast exposure time. For my tastes, F 5.6 doesn't provide enough depth of field for zone focusing applications. F 8.0 might have, but that is not a option for this lens. 

Focusing: I was a little disappointed on how limited the focusing options were. There is a small distance scale printed on the face of the lens, but as you can see from this image, the focusing arc from .5 meters to infinity is only about 30 degrees. Placed between those marked distances are a sequence of meaningless dots. Certainly not enough information for  distance estimation. I would have found the lens easier to use if the manufacturer provided both a more detailed distance scale and a depth of field scale.

One interesting feature is the built in lens cap that rotates to protect the lens when the focusing lever is when the distance is set beyond infinity. 

The Verdict: It would be reasonable to ask what this lens's raison d'ĂȘtre was supposed to be. I suspect that the designers thought it would be a good Street Lens for taking carefree "snaps" when waling about.  In my opinion there are a number of things that keep the lens from fulfilling that mission. First, the focal length is a bit long. Next, I have found the depth of field provided by 35mm focal length as being too shallow for zone focusing, Sure, a maximum aperture of F 5.6 might be adequate if distance and depth of field scales were provided. Finally, the single shooting aperture is a very serious limitation. Ironically, the lens itself produces reasonably sharp images when properly focused. Unfortunately, that narrow focusing arc makes it difficult to pinpoint that point of critical focus when the focusing peaking highlights zip in and out of view. If it were up to me, I'd change the following:

  • Change the pitch on the focusing threads to provide a wider focusing arc. This would make it easier to settle on the "sweet spot" when peak focusing,
  • Add a depth of field scale, 
  • Provide an adjustable aperture. Some times F 8.0 makes more sense. Or maybe even F 11, and
  • Shorten the focal length, perhaps to 25 mm. 
It's funny. After writing these four suggestions for improvements, I realized that I described the Voigtlander Snapshot Skopar. Also, I now want to buy that TTartisan copy of the Leitz Sumarron.

It shall be mine!

See original image here.
Post Script: While on my morning walk, I wondered what might have inspired the designers at 7Artixans to choose this unique look for its pancake lens. I felt as though I had seen this circular motif before, and I had. This is the Olympus O Product camera introduced in 1988 as a limited edition, collector's camera. It is basically an aluminum-clad Infinity Jr. point-and-shoot camera. The unique styling of the camera made it a celebrity of sorts in the camera world. In the mid 1970s I remember seeing one for sale at Brook's Camera on Kearny Street in San Francisco for about $300.00. That was big money in those days. According to Wikipedia, only 20,000 were produced worldwide.