Sunday, April 25, 2021

Photographs From The Spring Rendezvous


Once again, I've been asked to help promote a club whose members enjoy reliving a pioneer lifestyle, if only for one weekend at a time. For me, it's a chance to experiment with the judicious application of some artificial lighting, delivered by speedlight.

I made some pre-pandemic photos at this same event with a seasonal autumn background and similar lighting equipment. For a portion of this shoot I used a ProMaster Umbrella Soft Box. This unit is a basic shoot-through umbrella with a back cover that confines the flash output to the inside of the soft box. This directs all of your speedlight's output foreword through the diffusion panel. This may or may not be important, depending on how reflective your surroundings are. When used indoors, there is a slight chance of color contamination from light spilling over the edges of a conventional shoot-through umbrella. 

Lighting was provided by a FlashPoint speedlight. It was triggered with a Flashpoint radio controller mounted on a Nikon D70 with a 24-70mm 2.8 lens. This particular combination of commander and remote combination does not offer a TTL option, so exposure determination is done using educated guesswork. Since the flash is actually inside the softbox, I attached a dome diffuser over the flashtube. As you can see, the resulting light spread was even across the entire surface. I used a non-descript umbrella bracket with a conventional cold shoe to hold the speedlight in place. Had I thought to bring one of my home-made Right Angle  Flash Mounts,  I could have improved the flash alignment in relation to the umbrella's axis. While it might have better centered the light spread, it would have made the flash easier to slip through the hole in the back cover. A 200 Watt-Second Flashpoint unit with a bare tube would have been a better choice, although this unit might have been more easily damaged if it were to fall.

With the lighting selected, I hoisted the lighting combo onto a 12' light stand. During this weekend's shoot, the wind managed to knock the stand over twice, and each time one of my modifiers was either damaged or destroyed. The first victim was a conventional Zumbrella, and when the stand was wind-toppled, it was damaged beyond repair. I then switched to the Promaster Soft Box, but it too was knocked over and damaged, but was still usable. All this in spite of my efforts to anchor the stand down using a rather novel "sand bag" from FlashPoint. Instead of sand or gravel, the back has partitions for four standard water bottles. While it ultimately wasn't enough ballast to prevent the blow-overs, it helped some, and served to supplement my water supply. Notice that it is placed as close to the end of the leg as possible for maximum effect, preferably on the windward side of the light stand.


I was pleased with the results, even though I saw no difference between the shoot-through Zumbrella and the Promaster Umbrella Soft Box. For me, the Nikon D70 still reigns supreme for this type of work due to it shutter synchronization speeds. Most of these shots were made at 1/800 of a second and aperture settings from F 4.0 to F 8.0, due to a variety of flash to subject distances. These two subjects were chose as my best efforts, primarily because neither one wore glasses, and both wore hats with reasonably-sized hat brims. When oversized hats and spectacles appear on set, the results were, shall I say, not quite as good.

More to follow.

Sunday, April 18, 2021

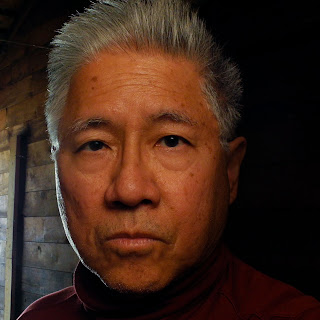
Self Timer Selfie

Chris Pine isn't answering my calls. I wonder why.

Even a doofus needs a photo once in a while, and here is perfect sample. I was getting ready to leave a weekend cottage that had no electricity, and all of the guests had to carry flashlights or wear headlamps, which is the option I chose. It suffices to say that doofi (plural?) often find themselves alone and bored, so selfies are a way to pass the time. Unfortunately, your camera's focusing options can be limited when you use your self timer, which is why I made this post.

When the self-timer option is selected (I assume it defaulted to ten seconds), the timing sequence stars as soon as the shutter release is pressed. At that moment, the camera locks focus on whatever is sees at that moment. It could not/would not re-focus to accommodate your final location.

For the record, this photo was made with a Nikon P7000 with a FlashPoint TTL Mini flash with its head turned toward the wall behind the camera. The flash is not particularly powerful, so a large aperture is required. The exposure was 1/250 second, F 4.0, ISO 400.

The work-around is simple. Pick the spot where the cameras will be positioned, and mark the location with something bright and reflective. This will be your "focusing dummy". Next, step to where you plan on posing, and with the self-timer set and ready, focus on the dummy and press the shutter release. Now quickly place the camera beside the dummy, return to where you stood when you locked focus, strike your pose, and wait for the click. Simple, no?

Barrel Distortion not corrected in post.
The results would have been a more predictable if the camera had a reticulated LCD panel, but since it didn't, I wound up taking nearly a dozen shots to get one I liked. Also, the original image suffered from noticeable barrel distortion, the rendering of straight lines as curved outward. This can be corrected (somewhat) in post-production. Here's the original, uncorrected image.

I'm sure this photo will ruin my standing as a serious photographer of interesting, noteworthy subjects. Alas, under the circumstances, I had to make do with who was available. 

Ahh, the self-deprecation I must endure for the sake of my craft.

Monday, April 12, 2021

Selfie In An Old Shed
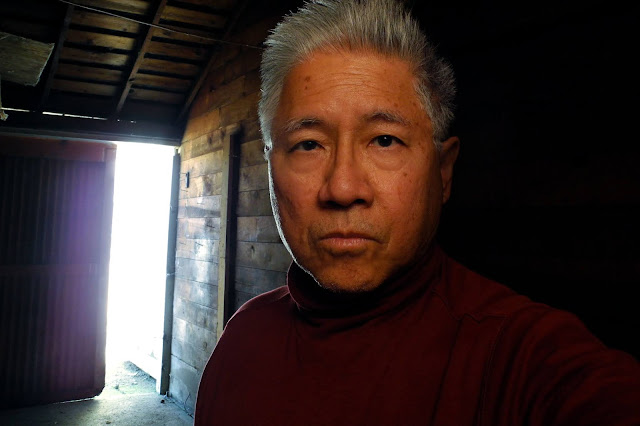
I called Chris Pine, but he wasn't available.

 Going For A Look: I was away on a road trip with some friends, with no intention of any serious photography, when we encountered a large, cement-floored shed, its door ajar, and it challenged me to step inside. After a careful inspection, I found no demons or monsters lurking about, so I thought I would try to make a photograph with the open door in the background. Since this wasn't a photographic expedition, I brought my fourth-tier kit which included a Nikon P7000 and a small, Flashpoint speedlight. The camera was a big-box electronics store customer return and priced to move. I actually used it once to photograph a dog sitting on a pile of artificial snow when I needed to utilize the camera's leaf shutter to balance the ambient light with the supplementary flash I needed to make the shot happen.

Limitations: This self-portrait was made with the built-in zoom lens at the equivalent of a 28mm lens in a full-frame format. Since the camera lacked a reticulated LCD screen, composition couldn't be accurately assessed, so getting the desired relationship between the background (door) and the foreground (me) was a really a matter of luck. With time on my hands and an empty SD card, I could just keep shooting until I made an image that pleased me. The speedlight, a Flashpoint Zoom Mini, traded its compact size for light output which forced me to keep the flash as close to the subject as possible. Bounce flash was possible, but limited.
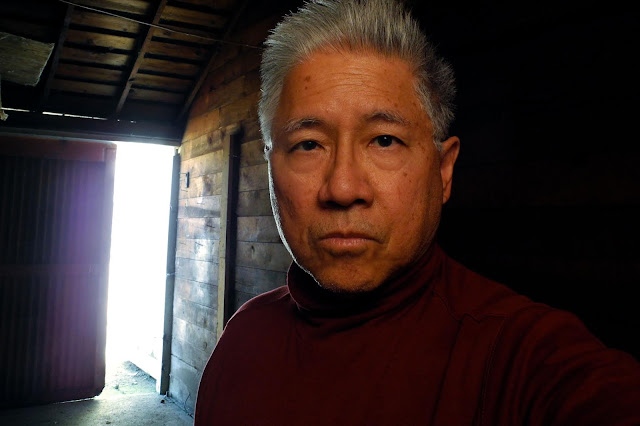
Base Exposure: First, I started to experiment with different exposure settings. After several "sketch" exposures, I settled on 1/40 second, F 5.0, ISO 400. This gave me a completely blown-out door (background) with some edge lighting on the ceiling and walls surrounding the frame. Lens flare was to be expected, and by adjusting the composition, could be kept to a minimum. With the background under control, I started to think about the foreground (me).

Bounce Flash: By simply rotating the head 180 degrees and elevating it slightly, I achieved a simple butterfly lighting for myself. The age-stained walls of the shed, while poor reflectors of light, did produce light with a warm glow.  The camera was then held at arm's length with the flash-to-background distance less than a foot. The gave me a relatively small reflective surface resulting in light that was more specular than one might have wished. By setting the speedlight to one-half power, I was able to achieve a suitable exposure level for my face. The edge lighting on the right side of my face was an unexpected and appreciated addition to the overall lighting solution.

Composition: I wanted to incorporate the open door as a compositional element. Since I was in front of the camera and not behind it, I could only guess when the proper alignment of the visual elements had finally been achieved. Through trial and error, I made a photo that was very close to what I wanted, a composition that was improved slightly by some judicious cropping.

Notice the my left ear is fully lit, and quite prominent.
In an earlier post on traditional portrait lighting, I would classify this as broad lighting, since the ear closest to the camera is fully lit. For whatever reason, broad lighting is frequently seen in so-called professional portraits, even it tends to emphasize the full width of the subject's face. I wouldn't be surprised to know that it's simpler to set up, but in most cases less than flattering.

Face burned in slightly to narrow my face
Burning In Post Production: The fix is simple in post processing. I simply used the Burn Tool to darken the left side of my face. This de-emphasizes my visible ear while giving the illusion of a thinner face. It's a subtle change, but if you compare the first (burned) and the second (as shot) version of the photo, you can see the effect. In most cases, darkening a distracting ear will definitely improve the final product. In my case, I set the Burn Tool first to darken the highlights, and then to the midtones. This effective decreases the width of my face, making me look thinner than I really am. This neat trick is definitely one worth remembering. 

After achieving proper exposure and a pleasing composition, all I had to do darken the side of my head slightly to narrow the face and de-emphasize the ear. The improvement is almost undetectable, but if you compare the before (second image) and the after (first image), you can see the difference.