For a compilation of the morning walk images, click here.
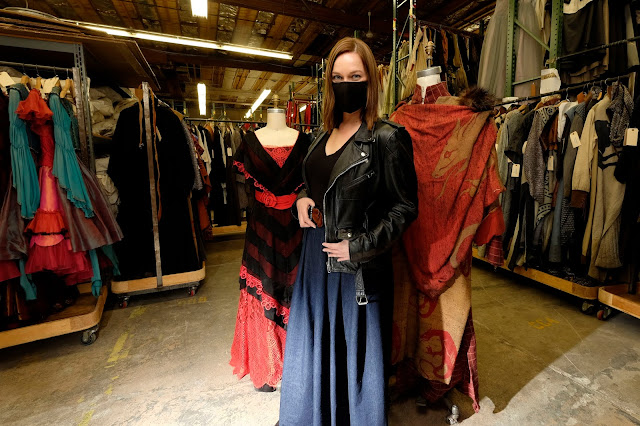
Opera Costume Warehouse: Covid 19 will leave its mark on every face I photograph for a long time to come. Since the shot was indoors, protocol dictated masks at all times, and in the interest of demonstrating the staff's willingness to following prescribed safety protocols, the mask stayed put.There is room for debate concerning the relative size of the three visual elements. On the one hand, the photo must call attention to the number of costumes available for sale (more than 500). On the other hand, it's about the young costume manager who happens to be a San Mateo resident. In retrospect, I could have experimented with the placement of the mannequins and the subsequent placement of my young subject. As usual, the placement is a compromise, since I had limited time, and my subject had her job to do.
Lighting: The key light was provided by a speedlight mounted about 8 feet off the ground, and slightly to my left. It was modified with a Zumbrella shoot-through umbrella. As a note of caution, I was using a radio-triggered speedlight which started to act up at the last moment. After several unsuccessful attempts to trigger the flash (it was function tested that very morning, so I knew it worked), I swapped it out for Old Reliable, a Nikon SB-800 set to SU-4 (optical remote) mode. A second flash, hotshoe mounted and directed towards the wall behind me, served as an on-camera optical trigger.
Floor Bounce Fill: I needed a bit of fill to add a bit of detail to my subject's dark skirt. Normally, fill light would be delivered from a position very near the optical axis of the lens. Some photographers, most notably David Hobby, employ a ring light to provide shadowless, on-axis fill light. Unfortunately, this technique usually produces a glare spot on the lenses of spectacle-wearing subjects.
An alternative fill technique involves bouncing the flash off the floor in front of the subject. No real name for this technique I learned about it in one of Joe McNally's instructional videos. I've used this technique before, but only in a controlled studio environment.
Since I was using my flashes as optical remotes, it was easy to add a second SB-800 and configure it to the SU-4 mode. I then directed a nearby spectator to aim a second flash towards the floor in front of my subject.
 |
| Fill light accidentally directed at the subject's feet |
You can see in this first attempt that the fill light was actually pointed at my subject's feet, which allowed direct light to flood the lower portion of the frame. I had my assistant re-position the flash until it pointed straight down at the floor in front of the light stand.
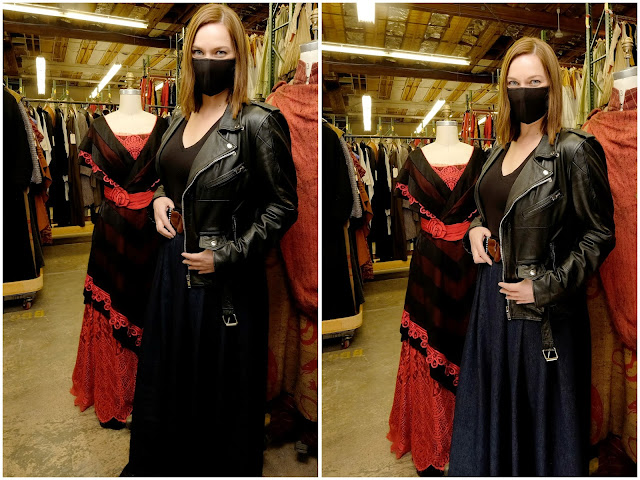 |
Without Floor Bounced Fill With Floor Bounced Fill
|
The left photo in this pair* was made without the floor-bounced fill, the second after. If you look closely, you can see the additional detail in the skirt in the right hand photo, along with increased detail in the chrome buckle and additional highlights on my subject's jacket. It may be difficult to see, but trust me, the level of shadow detail is greatly increased. For the most part, there are no obvious traces of that second fill light. However, the best is yet to come.
The floor bounce provides a large lighting surface that is large and not particularly bright. It is strong enough to provide a highlight on any curved reflective surface, including the jacket buckle and my subject's eyes. It's not an intense highlight, but it is bright enough to add some sparkle to the iris.
I showed the the final image to several friends and they all commented on how pretty my subject's eyes were. That second highlight, created by the floor-bounced fill, add something very subtle, but very complimentary.
*For comparison, both images were copied onto a single blank file in Elements and all of the layers flattened. This ensured the any exposure (Levels Command) adjustments would be applied equally to both images.


