Wednesday, December 29, 2021

Rethinking Location Lighting Part 1

After my recent experience at Bethlehem A.D. 2021, I started to re-think what I carry in my supplementary lighting bag. In the past, the speedlights, modifiers, and mounting bits and pieces were thrown into a partition-less Tenba bag, making it necessary to rummage through a jumble of lighting stuff, searching for the bits needed to assemble a proper lighting solution. Working at night with only a miner's lamp on my head doesn't make the task an easy one.

Buy your Domke bag here.
In years past I worked exclusively out of my big Domke F2 Bag where optional inserts with adjustable  dividers made it easier to store items in an upright position.  Then again, my approach to lighting consisted mainly of ceiling and wall bounce applications, and the only light modifier I carried was a Gary Fong Light Sphere. That second speedlight was just a backup

This catalog photo shows how I packed my equipment. With the partitions installed, you can see how easy it was to extract anything I needed.I would use the external pockets to hold two or more speedlights, while I kept the lenses and bodies in the padded interior. I still think the Domke is a great bag, but the weight of a full-blown system made me re-think my choosing Nikon DSLRs as my first-line, go to cameras. When I shifted to Fuji, much of the weight had been eliminated and my main carry bag got much smaller. But as my lighting solutions became more sophisticated, there were other carry issues to be addressed.

Initially, I relied heavily on the Nikon OEM CLS system, and employed the expensive (for the time) SB-800s and SB-900s for my primary flashes. When I started using Fujis, I tried to stay with the Fuji  OEM speedlights, but found them overpriced and underpowered, and I never felt that their TTL exposure metering was consistent enough for my purposes. Eventually I used my Nikon speedlights manually and relied on their native SU-4 (optical trigger) mode when multiple speedlights were needed.

Radio Triggered Flashes: As my conversion to Fuji is pretty much complete, I started to think about how much of my old equipment could be re-purposed to a mirrorless lifestyle.  The aforementioned Tenba bag has been my constant, though disorganized, companion for several years, having served as my primary Nikon camera bag in my pre-Domke years. In my re-imagination of the ultimate bag, organization of my speedlights was first in mind. I took an insert from a Think Tank Change Up camera pack, added some additional padded partitions, and voilĂ , my speedlights were now neatly arranged and easily accessible. And should I return to the Nikon world, the partitions will accommodate SB-800 and SB-900 speedlights without any additional adjustment.  

"Flash A" with settings taped in place.
Currently, four now-discontinued first generation Adorama / Godox Li-On Zoom speedlights replaced the Nikon SB-800s. Their primary claim to fame was that one could assemble an on-camera, radio triggered and adjusted lighting system that could be used on any platform that employed a conventional hot shoe. If you look closely, you can see that the flash "foot" has only a center contact. This allows the controller to ignore all proprietary electrical contacts, making it a pretty universal setup. I programmed the 4 flashes into four different letter groups, Each has its group letter written on a piece of tape. In addition, they have their settings taped in place so they can't be accidentally changed. Also, once a flash is used, I return it with the hot shoe down to remind me that the batteries may be partially depleted. If you look closely, you can see that I've added a 2 gig Compact Flash card and an 8 gig SD card to the slots in the insert. I chose a small CF card because I have several older DSLRs that can't use a larger card. You never know when an assignment demands the unique talents of an aging Fuji S2 Pro, my first 12 Megapixel camera.

Dedicated Radio Flash Triggers: The Flash Point Radio Transmitter (to the left of the flash) will ride in the mesh compartment in the Tenba's lid. By keeping them above the other equipment, I can minimize any possible damage to their antennas. I normally carry three transmitters but load batteries in only one. I'll load a second if I need to use a second camera.

Buy yours here.
Batteries: The batteries were my next concern. Because of their density, they could potentially damage fragile electronic equipment if allowed to crash about. This battery carrier from The Container Store gives me space for some AA and AAA batteries, two lithium-ion batteries for the Flash Points, plus some other odds and ends. There's plenty of additional room for spare batteries for my Godox V1, my Fuji X-100s, and my other Fuji bodies. It also holds two spare plug-in receiver modules for the Flash Point flashes.

For the moment, this little box currently holds all of the loose "heavies" that I brought with me on my last assignment, and the contents could be easily changed if the situation warrants. Spare camera batteries are usually kept in the camera bag and not the flash bag, but misfortunes arrive when it's least expected. It's comforting to know that I have spares in two different places.


So far, everything I've listed in this post has been neatly stowed away. As you can see, there's still plenty of space in the area beside the speedlight cluster and the battery box. And I still have the three outside pockets to fill.

I think I'm on to something. In my next post I'll add more goodies.

Wednesday, December 22, 2021

Bethlehem A.D. 2021

Manual exposure settings: 1/125 second, F 5.6, ISO 3200. Flash with CTO gel. WB Cloudy.

Bethlehem A.D. 2021 is an annual event sponsored by the Rise City Church in Redwood City. It was postponed last year because of the pandemic, but it's back again, sure and strong. Volunteers to to great lengths to recreate the look and feel of Bethlehem as it would have been at the first Christmas. I've been photographing the event since 2013, usually during the first night of this three-evening event. I chose to photograph the event during the dress rehearsal for several reasons. First, I'd be working alone, so the light stand I used to improve the lighting would be a real tripping hazard should the public was about. Second, I can easily direct my subjects when necessary. And finally, the evening of the rehearsal was going to be "dry", as rain was forecast for all three nights of the actual event.

This pair of shot were made at the same exposure. The left shot was done with only the ambient light, while the right shot with a CTO gelled Speedlight mounted on a 12' light stand, a necessary application since they are actually standing on a platform six feet off the ground. A Stofen-type diffusion dome was installed on a Flashpoint radio-controlled manual flash. In addition to the key light, an accent light was placed behind the center angel facing skyward. The light spill helped to add some "kick" to the outstretched sleeves of the center angel.

The camera was my Fuji X-T2 with the 16-55 F 2.8 lens set to 16mm. The vertical poles on the sides formed a frame to support incandescent lights on the left and right sides. The staging area wasn't as deep as one might have wished, so i positioned my subjects so the frame could be cropped out. In addition, I positioned the angels fore and aft so they would appear similar in height.

This tableau faced directly on Middlefield Road, one of Redwood City's main drags. Its prominent location encouraged the stage managers to pull out all the special effects stops, so both a fog machine and a spark generator were used to bring drama to the performance.  While the different effects were tested, I had a chance to see how they would affect the photograph, so there were lots and lots of sketch photos were made before the final shot. When the fog machine was at full power, my angels were completely hidden, forcing me to wait until most of the fog had dissipated. 

Next, the spark machine was fired up, and while the effect can be dramatic, it loses a lot in the translation. The perspective created by the subject position and the wide angle lens Here, the three angels were lost it the fog while sparks flew skyward from behind. There just weren't enough sparks to add substantively to the background, so I decided that the final shot would be a "fog only" proposition.

In this shot (right), you can see the sparks set against a completely black background. There really weren't enough sparks to fill the background, and frankly the sparks that were produced look a little lonely out there. 

I feel I need to make a final point about the lighting. The diffusion dome on  the speedlight doesn't soften the light noticeably. The shot is carried by the position of the light itself. With the light stand extended to 12', the light was position slightly above my subject's eye level, since they're standing on an elevated platform. 


This shot was submitted because there was just enough fog to give the background some character while not completely obscuring my subject's faces. This is often a trial and error process because what you thought you saw in the viewfinder isn't always what shows up on the playback.  To repeat an old maxim:  Photographers build their reputations on the images they discard as well as those they choose to submit.


When the shot was in the "can", the stage crew asked if I'd make a shot of them together. Easy peasey, since the lights were still in position and the exposure dialed in. For the record, once the lighting was established and exposure set, I made my first exposure at 8:57 PM, and the last at 9:22 PM. It was a little longer than I would have wanted, but I had to work through al lot a variables, including waiting for the appearance of my third angel. But all in all, the shoot was a lot of fun.

Sunday, December 12, 2021

TTArtisan Lenses - Redux

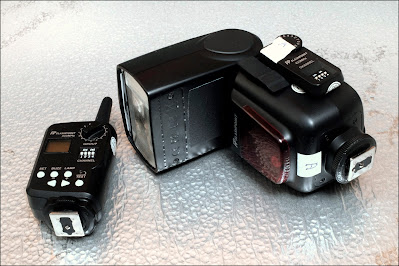
35mm F 1.4 TTArtisan Lens. Buy yours here.
I have been using the 35mm F 1.4 TTArtisan lens for about a week now. I bought it, just as I threatened to do, because it shares the same physical layout as my first TTArtisan purchase, the 17mm 1.4. Both are bright, smooth focusing, and have half-stop clicks on the aperture ring, the 35's being quite distinct and the 17's almost imperceptible. Still, I am generally pleased with their performance, but decided that I wouldn't complete the trio by buying the 50mm F 1.2 since the control placement on my 7artisans 50mm 1.2 is very similar to the other two.

The 35 has some minor quirks. First, the half-stop clicks end at F 4.0 and thereafter click on the full stops only. Second, there is no click to identify F 11, only a red dot on the aperture ring between F 8.0 and F 16. Lastly, the distance scale is only in meters.

TTArtisan Filter Sizes, Lens Hoods: The 35mm and the 17mm both use unusually small filters, the 17 using a 40.5mm filter while the 35 a 39mm. Neither size is impossible to find, as they were both standard filter sizes for Leitz lenses. When it comes tor lens hoods, the 35mm lens isn't fussy at all, since any hood for a so-called "normal" (50mm full frame equivalent) lens will do. Finding a hood for the 17mm was a bit of a struggle, since even the so-called "wide angle" hoods introduced some vignetting (obstruction at the very corners of the frame). I settled on a Nikon HN CP17 lens hood which I just happened to have, but definitely did NOT pay full price for. A less expensive alternative would be one from a third-party maker on eBay since Nikon no longer sells this hood, as it was designed for the discontinued P7700 Point-and-Shoot.

November 20, 2021

On The Road: I've taken the lens out on three morning walks and today I came up short in the inspiration and opportunity departments. In this shot of a dustpan on the side of a garbage truck there was none of the distortion normally associated with wide angle lenses when used at short working distances. I find this image relaxing to look at, maybe because the two dimensional nature of the scene doesn't challenge my notions of perspective, since there is no foreground or background.

One final note: Another reason I won't be buying a TTArtisans 50mm F 1.4 lens is its 52mm filter threads, while the 7Artisans is already threaded for 49mm.  I purchased step-up adapters for so I can use a 49mm polarizer on all of my manual lenses. Just in case. Incidentally, 49mm is the native filter size for the Fuji X100 and X70 cameras.

November 20, 2021

Entomologists Of The World Rejoice! I didn't realize that there was so much merchandise with this proclamation. Sweat shirts, T-Shirts, and windshield decals were easily found. Again, the longer subject-to-camera distance made this image easy to mentally process because of the gradual perspective transition from right (near) to left (far). 

November 21, 2021

This last photo is the only in-camera monochrome image that I actually like. By using the 35mm lens, I was able to include more of the shaded mountainside and less of the sky in the background. 

Thinking Wide: While I doubt that I'll be carrying both lenses tomorrow, this exercise did clarify the importance of the background, and how much it can add to. or detract from, the photo, taken as a whole. In this photo (right), I was able to use the blue sky and fluffy clouds to my advantage. In and of themselves, the sky background doesn't add anything to the photo, but it doesn't take anything away either. It allowed me to separate my dancing subjects from their surroundings. A wide angle lens, used at a low angle, and a short shooting distance helped to make this a real money shot. But had I used that same lens on my tree, the background would have been an uneven merger of blue sky and mountain shadow, thus introducing a possible distraction for the viewer.

I believe I'll be content to consider my collection of manual focus Fuji-compatible lenses complete. I have several adapters to allow me to use both NIkkor and Takumar lenses, should I need something a little longer. A collection of manual focusing prime lenses takes up less space that my "business" cameras, and if I ever take a road trip again, this retro-kit of a body and a couple of lenses would suit me fine.

Sunday, December 5, 2021

Fuji X100S, FlashQ Flash

1/1000 second, F 4.0, ISO 200

Taking A Break: I felt I deserved a break from manual focusing, and went in a totally different path I brought a Fuji X100S camera and a QFlash, just for fun. The Fuji's leaf shutter would allow me to use a wider variety of exposure times, but 1/1000 seems to be the minimum setting to avoid possible transmission delays when using radio flash triggers.

This particular stop sign has a makeshift blinder installed on the side to prevent drivers from a side street from misinterpreting its intended audience. I used the QFlash to help me maintain the dark sky while improving the color saturation in the sign. I  held it as high overhead as I could in an effort to even the top to bottom exposure. It worked reasonably well, and the "hot spots" aren't too distracting.


In this shot, the early morning sunlight created a highlight on my subject's left. All Minions look the same to me. The radio trigger feature allowed me to position the flash high overhead, as you can see by the shadow cast by the goggles.

1/1000 second, F 5.6, ISO 200 with flash

In this test shot, I  set the camera's exposure manually to darken the sky. I mounted the flash on the camera's hot shoe, set it to full power, and fired away. Before the flash could fully recycle, I made a second exposure to compare a "with flash" exposure with a "no flash" one. The camera to subject distance was about seven feet.

1/1000 second, F 5.6, ISO 200 without flash
When compared to the "no flash" version on the right, you can see that the little flash can really make a difference at close range. Based on this subjective, non-scientific evaluation, I estimate the outdoor guide number at full power to be about 40 at ISO 200. This is at odds with the factory Guide Number of 91, adjusted by a factor of 1.4 to accommodate the higher ISO of 200.

Guide Numbers Are Just Guides: If your wondering about the discrepancy, it's because factory guide numbers assume that the flash will be fired indoors, and that some of the light reflected from the walls and the ceiling will contribute to the total illumination on the subject. In the absence of reflectors, much more light is just lost, and the Guide Number will drop accordingly.

A leaf-shuttered camera and a small flash. Don't leave home without them.