 |
| I called Chris Pine, but he wasn't available. |
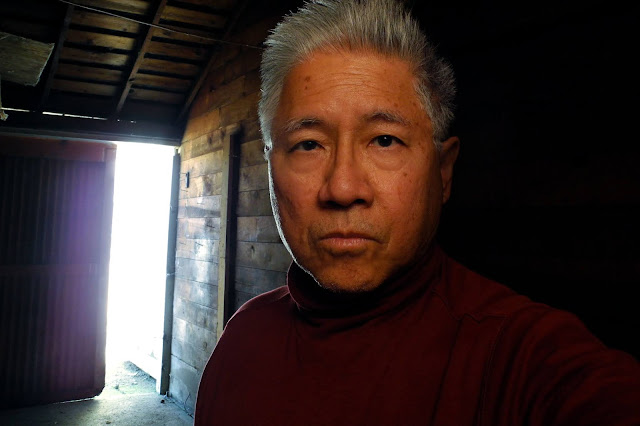
Going For A Look: I was away on a road trip with some friends, with no intention of any serious photography, when we encountered a large, cement-floored shed, its door ajar, and it challenged me to step inside. After a careful inspection, I found no demons or monsters lurking about, so I thought I would try to make a photograph with the open door in the background. Since this wasn't a photographic expedition, I brought my fourth-tier kit which included a Nikon P7000 and a small, Flashpoint speedlight. The camera was a big-box electronics store customer return and priced to move. I actually used it once to photograph a dog sitting on a pile of artificial snow when I needed to utilize the camera's leaf shutter to balance the ambient light with the supplementary flash I needed to make the shot happen.
Limitations: This self-portrait was made with the built-in zoom lens at the equivalent of a 28mm lens in a full-frame format. Since the camera lacked a reticulated LCD screen, composition couldn't be accurately assessed, so getting the desired relationship between the background (door) and the foreground (me) was a really a matter of luck. With time on my hands and an empty SD card, I could just keep shooting until I made an image that pleased me. The speedlight, a Flashpoint Zoom Mini, traded its compact size for light output which forced me to keep the flash as close to the subject as possible. Bounce flash was possible, but limited.
Base Exposure: First, I started to experiment with different exposure settings. After several "sketch" exposures, I settled on 1/40 second, F 5.0, ISO 400. This gave me a completely blown-out door (background) with some edge lighting on the ceiling and walls surrounding the frame. Lens flare was to be expected, and by adjusting the composition, could be kept to a minimum. With the background under control, I started to think about the foreground (me).
Bounce Flash: By simply rotating the head 180 degrees and elevating it slightly, I achieved a simple butterfly lighting for myself. The age-stained walls of the shed, while poor reflectors of light, did produce light with a warm glow. The camera was then held at arm's length with the flash-to-background distance less than a foot. The gave me a relatively small reflective surface resulting in light that was more specular than one might have wished. By setting the speedlight to one-half power, I was able to achieve a suitable exposure level for my face. The edge lighting on the right side of my face was an unexpected and appreciated addition to the overall lighting solution.
Composition: I wanted to incorporate the open door as a compositional element. Since I was in front of the camera and not behind it, I could only guess when the proper alignment of the visual elements had finally been achieved. Through trial and error, I made a photo that was very close to what I wanted, a composition that was improved slightly by some judicious cropping.
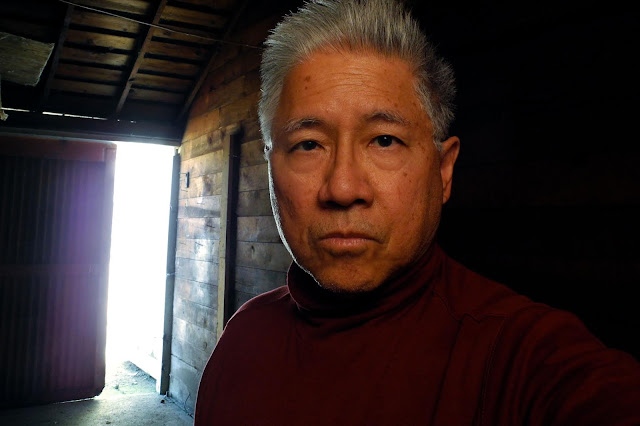 |
| Notice the my left ear is fully lit, and quite prominent. |
In an earlier post on traditional portrait lighting, I would classify this as broad lighting, since the ear closest to the camera is fully lit. For whatever reason, broad lighting is frequently seen in so-called professional portraits, even it tends to emphasize the full width of the subject's face. I wouldn't be surprised to know that it's simpler to set up, but in most cases less than flattering.
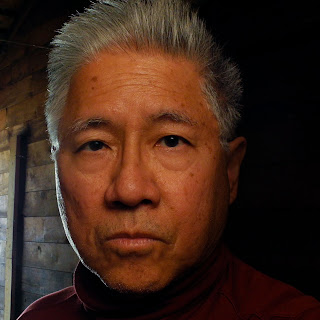 |
| Face burned in slightly to narrow my face |
Burning In Post Production: The fix is simple in post processing. I simply used the Burn Tool to darken the left side of my face. This de-emphasizes my visible ear while giving the illusion of a thinner face. It's a subtle change, but if you compare the first (burned) and the second (as shot) version of the photo, you can see the effect. In most cases, darkening a distracting ear will definitely improve the final product. In my case, I set the Burn Tool first to darken the highlights, and then to the midtones. This effective decreases the width of my face, making me look thinner than I really am. This neat trick is definitely one worth remembering.
After achieving proper exposure and a pleasing composition, all I had to do darken the side of my head slightly to narrow the face and de-emphasize the ear. The improvement is almost undetectable, but if you compare the before (second image) and the after (first image), you can see the difference.


