Tuesday, December 26, 2023

The Nikon Speedlight Still Impresses

Old Friend To The Rescue: My last assignment at the Fox Theater in Redwood City reminded me how truly great the Nikon SB-800 and its predecessor the SB-80 DX, were so far as design was concerned. My Nikon speedlights have been demoted to second tier for two reasons. First,  Nikon DSLR cameras are no longer my camera of choice for field work, and second, I usually need the higher output and faster recycle time of the Godox flashes and their proprietary lithium batteries. My years using Nikon speedlights have taught me to always carry spare batteries, or alternately, attach an SD-8a external battery pack if "sustained fire" was required. 

The event was a dress rehearsal of Peninsula Art's Hip Hop Nutcracker, and I decided to attend and use my three of my newly acquired Zeiss lenses on my Sony A7. Now manually focusing a lens mounted on a mirrorless camera is always a challenge, but add an indoor venue and one's troubles immediately multiply. Still, I was up for the challenge of high ISO settings and occasionally poorly focused images. As assurance, I packed an SB-800 speedlight, partly because the Sony A7 does not have a built-in flash of its own. Luckily for me, the speedlight that I grabbed had a pre-cut CTO gel taped to the head. I found a diffusion dome, stuffed it and the speedlight into a belt pouch, and considered myself ready.


To pass the time before the performance, I set about checking the white balance of the house lights. By changing from my normal Cloudy to the Incandescent White Balance Preset, I corrected the rendition to something closer to daylight. You can see the difference in this before and after comparison.

1/5 second, ISO 1600, Aperture not recorded. Fill flash with diffuser and  CTO gel installed, 45 degree inclination.
The final image was a little clinical, so I warmed it up using the temperature slider in the Adjust Color For Skin Tone option during post production. The flash had both the diffusion dome and the CTO gel installed. And now I had a base-line for any crowd images I might attempt after the performance. Incidentally, I made these images before the performance started. Photos and observations from and about the performance can be seen here.

1/8 second, ISO 800, Aperture Unrecorded. Flash assist.
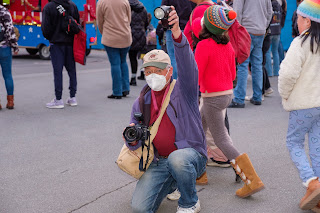
Fast Forward: When the show ended, the cast members walked up the aisles, giving High Fives to as many hands as possible. I managed to re-position myself by the exit as the actors approached, and managed to get this single shot of when this actor paused long enough for me to establish focus and squeeze off a shot. The gelled flash with the diffusion dome gave me a color-corrected light source, and by tilting the head up at a 45 degree angle gave me a little more distance from the lens axis. I've used this technique before, and have found that it gives surprisingly good results considering its ease in application.

Reigning Champion: Here you can see the uncluttered control panel of the Nikon SB-800. It is the picture of exquisite simplicity. All of the buttons are raised and easy to depress. What's more, the buttons are always active. When you press the [+], it always increases the output by 1/3 of a stop. Likewise the buttons controlling the zoom angle. Multiple trees equals a wider spread, the single tree a narrower one. The [SEL] button serves as both "Menu" and "Select", since this gives the user access to the multiple options that are not frequently changed. The [MODE] button governs the four  flash control and output options: TTL, Manual, and Multi (stroboscopic), as you would expect on any flash. The fourth option, Aperture, provides non-TTL flash exposure output adjustment, a feature that nobody seems to have offered since the introduction of iTTL (Through The Lens) flash metering. Nearly all older Nikon speedlights (SB-600 and SB-400 excluded) have this feature, up to and including the SB-900. The take-away is that pushdown buttons are much easier to use than the rotating selection wheel/ring of the Godox, which I'll describe in a moment. This is especially important when you only have one hand with which to make your adjustments. Use your thumb to make your selections and the other four fingers to support the speedlight. Easy Peasy, especially when working in near darkness.

Original Photo can be found here.
The Young Upstart: The Godox flash is a far more advanced flash so far as features are concerned. I suspect that the engineers, when designed the basic body design for use over multiple platforms, chose to put as many controls as possible on the flash itself, making it easier to transition to different camera brands without having to adopt a different skills set. While the Nikon zoom and output controls require only a single touch for each increment of change, Godox makes it a three-step process. For example, to change the output you must first press the serrated rotating control wheel at the 9:00 position and rotate the wheel clockwise or counter-clockwise to increase or decrease the output. Finally, you need to press the unmarked center button to lock in your adjustments. Running and Gunning as I do, I usually forget this important last step, and later discover that my random movements across the back of the flash affected some change in the output. In my mind, that's way too much to remember.

I may rethink my flash carrying habits and start packing my Just In Case Bag in the trunk of my car. Everything I would need, including some spare batteries for my Fuji cameras, would already be there.

Sunday, December 24, 2023

Bee Happy!


Happy Holidays, and may
2024 be free from angst!

Sunday, December 17, 2023

The Hip Hop Nutcracker


This was an assignment I hadn't planned on taking. I wanted to try out some new lenses on my Sony A7 body during a walk in Marin County. In addition, I also wanted to test the practicality of using a manually focusing battery of prime lenses on an actual assignment at some point. These two pet projects converged during a performance of the Hip Hop Nutcracker, presented by Peninsula Lively Arts and performed at the Fox Theater in Redwood City, a venue and city I knew reasonably well.

Recently my friend Meshelle gave me four Zeiss Contax/Yashica lenses along with two Contax film SLR bodies, all of which had belonged to one of her friends. I carried three of those lenses with me that morning; a 25mm F 2.8 wide angle, a 50mm 1.4 normal, and a 85mm F 1.4 short telephoto lens. Along with these three lenses and my one Sony body, I carried a single Nikon SB 800 with its diffusion dome and a CTO gel taped to the flash head. I would be shooting in an indoor venue, and since it was a staged production, the lighting was sure to be "creative".

This photo of the sleeping Clara shows that when lit by a conventional incandescent spotlight, proper coloration of the subject is indeed possible. However, the colored gels that were added for effect complicated obtaining a color rendition that was reasonably accurate. To complicate things further, many of those tinted lights were spotlights aimed at one specific portion of the stage. This resulted in areas with differences in both the color tint and brightness within different areas of the frame.


The Money Shot: Focusing was also an issue. Focus peaking works best when you have lots of light and a high-contrast foreground subject, which was not the case here. For this shot, I focused on the dancer's foot, as there was a good chance he would stay "anchored" to that location long enough to get at least one well-focused shot. Add to that the dancer's constant movement and you'll get many "near misses" when it comes to selecting one image with a pleasing composition. Fortunately for me I found this single image in a veritable mountain of near misses.
This selection represents 9 of the 11 images that were initially taken. In addition to focusing errors, there was the problem of the subject moving in and out of the shaft of light that Illuminated him. I suspect that I quickly reviewed the take and felt that the final image was going to be one of the selected images.
1/250 second, ISO 1600, Aperture Unknown.
This is a cropped version of the last image. It is as sharp as can be expected, considering the high levels of noise that gave the image a granular, film-like appearance. In addition, the subject in this frame is fully in the spotlight, something that can't be said for many of the images I rejected.

1/8 second, ISO 800,  Incandescent Preset, Aperture Unknown, 
Pressing The Flesh: At the conclusion of the performance, the cast walked up the aisle, high-fiving as many hands as they could reach.  I realized I was in the wrong place if I wanted a photo, so I literally ran up the aisle from my perch at Stage Left, crossed the lobby, and re-entered the theater on the opposite side. The Nikon speedlight with its dome diffuser and the CTO gel was retrieved from its belt pouch and mounted on the hot shoe. After checking to see if the white balance was set to Incandescent, I angled the head up slightly to increase the size of the diffusion source, and then took a few photos to fine tune the exposure. This can be tricky, since there are three factors involved: the flash output, the shooting aperture, and the ISO setting on the camera body. I don't remember doing to because these adjustments because, over the years, they have become second nature to me.

Final Thoughts: Attempting to shoot an assignment without the benefits of autofocusing made this a very challenging assignment. Fortunately for me, I wasn't sent by the paper, which is to say that if I messed up, I could keep it to myself and nobody would be the wiser. I also learned that I need to keep a small flashlight on me whenever I have an indoor assignment. You never know when you have to make an adjustment that requires actually seeing the various settings. And finally, I was reminded of just how well designed the Nikon SB800 was. Both output and zoom angle  are adjusted from the outside using a rocker switch that is far easier to manipulate than those found on the Godox family of flashers, and that they are easier to do in the dark. If the Nikon SB800 only had a dedicated lithium battery, I'd still be using them today.

I'll rant on that more in a future post.

Sunday, December 10, 2023

The Holiday Train

Dashing: Cal Train schedules a special Holiday Train to  make the run from San Francisco to Mountain View and Menlo Park. The train makes its first run on Saturday and stops at several stations along the way. On Sunday the train makes a second run to visit the stops it missed the day before. I would have preferred to photograph the train on Sunday, as the stops include three cities in the center of the Journal's readership area, but could only attend the Saturday run where the only "local" stop would be Redwood City.

As it turned out, the Redwood City Holiday Parade was scheduled for the same evening, so the assignment was a welcomed "twofer". The Parade started at 4:00 pm, well before the Train's 6:10 arrival, so I knew that I would have plenty of time to make the Money Shot. After some desperate minutes spent securing a parking space, I went to find the parade. Luckily for me, I spotted the staging area with dozens of marchers, so it was easy to find them after my car was secure. Since the Parade wasn't part of the assignment, I spent some time experimenting with my flash held off camera and triggered by a shoe-mounted radio controller.  The Fuji TTL metering system has always been iffy at best, so I opted to determine the exposure manually.

This photo was sent to me by Jay Minares, a photographer who I know from the annual Bethlehem 
Christmas recreations in Redwood City. During the parade, I used this off-camera flash technique using a radio controller mounted on my Fuji X-T2. It was the technique used for the two parade photos, In the first example, the flash was properly directed towards the subjects, giving me even illumination right down to the marcher's shoes. The second shot shows the flash pointed slightly upward, a happy accident that emphasized the closer marcher without overexposing her legs. It can be difficult aiming both the camera and the flash at the exact same spot, and near-misses are common.
1/30, F 6.4, ISO 6400

I am pleased with these two marching shots. You can see from the exposure that I was stretching the capability of the camera, as the ISO setting was the highest value available to me. 1/30 of a second was obviously not enough to prevent the motion blur of one marcher's waving hand.
1/60, F 8.0, ISO 6400
When this second group of marchers appeared, I knew that I would have to cut back on the flash output. If memory serves, I was running at 1/128 power, so I opted to stop down one stop. Coincidentally, I decreased the exposure time by a full stop in an attempt to recover the lettering on the theater marque in the background. This might have been an interesting photo to submit, although it was heavy on context and light on content.

Exposure Considerations: As ordinary as these two photos appear, there was a lot of exposure juggling behind them. First, there is the foreground, whose exposure is determined by the flash output and the aperture. The second and third exposure settings are the Fox marque and the sky, which are controlled by the exposure time. Underexposure can correct the overexposure of the marque, but will consequently darken the sky. In the second shot, the sky/marque exposure were reduced by 1 2/3 stops, a combination of a reduced aperture size to compensate for the decreased subject/flash distance, and the decrease in exposure time. The balancing act was made more arduous by the difficulty in adjusting the flash output using the on-camera flash commander. More on that in a later post.

Parade Chasing: Parades are moving targets, and the photographer is confronted with a choice. One can stay in one spot and wait for the perfect image to appear, or one can find a suitable subject and move along with it, photographing it whenever an opportunity presents itself. I chose the former approach when I found that the Fox Theater made a great backdrop, and the my wide angle lens could accommodate the evening sky, and my subjects in the foreground. 

The Train Station was a short walk away from the  parade route. I arrived with plenty of time to prepare for the train's arrival. 

The decorated Holiday Train arrived right on time. Barricades were arranged on the boarding platform to provide an unobstructed path for Mr. and Mrs. Claus,  Rodolph, Frosty, and Victorian Era Carolers to parade before the audience, This was my first Holiday Train photo assignment, and I was surprised to see how popular the event was. Nearly all of the photos were made from the "Hail Mary" technique, the one where the camera is held high overhead. 

Children of all ages stood behind the barricade. Wherever I went I was in danger of accidentally stepping on some small munchkin, so I did my best to keep a safe distance and go for the high-overhead shot. The flash technique was changed from my earlier off-camera technique to simply mounting the flash on the camera, adding a diffusion dome and adjusting the flash head to about 45 degrees to maximize the flash coverage and raise the flash's height just a smidge.

Rat-Tat-Tat: Because the flash output was so low, I was able to set the camera to the Continues Low Speed Burst mode. This allowed me to fire bursts of three to five shots before the flash was exhausted. This is a manual-exposure-only technique that can help capture those fleeting moments as the entertainers walked back and forth only the barricade in an effort to give a smile to every spectator.
If you examine the four-shot sequence, you can see that the Polar Bear is giving Low-Fives to members of the audience. Only in the last shot is the paw (more) clearly delineated against the background. Had I not made a Santa photo, this shot would have my first choice.

When photographing at relatively short distances (I was using a 10-24 F 4.0 zoom lens) the relatively modest elevation of the shoe-mounted flash can provide just enough height to provide some modeling on my subject's face. But when working in such cramped quarters as I did this evening, a shoe-mounted flash with an angled diffuser dome is the best you can do. I did have a Gary Fong Light Sphere in my bag, but was afraid that it would be easily knocked off of the flash head and lend where it couldn't be retrieved. However, the burst-firing of my camera coupled with the high ISO setting and minimal output of the flash worked out well on this assignment. Not particularly creative, but it gets the job done.

Sunday, November 19, 2023

7Artisans 35mm Pancake Lens

Buy yours here.
There have been a number of manually focused lenses introduced that are compatible with the venerable Leica M bayonet. This has been something of a windfall for those of us who are experimenting with vintage lenses and the new generation of full-framed mirrorless camera bodies from the Big Three makers. To the good, they follow the compact form factor of the traditional lenses designed for rangefinder film cameras bodies. You see, without the moving mirror of the traditional single lens reflex body, the lenses can be built much closer to the sensor plane. 

Chicken Or Egg: While I am not a photo historian, I have my opinions on how we got here, and why I hold the Fuji X-Pro 1 to blame. When it was introduced in 2012, it was marketed as a way for rangefinder diehards to make the transition to digital by providing a familiar form factor, optical viewfinder, and in-camera monochrome simulations. Fujifilm wisely introduced an accessory M-mount adapter to facilitate the transplant. The idea caught on, although the crop factor essentially increased the focal length of these lenses by a factor of 1.5 X, a serious drawback to wide lens aficionados.

The Chinese Connection: Right around the start of the Pandemic, several Chinese companies began making inexpensive, manual focus lenses for use with a variety of mirrorless cameras. Photographers using Fuji and Micro Four Thirds bodies were given a veritable cornucopia of inexpensive lenses to play with, and with many available for less than $100.00, it was an easy vice to indulge in. These lenses were designed for the half-frame equivalent format, and slowly but surely, the selection of new lenses got wider and wider, and I bought a number of them.

Enter The Dragon: Unbeknownst to me, Sony made a major breakthrough when in introduced its A7 mirrorless in 2013. It was the first of its kind: A full framed mirrorless camera. The camera slipped under my radar as I was a Nikon DSLR fan, and my mirrorless camera interest centered on the Fuji X-100 series of cameras. And without my noticing, Canon and Nikon would introduce their own full-framed camera bodies. I watched from afar as Nikon introduced its Z series of full framed bodies, but did not act because my D700 and two D600 bodies were more than up to the task. Besides, I had the necessary lenses to my full-framed bodies, so no further action was deemed necessary. I was, by now, committed to the Fuji X system. But the sea was rapidly changing, and I was facing away from the coast.

Savvy lens designers saw another window of opportunity opening. While engineers with the Big Three (Canon, Nikon, and Sony) were busy designing high end optics, others were exploring the possibilities of resurrecting older lens formulas. Since there was no longer a need to accommodate a moving mirror, older rangefinder designs could be copied in lenses with mounts for these new cameras. And while we're at it, how about some Leica M compatible models? Surely, there must be whole generations of photographers with Leica M bodies who would love to acquire usable lenses at a fraction of the price of a Leitz OEM offering. This could be done by adding the necessary rangefinder cam to the focusing mechanism. It adds to the cost, but it's necessary for any non-digital application.
This composite shows the Leitz Sumarron-M 28mm F 5.6 (left) compared to the TTartisan clone (right). You have to give TTartisan credit for capturing the esthetic feel of the more expensive Leitz lens. Price? $3,095.00  vs. $326.00, respectively. Performance? Satisfactory, from what I've heard. What more important is the demand for the lens, proving there is a market for photographers wanting to use there film (or digital) Leicas without going into debt to acquire lenses. The similarities are more than skin deep. These lenses a constructed from brass and glass, giving them both a heftiness from at time when aluminum was necessary to reduce weight. But I digress. Let's get back to the lens at hand, the 7Artisans pancake.

Aperture:
The lens has a sincle aperture permanently set to 5.6. When shooting outdoors during the day, exposure is not a problem if you're shooting in Aperture Priority mode at a modest ISO setting. When working indoors, you'll need to boost the ISO to a level that insures a sufficiently fast exposure time. For my tastes, F 5.6 doesn't provide enough depth of field for zone focusing applications. F 8.0 might have, but that is not a option for this lens. 

Focusing: I was a little disappointed on how limited the focusing options were. There is a small distance scale printed on the face of the lens, but as you can see from this image, the focusing arc from .5 meters to infinity is only about 30 degrees. Placed between those marked distances are a sequence of meaningless dots. Certainly not enough information for  distance estimation. I would have found the lens easier to use if the manufacturer provided both a more detailed distance scale and a depth of field scale.

One interesting feature is the built in lens cap that rotates to protect the lens when the focusing lever is when the distance is set beyond infinity. 

The Verdict: It would be reasonable to ask what this lens's raison d'être was supposed to be. I suspect that the designers thought it would be a good Street Lens for taking carefree "snaps" when waling about.  In my opinion there are a number of things that keep the lens from fulfilling that mission. First, the focal length is a bit long. Next, I have found the depth of field provided by 35mm focal length as being too shallow for zone focusing, Sure, a maximum aperture of F 5.6 might be adequate if distance and depth of field scales were provided. Finally, the single shooting aperture is a very serious limitation. Ironically, the lens itself produces reasonably sharp images when properly focused. Unfortunately, that narrow focusing arc makes it difficult to pinpoint that point of critical focus when the focusing peaking highlights zip in and out of view. If it were up to me, I'd change the following:

  • Change the pitch on the focusing threads to provide a wider focusing arc. This would make it easier to settle on the "sweet spot" when peak focusing,
  • Add a depth of field scale, 
  • Provide an adjustable aperture. Some times F 8.0 makes more sense. Or maybe even F 11, and
  • Shorten the focal length, perhaps to 25 mm. 
It's funny. After writing these four suggestions for improvements, I realized that I described the Voigtlander Snapshot Skopar. Also, I now want to buy that TTartisan copy of the Leitz Sumarron.

It shall be mine!

See original image here.
Post Script: While on my morning walk, I wondered what might have inspired the designers at 7Artixans to choose this unique look for its pancake lens. I felt as though I had seen this circular motif before, and I had. This is the Olympus O Product camera introduced in 1988 as a limited edition, collector's camera. It is basically an aluminum-clad Infinity Jr. point-and-shoot camera. The unique styling of the camera made it a celebrity of sorts in the camera world. In the mid 1970s I remember seeing one for sale at Brook's Camera on Kearny Street in San Francisco for about $300.00. That was big money in those days. According to Wikipedia, only 20,000 were produced worldwide.

Monday, November 6, 2023

Halloween At The Carolands Mansion


The Halloween Party at the Caroland's Mansion has become a must-do event for me, having missed it only when I was out of town. Staff and volunteers transform the mansion into a haunted house, complete with projected images on the walls, a haunted cemetery, and a witch that flies overhead on a cable. It is the "first stop" for trick-or-treaters in the neighborhood, and kids of all ages in all manners of costume shriek and giggle as they visit the ghastly tableaus and other macabre visions.

Timing is everything, especially when ambient light plays an important role. In order to show the ghostly projection on the exterior walls, one must wait until well after sundown and work with very high ISO settings. But by arriving early, finding a parking spot close to the main entrance was easy. 

I arrived at exactly 5:00 pm, and the sun wasn't schedule dot set until about 7:00. With time to kill, I walked about a made some random photographs. I often use a shoe-mounted speedlight to act as fill. While one could argue that this wouldn't be required when working in an "open shade" environment, the speedlight provides a color temperature that better matches the Cloudy White Balance Preset I usually use. 

These two shots were done with an on-camera flash to give some shape and some highlights. Without it, you are working in open shade lighting with little contrast and indistinct highlights.

As the ambient lighting dropped, I started to increase my ISO value, eventually hitting the 6400 mark. It's interesting to think that as the ISO increases, so does the effective range of my speedlight.

As the venue got darker and my ISO creeped higher, the single speedlight I had mounted on a light stand became proportionally more powerful. The mansion's driveway had a  to facilitate the loading and unloading of passengers, and the island at its center gave me safe place to position my flash. Since it was controlled by a radio trigger, I could point it in the general direction of the gathering crowds and move about taking candid photos. Since the subject-to-flash distance was constant, I wasn't always adjusting my shooting aperture or the speedlight's output.

I had arranged to make a group shot of the volunteers. Unfortunately, they wanted a photo made in the mock pumpkin patch. It was scheduled for later in the evening when there was a lull in the activities. The placement of the Key Light wasn't a problem.  I simple moved that shoe-mounted speedlight closer to my subjects. I tried to add some edge lighting to the group by placing two speedlights aimed at the backs of their heads, but only managed to get some spill light on the right side of the frame. Without additional light stands, I was limited to where those kicker lights could be placed. Close, very close, but the shot could still be improved.

Looking back, had I brought two extra light stands, I could have placed them just outside the frame, simply raised them to full height, and pointed them towards the ground, creating a puddle of light aimed at the the details in the behind. Instead of a rim light, I could have achieved some background separation while providing the viewer with some interesting details.

In the end, the top photo appeared on Page 2 of the Journal, while the bottom photo may wind up in a small frame on several desks within the organization.

Wednesday, October 25, 2023

TTArtisans 50mm F 2.0 Lens - Full Frame Disappointment


Bad Morning, Bad Lens: 
It was cold, windy, and a little moist. It was also the first and last time I'll use this lens. Touted as a "wunderlens" for its price, its performance was less than satisfactory. First, the vignetting was beyond what I would accept as artistic. Next, the degree of  smearing (a.k.a. coma)  of specular highlights (streetlights) was so unexpected, and so disappointing. 

I will admit it was a nice attempt at producing a full-frame, manually focused lens at this price point. I got the performance that I paid for, which wasn't much by any measure. Pity though, as I thought it was a nice lens.

Until I used. it.

Saturday, October 21, 2023

Shooting My New Snapshot Skopar


A Series Of Fortunate Incidents: My Skopar arrived yesterday afternoon, and this morning, I would return to the Houseboat Communities of Sausalito to try it out.

The sun was already up, and there were some scattered clouds that drifted in and out of the sunlight's path. This affected how the shadows would be rendered.

Poof! Purchasing the Skopar had the desired effect. The design of the lens discouraged precise focusing and forced me to depend on the preset clicks at 1, 1.5, and 3 meter distances. For the most part, I left the lens set to 3 meters, and left the aperture to F 8.0. This gave me a theoretical "sharp focus zone" from 4 feet to infinity.

It Worked! For whatever reason, this technique, often called Zone Focusing, worked perfectly with the Skopar. To add jimmies* to the cupcake, using the Focus Peaking function displays the zones of highest contrast (sharpest focus) in red.  By just glancing in the EVF, you knew that if the zones of interest were so highlighted, you had some assurances that those areas would be in focus.


Walking quietly in the floating community, I met a kitty and a doggy, and enjoyed some momentary relief from my tinnitus. Nearly a dozen photos made it to the final cut, but I culled several for brevity. I don't often make that many images on a single outing, but the time of day, the varied qualities of the morning light, and the surprising performance of the lens contributed to a wonderful outing on the bay. 

Needless to say, the  Skopar succeeded in getting me out of the city "rut"  and helping me produce some fun images in a relatively short period of time. Happy camper, I am!

*"Jimmies" is a term used widely in Pittsburgh, Boston, and in parts of the Midwest. They are called "sprinkles" everywhere else.

Sunday, October 15, 2023

The Color Skopar - The Lens I Was Reluctant To Try


Shot with Voigtlander Snapshot Skopar on a Sony A7 body.

I have a habit of saying, "Never handle anything that you are not prepared to own". Once in a while, a piece of equipment will fall into your hands and you'll experience an instant rapport. You will find your perfect muse, the medium through which you convert a momentary visual experience into something tangible and permanent, be it printed or published. 

Snapshot Color Skopar. Image Source: Click here.
Note the rangefinder cam.
Shawn, my friend and Leica uber-enthusiast, is a careful photographer, His collection of lenses (all mint, I might add) includes some Voigtlander primes for his M-Series bodies. I became more interested in the compact Leica lenses since converting to Fuji mirrorless cameras. The  Fuji X-Pro1 was a digital homage to the Leica M3, as the former went to great lengths to simulate the style and feel of the latter. In addition, the mirrorless designed allowed a wide variety of lenses to be attached, breathing new life into those film era lenses sequestered in boxes and drawers, anxiously waiting for their chance to be used once again.  Alas, the APS sensor cropping of the Fuji bodies denied my vintage wide angle lenses their true aspirations of recording sweeping vistas and unusual compositions.

The full-framed Sony A7 changed all that. Introduced in 2013, they are now reasonably priced on the used market, so I purchased a near-mint specimen and some lens adapters (Nikon, Pentax Thread, Minolta)  to go with it. The body was also shallow enough to accept vintage rangefinder lens, should I encounter one. I looked down upon my newly acquired kit and I saw that it was good.

Troublemaker: Shawn, on hearing about my Sony, loaned me three Voigtlander M mount lenses to try, including the Snapshot Skopar I had shown an interest in. Since the proper adapters were relatively inexpensive, it was a chance to experience these elegant older lenses using digital capture technologies. I wound up purchasing both the earlier threaded adapter (L39) and and bayonet M adapter. I had some difficulty mounting the lenses, as the fit was very tight. For fear of damaging the mount, I seated the lens only finger tight and cradled the lens in my hand while I used it. I stepped outside and made a few exposures, and returned to my laptop to see what the little lens hath wrought.


Original File: Color Preset Vivid , Exposure Compensation +0.3.

This sample file was something of an eye-opener. The image was exposed using Aperture Priority, and the histogram shows that the Sony's metering was spot-on. The EXIF data indicated that I had an Exposure Compensation setting of + 1/3 stop, an anomaly, since I normally set it to - 1/3 to get a more pleasing (to me) rendition of the sky. I was not prepared for what I saw when I enlarged the file. There was a much wider variety of shades of green in the foliage, and an "snap" to the image that I hadn't seen before. The lens was incredibly compact, as one would expect from a rangefinder-dedicated lens design. And the undeniable quality of the construction whispered volumes. I was entranced.

Leica Or Leica? According to Shawn, the lens came in two variants. The first was designed for the pre-M series Leica bodies that used the screw thread mount, while later improved versions, identified as the "Color" Skopars, had bayonet mounts for the M-Series Leicas, and rangefinder coupling for precise focusing. In addition, an accessory viewfinder was available for use on the original Leica III and M series cameras.


I found this ad for a threaded non-color Snapshot Skopar at KEH Camera. Since I would be using it with a mirrorless camera body (either Sony A7 or Fuji X), the absence of a viewfinder wasn't a problem. The threaded mount wouldn't be an issue with either system, since the necessary adapter would always stay mounted on the lens. The price was close enough to the newly-manufactured Chinese lenses that are being offered in rangefinder-coupled Leica M bayonet mounts. So after several days of pre-purchase anguish, I bought it.

I can only hope that the little lens will perform as well as Shawn's Color Skopar, but it if just comes close I'll be very happy. After all, I've been using bargain-basement manually focused Chinese lenses, and I've been pleased with their performance so far. I will keep you posted.

Wednesday, October 11, 2023

Pink Ribbon Party - Breast Cancer Awareness Month


Not A Triumph Of Artistic Effort: It's simple shot when one has the bare minimum of equipment and enough time to execute the shot. If you hadn't guessed, it has been augmented by flash. Need proof?


Here is essentially the same shot without flash. 
I can tell from your collective gasp that you were surprised by how much the image depended on a speedlight or two. Here's what went down.

Placing The Key Light: I arrived on the "set" with a notion that i wanted to include the breast exam van, and when I found that it had a large graphic on the side, I decided that I would include as much as possible. As luck would have it, the morning sun arrived at an angle, putting the side of the van in shadow, while the open door was partially front lit.  There would be something of a balancing act to prevent the sunlit highlights from being overexposed beyond recognition while applying enough light to bring detail to the shadows. I went back to my car and retrieved a Flashpoint Nano light stand and used it to raise my key speedlight to a height of about six feet off the ground and positioned just out of the frame. Since I was in an area with limited foot traffic, I felt the stand's placement would not present a safety hazard. The speedlight defaults to an A-Channel, Group 1 setting, the same setting to my radio flash trigger. And while the flash to subject distance wasn't recorded, it was less than to the camera-to-subject distance of the final shot. I made the shot from a low crouch position.


Now I was getting close, but the cigar wasn't within sight. I intentionally aimed the flash head at the door, as I planned to position my subjects around the short stairway. 
I could see that the flash was definitely adding some shape to my subjects faces, but the shadow area wasn't bright enough to match the sunlit portions at the right of the frame. 

Second Flash: This was almost a Hail Mary move, but I fished out my second flash, a Flashpoint/Godox like my key light. It too was set to Channel A   Group 1, so I now had a second full-power flash at my disposal. I knew that if the output of this fill light was too much, I could decrease its output by covering a portion of the flash head with my hand. As it turned out, I needed all the light the fill flash could give me.


Light Is Additive: In this cropped portion of the final image, you can see that the second light filled in the shadows nicely while helping the Key Light brighten things up a bit. And as frosting on the cake, that fill light brought the graphic on the side of the van to life. By holding the fill light close to the lens axis, there is no indication of a secondary shadow.

Speaking Of Equipment...In past posts I have mentioned that occasionally Murphy's Law will hijack the situation and leave you unable to complete the assignment. To address this,  I always carry at least two of everything in case of a mechanical failure. In the case of my speedlights, they were pre-set to respond to the dedicated shoe-mounted radio controller. Either flash will function on-camera or as an off-camera remote right out of the bag. This allowed the nearly instant application of a second flash when it appeared the photo was about to go south.