 |
| Photo #1 |
Opportunity Favors The Prepared Mind: I've been following Neil van Niekerk for quite some time. His approach to on-camera flash allow for some very creative lighting techniques suited for a photographer who is working alone. His technique takes advantage of the state-of-the-art digital single lens reflex (DSLR) camera technology to stretch the limits of bounced flash. He utilizes high ISO settings, narrow-beamed on-camera accessory speedlights, and bounce surfaces he finds on location.
I've adopted Mr. van Niekerk's techniques with great success indoors, but never applied it outdoors for lack of a suitable bounce surface. In retrospect, I guess I wasn't looking hard enough.
 |
| Photo #2 |
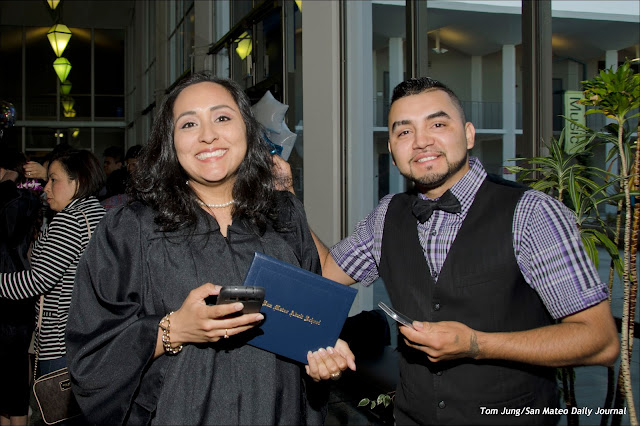
Grad Night: Every year I photograph the San Mateo Adult School's Graduation Ceremony. The reasoning it twofold: I need to make a record shot of the graduating class for our 'I Love Me Wall", and to hopefully make an image interesting enough to be published in the community section of the Daily Journal. I had just finished the shooting the handshakes and moved out to the courtyard to make some photos of the graduates before they turned in their gowns and went home. In the interest of speed, I decided to use may handshake setup, A D7000 with a 18-200mm zoom lens with an SB-900 and SD-8a battery pack for light. My first shots had the bare flash pointing directly at my subjects. As I roamed around the lobby, I made a few shots, not of which were particularly well lit. All I can say is the rig was simple to use, something like a gigantic point-and-shoot. This first shot (Photo #2) was pretty typical of shots made with direct, hard lighting with the flash positioned high above the lens axis.
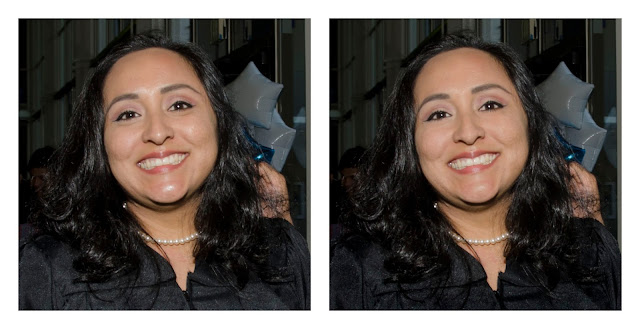
Speed Retouching: Direct flash photos often require retouching to make the images more attractive. I have streamlined my work flow to address both the highlights on my subject's forehead and nose, and the darkened rings below their eyes. Check out this comparison (Photo #3) of a cropped portion of the sample image.
 |
| Photo #3 |
I used my "Holy Trinity" of retouching. These three steps are applied in the following order:
- Clone Tool: Set to Lighten, 25%. Sample the light area of the cheek as your source point and "paint" over the darkened regions below the eyes.
- Brush Tool: Set to Darken, 20%. Sample the side of the nose as your source point and paint the highlights on the nose, forehead, chin, and cheeks.
- Burn Tool: Set to Shadows, 20%. The graduation gown is then "burned" to bring its color closer to a true black.
By using three separate tools, you don't have to spend time choosing between options. It takes less time to change from the Clone Tool to the Brush Tool than to re-set the Clone Tool to address the darker and lighter regions of the face.
 |
| Photo #4 |
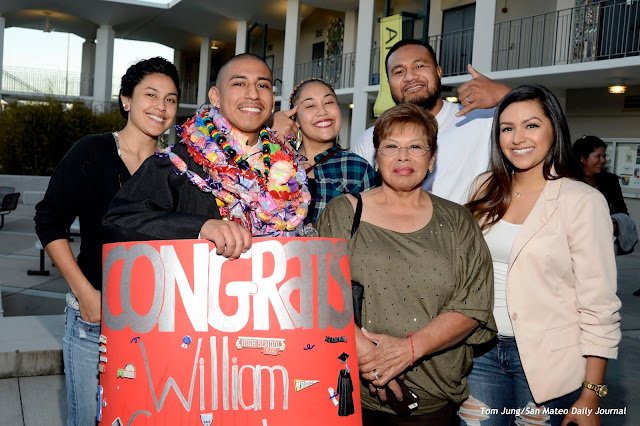
I roamed the courtyard, looking for family groups to photograph. I performed the three-part adjustments to every face in this family group (Photo #4), giving me a reasonably good party portrait. Obviously, the glare from the silver letters on the congratulatory banner reflect the harsh qualities direct flash can have. Thankfully, the high over axis flash position provided by the flash bracket helped give the image some three-dimensionality.
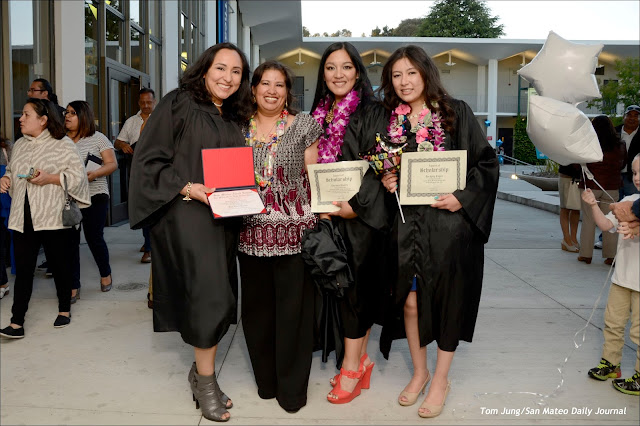
Ah HAH! Shortly after this shot was made, I noticed that second floor walkway surrounding the inner courtyard walls. It occurred to me that this could become a "ceiling" that I could use to bounce my flash. This, and the light colored walls, gave me a large bounce surface that I could use to produce a more even light. I changed my tactic: Instead of going to my subjects, I invited them to join me by the wall where I could photograph them. This trio of young graduates clearly shows the improvement of bounced flash over direct flash. And while I still used the "Holy Trinity" of retouching, I could usually skip the highlight adjustment.
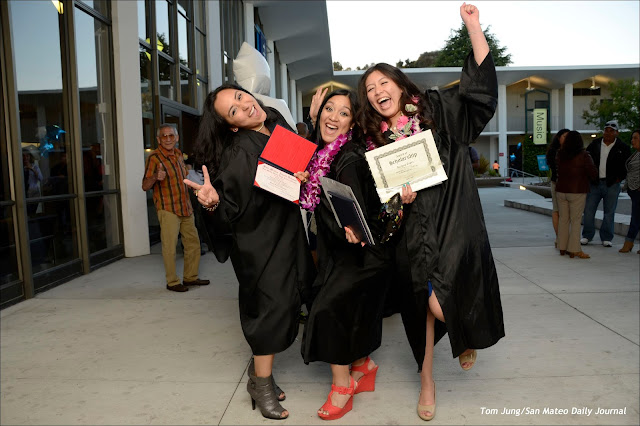
I thought this trio of excited graduates would make a great photo for submission to the paper. After positioning them in the "sweet spot" in front of my improvised bounce surfaces, I made a simple smile shot. A reproduction of Photo #1 can be seen at the left.
Wardrobe Notes: Louisiana photographer Kirk Volclain, in a video from PhotoVision, made an interesting point: Shoes can be a very important part of a young woman's wardrobe. For this reason, I always try to include a full-length photo that includes the shoes. In this case, it was a bit of a challenge, because even my lens set to 18mm, I still had my back pressed against the wall behind me.
 |
| Photo #5 |
As always, I asked if they wanted to make a fun shot for using on their social media sites. The resulting photos can be a lot of fun to make once the subjects understand that I want them to have something fun to remember the event by (Photo #5).
 |
| Photo #6 |
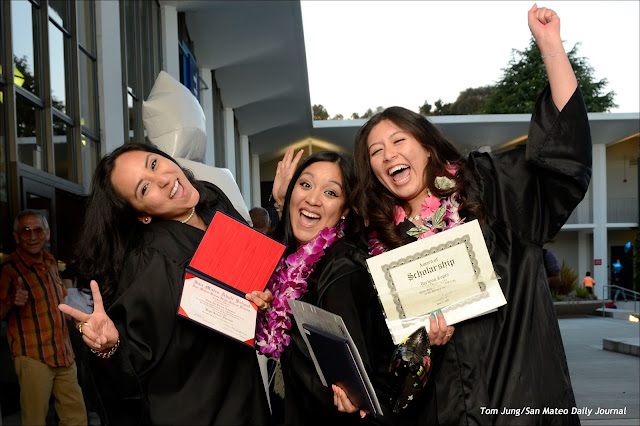
I felt this was a suitable image for the Journal, but I decided to crop it tighter (Photo #6), since I had no way of knowing how it would be presented. If the photo was reproduced in a small format, most of the detail seen in my original composition would be lost. So I re-cropped the image to emphasize the faces and the certificates, a wise decision when you consider the hard copy was only 1.75" x 3.25" in size, and black and white to boot. The photo ran in the June 22, 2015 issue on page 19.
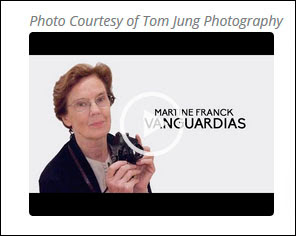
2010: I made this photo of Martine Franck at the San Francisco Museum of Modern Art on October 27, 2010. As the widow of Henri Cartier-Bresson, she was present at the opening of a retrospective of her late husband's work. I am embarrassed to say that I did not know that she was related to Cartier-Bresson.
I remember spending several minutes arranging the seated Ms. Franck to align her with the photo on the wall behind her, one of her late husband's most recognizable images. Interestingly, she had her Leica in her handbag, so I asked her to hold it for the photo. While I was proud to have thought of the composition, it ultimately didn't run for the reasons I outlined in this earlier post. She did notice the colored gel I taped over my built-in flash, and seemed impressed that I had thought to do so.
2015: During an idle search, I found that Ms. Franck passed away on August 16, 2012. I found this obituary in Los Tiempos, for which I received credit:
An English web posting from Films Not Dead also used the photo, but since it wasn't part of her portfolio, it was credited to "self".
Jessica Morelli also used the photo on her blog, which you can see here.
Here's another version at this link.
I was surprised to find that this image wound up on four tributes to her life and work. I guess the mere fact that a Bolivian newspaper, a camera store in London, and two bloggers found and used my image is something of a compliment. All the same, it points out the changing views on ownership, fair use, and "borrowing" images, something I've often done myself. But I always gave credit to the photographer, and always included a line to where the original posting could be found.
I don't mind
sharing, but only one organization remembered to say "Thank you", or
whatever passes for courtesy in this hipster age.
* * *
 |
| Credited June 30, 3015 |
Update, June 30, 2015. Sean Buckley suggested that I contact the bloggers and let them know they were "borrowing" something, not finding something that was free for the taking. I contacted the three bloggers who hadn't credited the image. blasfotografia.com updated the posting a few hours later.
July 5, 2015:
Films Not Dead revised their slideshow presentation, giving credit to
Magnum Photography, and to me, at the pane leading to the slide show.
I've been monitoring the site since I made the initial post, and I have
reason to believe they gave some thought to the best way to handle the
multiple credits.


