Sunday, July 6, 2014

La Quinceanera 2014 Part 1

I was asked if I could photograph a Quinceanera by a guest at Brad and Rene's wedding. Having never done a Quinceanera before, I thought it would be an interesting opportunity to practice shooting in a new (for me) "social environment". As I had hoped, it gave me a chance to practice some shooting techniques I don't get to use very often.

The Practice Session: The assignment was broken into three parts: the Practice Session, the Full Length Formal Portrait Session, and the Quinceanera itself. Photographing the practice gave me a chance to meet my "Q-Girl", her escorts, and her attendants. After some routine photos of young men and women learning the customary dance steps from the official event choreographer, there was some time for some fun shots. I recalled that Phillipe Hallsman created a series of "Jump Photos" where he made photos of people actually jumping in front of his camera. Mr. Hallsman contended that a person's true personality could be seen at the height of their jump, revealing his subject's unguarded personality.

What started as a simple exercise turned into a 45 minute giggle-fest where everybody wanted to be photographed with different people in the party. I certainly managed to break the ice, and I later leaned that the "jump session" was the subject of much discussion that evening, all complimentary.

Photo #1
This particular shot (Photo #1) featured Gretchen (center) flanked by her two Quinceanera coaches. Perhaps they just were happy that the day's practice session was finally over. Lighting required two SB-800 speedlights, mounted on lightstands, positioned behind the subjects and aimed forward in a cross-light setup. You can see a bit of flare from the light located at camera right, a sign that the cardboard scrim I attached to the flash didn't work as well as I had hoped. The camera left lightstand was actually cloned out of the final image. The subjects were front lit with a Lastolite EZBox held by my assistant Cissie, who was standing in front of me, just out of the left side of the frame. Unlike the Zumbrella, there is no "back splatter" of light when using the EZBox, and subsequently no contrast reducing flare from within the lens.

Photo #2
The Full Length Portrait. Phase 2 consisted of the formal full-length portrait. Gretchen wanted a on outdoor setting, and while there were some suggestions of more exotic locations, I decided that a good compromise would be the San Mateo Central Park gazebo, which was just outside of the headquarters of the San Mateo Arboretum Society. The gazebo was surrounded by well-tended flowers in full bloom, and can be seen in the background (Photo #2). Looking back on this image, there are some minor alignment problems that could have been solved by using a tripod and carefully adjusting the framing. In cases like this, it would have been useful if I had centered the camera on the framework of the Gazebo and moved Gretchen withing the composition, but I purposely didn't bring one because it might have been in someone's way. 

Learn Something New: For this outdoor portrait  I was using two Nikon SB-900s mounted in a Lastolite EZBox II Flash Bracket triggered by two Pocket Wizard Flex units. Nikon SD-8a supplementary battery packs were added to cut recycling time. I used a shoot-through umbrella as a light modifier which Cissie held aloft on a paint pole. I put two ceiling-pointing speedlights on the floor of the gazebo to light the interior. I discovered that if the Pocket Wizards are configured to fire in the manual (not iTTL) mode, the single flash impulse would properly trigger the two optically slaved Gazebo lights. This required a good bit of adjustment prior to Gretchen's arrival, but made for a less complicated lighting solution.

The Main Event: Photographing the Quinceanera itself was very much like a wedding. You'll be required to apply a variety of exposure techniques under a variety of circumstances.

Photo #3
For the outdoor shots, I decided to go with 2 SB-900s set to 1/2 power and triggered optically (SB-4 mode) using a camera mounted, fully manual LumoPro 180. My reasoning was that if I was confronted with bright, direct sunlight, I could easily move the flash to my Nikon A or Sony R1 and synchronize my shots at 1/500 of a second or higher, effectively doubling the relative output of my SB-900s. I relied on Cissie to maintain a distance of 10' from the flashes to the subject. No light modifier was used because I needed all of the lighting power I could muster for shooting in bright sunlight. The exposure setting for this shot, taken in the shade of an awning, was 1/250 at F11 (Photo #3). Incidentally, I could have easily cropped the right side glare, but left the image  in its original aspect ratio so I'd have some space to crop if I needed to.

Photo #4
 The day was cloudy bright, as you can see by the soft-edged shadow beneath the limo (Photo #4). In this case, the twin speedlights provided the necessary shaping of my subject's faces. Exposure was 1/160 of a second at F10, ISO 200. I wish I had thought to radio-sync a speedlight or two for a shot made inside of the limo, but just there wasn't any time. 
Photo #5
Indoor Available Light: For the ceremony itself, available light would be the desired mode of operation. I spoke with the Quinceanera Concierge about using flash. While she said that I was free to use flash EXCEPT during prayer, so Iremoved the flashes from my cameras, opened the apertures, and raised the ISO settings. Digital noise was a real problem at the high ISOs, but I managed to get some acceptable images when the available lighting was relatively even, like this one (Photo #5).

Photo #6
Indoor Running And Gunning: R and G means just that: Maximum mobility coupled with high speed shooting. As soon as the ceremony was over, I went to the back of the church to make this flash photo (Photo #6). I set one camera aside just for this purpose. And even with a direct, camera mounted flash, I kept a fairly high ISO setting so the ambient lighting at the front of the church would render enough detail to be recognizable. I am ashamed to admit that I used a shoe-mounted flash because I own several flash brackets that would have brought the light higher above the lens axis.

After some obligatory formals, it's off the the next venue. Since we're leaving the church, the approach will be more of a combination of event and journalistic photography, with difference approaches for each new situation, allow me unrestricted use of my speedlights. More to follow.

Sunday, June 29, 2014

International Day 2014

Photo #1
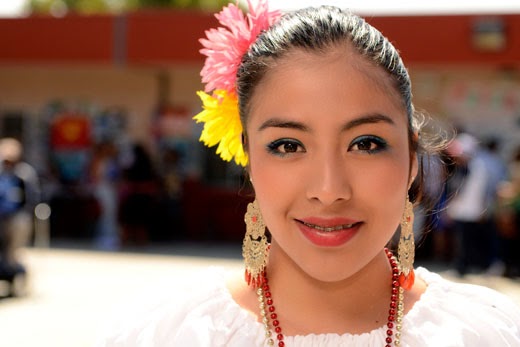
International Day at the San Mateo Adult School is a big event. Normally, students are grouped by ability, but for this event, students form planning groups based on their countries of origin. Along with cultural displays and an international buffet of food from around the world, there is a program of traditional songs and dances. For a photographer, it's a target rich environment, with many opportunities to experiment with different lighting techniques. I had Cissie to assist me, so she became my "Voice Actuated Lightstand". This gave me the freedom to position my light wherever I wanted, within reason.

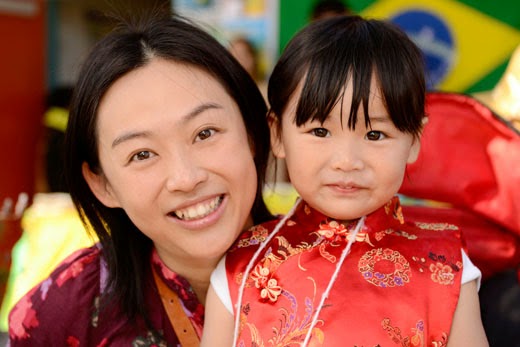
I used a single Nikon SB-800 as a light source, but added an SD-8 supplementary battery pack modified to work with the SB-800 and SB-900 speedlights. This gave me a shorter recycle time, a helpful addition when multiple shots are necessary. For Photo #1, #2, and #3 I used a Lastolite 15" EZBox on the end of a paint pole. I rotated the SB-800 so the sensor cell faced to the rear. So long as the camera was slightly behind the EZbox, I could easily maintain line-of-site communication between the on-camera commander and the remote SB-800. In Photo #1, the EZBox is held just above the camera. You can see that the lighting on background is mixed: While most is in the shadow, there is a yellow "hot spot" created by direct sunlight. You can tell the subject is completely in shadow by the absence of highlights in her hair.
Photo #2
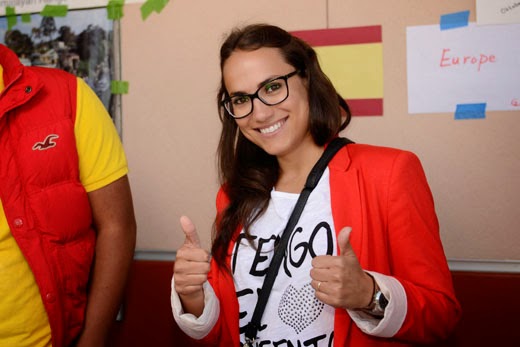
The subject in Photo #2 was standing with her back to the late morning sun.The sunlight was strong enough to provide highlights for the hair but from an angle low enough to not light any portion of her face.  The background exposure was an average of the darker shadow regions and the reflect light from the concrete sidewalk. My personal takeaway is a reminder to carefully check the subject in the LCD before moving on. Had I done this, I might have noticed that the top of her head gets a little lost in the background sky. It would have been very easy to have my subject take a few steps backward, had I noticed the problem earlier.

Photo #3
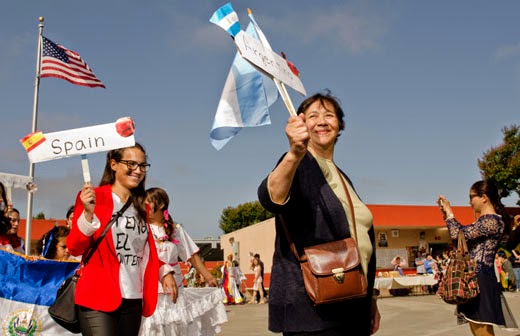
Photo #3 was a simple shot with the subject and the background completely in the shade. Not particularly interesting, but a good record of an enthusiastic guest at the party.
Photo #4
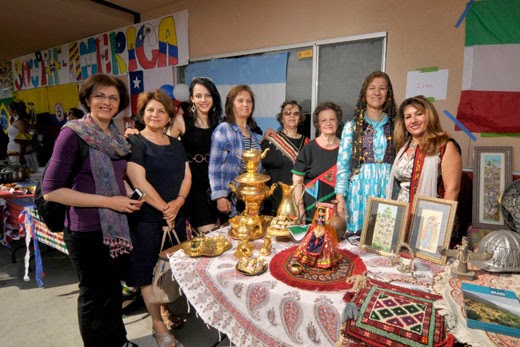
Photos #4 and #5 were pretty much "light on a stick" photos. They were made with using direct flash (no modifier) triggered by a no-name radio flash trigger. This setup was originally for a digital camera that didn't support Nikon's iTTL (intelligent Through The Lens) flash metering, but at the last minute it was used on a Nikon DSLR. Here, the speedlight provided some fill light for the shadows. Flash output was set manually, but I don't remember to what level. I often set the output manually when my light-to-subject distance remains fairly constant or when there is a chance that a light colored background like the sky might confuse the iTTL metering. 

If you look closely at the Photo #4, you'll see the shadow cast by the flash beneath the subject's chin. I suspect that these shadows are only annoying to people like myself, but the elevated position of the flash prevents over exposure of the subject's lower body, something I'd find much more troubling that the double shadow.
Photo #5
Photo #5 demonstrates how much one can get from a single speedlight, providing you have a wide-angle lens on your camera. The short working distances for the camera and the flash can give you access to small apertures to keep your shutter speed within the limits set by your maximum synchronization speed. The brightness levels of the shadows and the highlights are very close.
Photo #6
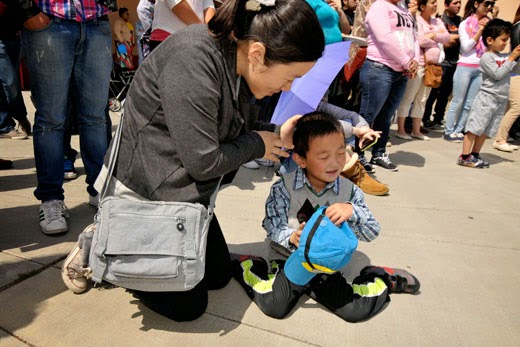
On camera flash fill still has a place (Photo #6). If you're using a wide angle lens and can keep the subject's plane of interest parallel to the sensor, you can minimize distortion at the corners. It also helps to keep the subjects as close to the center of the image as possible. Remember that the fill light from your flash adds to the existing fill from the concrete, so one wouldn't want to overdo it. In this case, the fill is so subtle that you might not notice it. But if you examine the boy's jawline, you can see from the relative brightness of the shadow that there is a fair mount of ambient fill light coming from below. As with all things, don't overdo it.