Saturday, May 7, 2022

Woodside Store Day


The Photo I Had To Make: The first of the requisite Four Bs of a good newspaper photograph (Babies, Babes, Beasts, or Blood) was represented in this photo, although in my world, "babies" and "cute kids" are one in the same. The context to link it to Woodside Store Days, the old fashion washing machine and clothes wringer, were there too. The focal point (where the subjects are looking) was apparent. With all of the boxes checked, I submitted the photo as soon as the caption was written, well before 7:00 pm deadline. The photo was destined for the front page, so with the photo "in the can", the pressure was off.

Woodside Store Day 2019
Past Efforts: I've photographed the Woodside Store Day event several times in the PP (Pre-Pandemic) years, and two photographs stick out in my mind. The one of the 2019 Pie Eating contest wasn't submitted because it consisted of two kids, their lips covered with berry pie filling. The young lady was smiling at her apparent victory, while the little boy beside her seems to be staring  disbelief. Since it really didn't have any visuals relating the event, it wasn't summited. 

The second shot, made in 2017, showed the interior of the store with rows of canned goods and farm supplies lining the shelves. One of the docents, dressed in a period costume, was in the foreground. The shot went over well at the office because, unbeknownst to me, the paper's Editor in Chief was standing in the doorway.

Woodside Store Day 2017
There were some things I would improve if given the chance. For one thing, the quality of the lighting on my subject was much broader than that on the background. The shadows on her face are extremely soft when compared to the harsh lighting from the incandescent accent lights mounted in the ceiling.
Second, the lighting appears a bit cool in contrast to the incandescent background lights. Lastly, the exposure was adjusted to so that details from the exterior would be recognizable. This underexposed the store's interior.
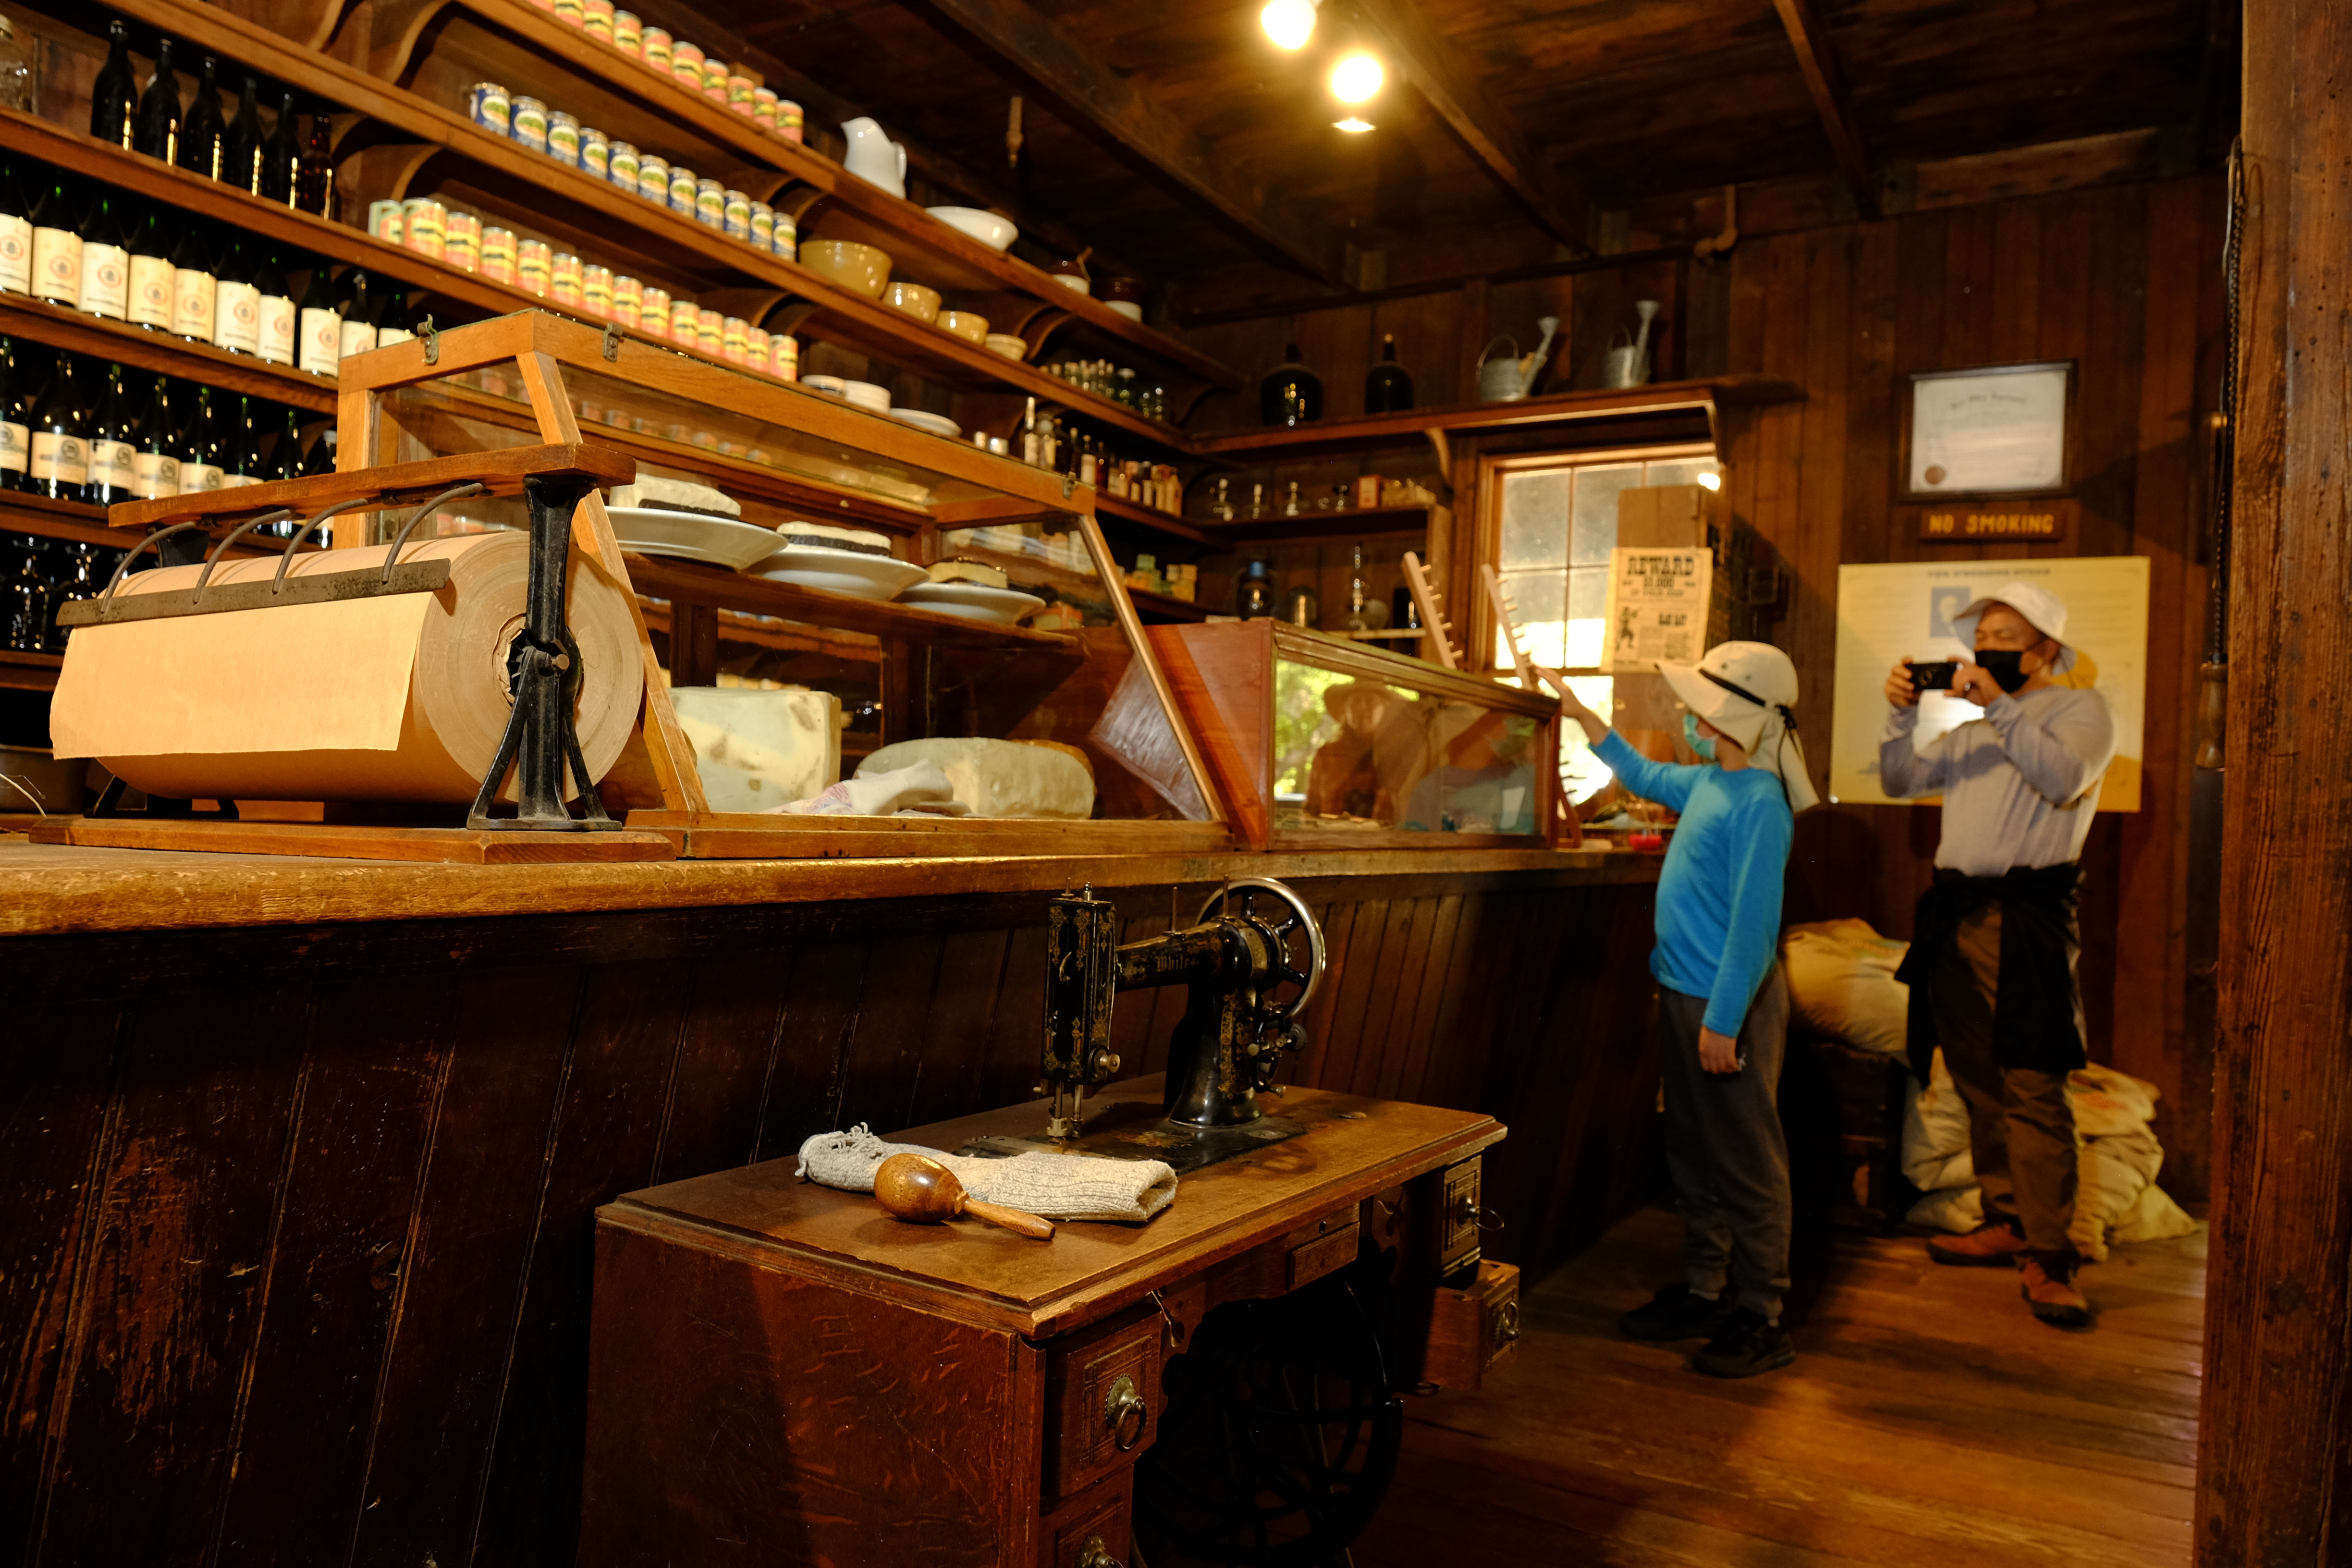
Five years hence, I thought I'd explore ways to improve the image. First, I decided to reframe the image to eliminate the door and give myself more exposure leeway for choosing the interior exposure.

This test exposure was based on what would properly exposes the merchandise on the shelves. By excluding the doorway from the frame, I didn't have to worry about blown  highlights.  Also, I went to some lengths to level the camera to prevent "stretch face" distortion in the corners, the so-called "wide angle distortion". This framing was achieved by holding the camera at waist level. Some slight convergence (vertical lines appearing to merge in the distance) exists, but it whispers instead of shouts.

1/35 second, F 4.0, ISO 1000

I was able to convince my subject to stand by the sewing machine and to pretend to study it. To simulate the high top lighting, I installed a diffusion dome on the flash and held it at arm's length high above my head. This gave me a medium hard shadow similar to those created by the ambient accent lighting. I did not gel the flash, so the lighting on my subject's face is close to true daylight.

Final Notes: When working with a shot where the background framing is critical, I have the subject move left and right, fore and aft, until his/her position is exactly where I want it. For this recent re-make, I just assumed the sewing machine was the subject to simplify any instructions I would be giving to my young subject.

Sunday, April 24, 2022

Getting A Fuji Lens Hood On A Meike Lens

Buy yours here.
Lens Hoods: In keeping with the whole pancake theme, I needed an equally flat lens hood to go with the lens. I wanted to have a hood like the one I just installed on my Fuji 27mm F 2.8, but knew it wasn't going to be a slam dunk. Ah, the journey to acquisition is a long and twisted path, one that I shall share with you, since the solution was a convergence of factoids gathered during my 50 years of photography.

Male Or Female? Before we start, let's talk about filter threads. Lenses that can accept threaded accessories usually have the proper size printed on the lens bezel. In the case of the Meike 2.8 / 28mm (2.8  is the maximum aperture, 28mm is the focal length), we see the number 49 which means it will accept standard 49mm accessories. Now if you look closely, you can see that the threads are located on the inside of the bezel, which means an outside-threaded (male) accessory will be needed. I looked for a lens hood that is both male threaded AND dome shaped, and my choices were:
  • Nikon's HN-35 for the 45mm 2.8 P (circa 2001)
  • Nikon's HN-4 for the 45mm 2.8 GN (circa 1969)
I found several hoods from which to choose, but they would have been "free" had I purchased the lens to which it was attached, the prices varying from $300 to $500. That's one expensive hood. To top it off, I would have needed an adapter to convert the Meike's 49mm lens thread to the customary 52mm Nikon thread.

Now Fuji makes the exact lens hood I'm looking for, but it's designed for mounting on the X70, the other fixed-lens Fuji camera. Unfortunately, the hoods have female threads, designed to engage the Fuji cameras' 49mm male threaded bezel. So near, yet so far.

Ancient Wisdom: When I first started dabbling in cameras, photographers often adapted lenses and accessories to maximize their usefulness. One trick was to mount a 50mm lens backwards to the front of a short telephoto lens, producing a super-marcro lens combination for extreme closeup photography. Manufacturers began to make threaded adapters to facilitate this nose-to-nose lens setup for almost any reasonable combination of thread sizes. 

On the off chance that some eBay seller might have one, I searched for a "male male 49mm adapter" and chose this one from several stocking sources.  Then all I had to do was thread the adapter onto the Meike lens and have male threads available to accept the Fuji-style hood. And if I needed to add a filter, I could simply remove the adapter-hood unit, screw in any 49mm filter directly to the lens bezel, and re-attach the hood. Brilliant!  

Now the OEM lens hood for the X-70 was quite expensive, so I purchased a JJC knockoff on eBay.  


With the thread adapter and hood installed, the package was not that compact. However, if the hood was removed, the depth of the camera would be significantly reduced, almost as shallow as the 27mm Fuji lens. The lens hood provided a lot of protection from fingerprints, so much so that I might not need to install a protective UV filter, thus allowing the lens to function "au naturel". 


How Do They Compare In Size? Size-wise, the lenses themselves are comparable. The hooded Fuji lens is on the left, the hooded Meike on the right. The hoods, when installed, do matter, as the Meike hood (49mm) is much larger than Fuji's dedicated hood (39mm). You can also see that, without an aperture ring, the Fuji lens looks a little toy-like.

Now let's go make some photographs.*


I was ready to take the Meike out and see if it performed as well as I hoped. Mounted on an X-Pro 1 body, the lens proved to be an inspirational combination. I would say the lens exceeded my expectations in the sharpness department, although the colors seemed "different" from what I'm used to. Can't put my finger on it, and it could be my imagination. 

I am undeniably pleased with my purchase. 

*The photos were actually made on April 18, 2022, long before this post was published.