 |
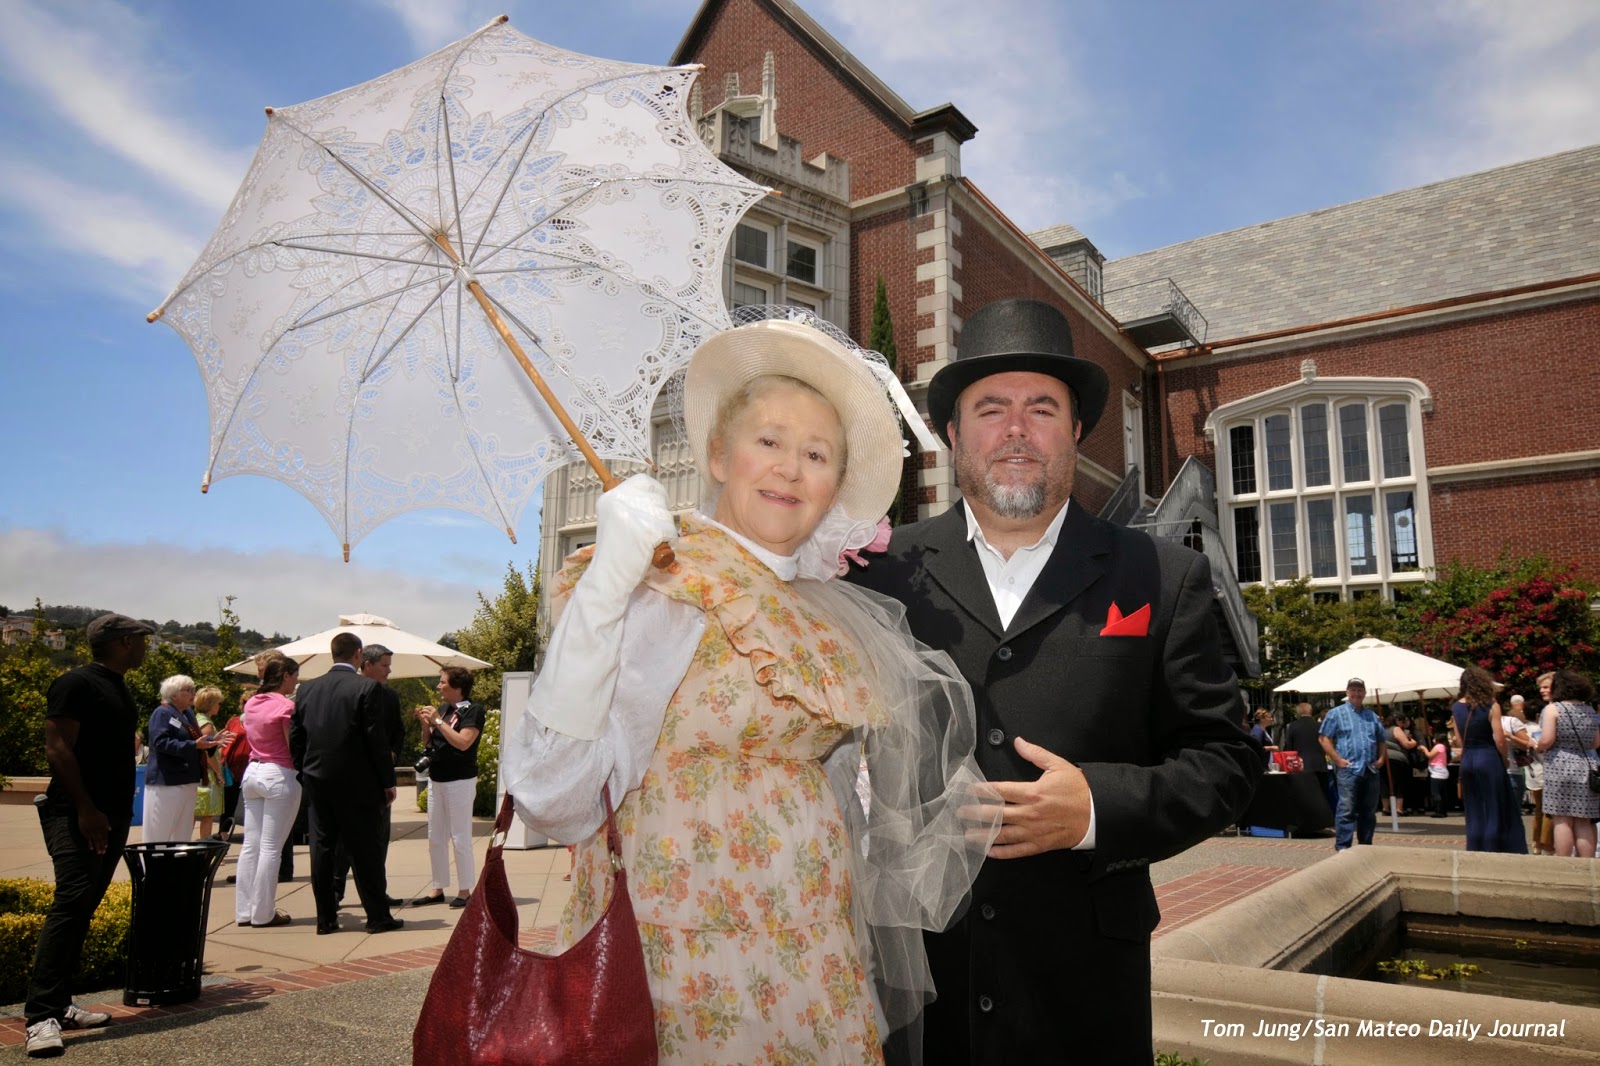
| Photo #1: 1/250, F 11.0, ISO (equivalent) 100 |
This photo
is Right Out of Camera, and has not been altered in any way, save the credit
line layered into the lower right hand corner. It was taken at the Kohl Mansion in Burlingame
during its year-long 100th Anniversary Celebration. Guests were invited to wear
period correct clothing, as this couple did. The shot, made soon after my
arrival, became my first-choice submission after I learned that the gentleman
was the Vice President of the Burlingame Historical Society. The parasol, the
blue skies, and wispy clouds made the photo. An explanation of the in-camera
exposure tweaks will follow.
Posed or
Directed? This photo was not posed, but instead directed. Before making the
shot, I introduced myself and explained that I wanted to make a photo with the
mansion in the background. Once they were in place, I adjusted my position
until the edges of the parasol weren’t clipped. The photo was a keeper in a
single take: I examined it with a Hoodman Hood Loupe, and found the image
totally satisfactory. Even so, I continued to photograph for another hour,
since you never know when a better image might come along. Having this shot in
the can gave me a chance to relax and look for images that might prove more
interesting. I did make some additional exposures, but I already felt I had
taken the winner.
Automated
Exposure Settings: Although I had an E-Z Box in the trunk of my car and my
Zumbrella on a Monopod on my belt, I just went with on camera speedlight fill.
For today, I set my D300 as follows:
- Lens: 11-16 2.8 Tokina.
- Exposure Mode: I set it the camera to Shutter Priority at 1/250 of a second (the highest normal sync speed).
- Exposure Compensation: Exposure Compensation on the body was set to -1/3 of a stop, which helped to darken the sky and bring out the clouds.
- Aperture: Set by the camera. Depending on the background, the aperture ran from F11 to F8.
- ISO: The ISO on the D300 was set to L 1.0, which is 1 full stop below the minimum ISO 200 setting, giving me an effective ISO of 100. I have no idea why Nikon doesn’t just call it ISO 100.
- Speedlight: A Nikon SB-800 was shoe-mounted and was set to the standard TTL mode with an exposure compensation setting from -1 to -2 stops. I don't recall the exact compensation used for this photo, as it isn't included in the EXIF data as viewed via the File Info option in Elements. I can't say if the data could have been retrieved with other software.
Flash Exposure
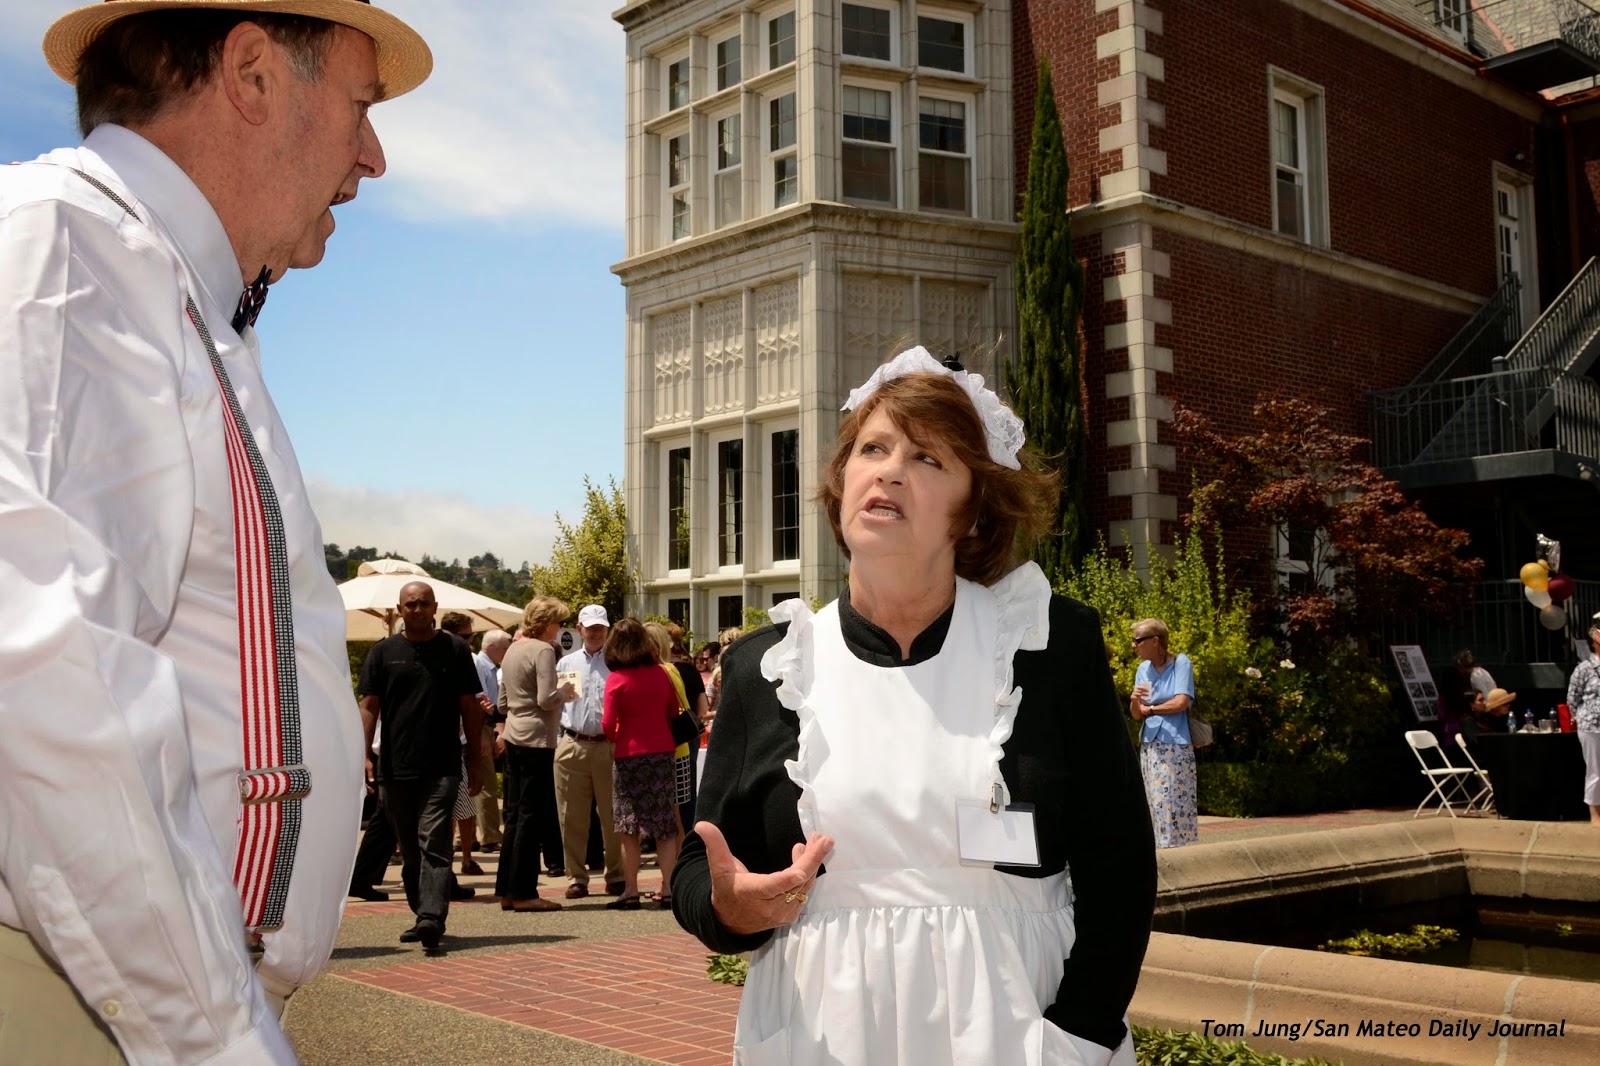
Variations: I made Photo #3 a little later in the day. It illustrates a
slightly different lighting arrangement. Notice that the natural sunlight
played a more important role in lighting the front plane of my subject's face.
If I were to make the photo with a Flash Exposure Compensation setting of
"0", the light would surely overexpose the right side of my subject's
face. Here, the Flash EC must be set much lower. How much? This is probably a
salt to taste adjustment. Too much light and you will the burn out the
highlights. Too little and you risk losing detain in the shadow side of the
face. I think I found the "Goldilocks" Zone: Not too hot, not too
cold, but just right!
 You can see from
this enlarged section that the shadow side of the face was filled enough to
bring out the detail, but the highlight side of the face is pleasingly
rendered. There are some other graphic elements in the image. My heroine is placed
close to the center of the frame, but not on it. The immediate background is
the shadow side of the Mansion, which helps bring some separation for her face.
Her protagonist at camera left helped to frame the image, and his gaze brought
the viewer's attention to my main subject. This wasn't as compelling (or
attractive) an image as my first choice, but served as a good example of the
fluid approach to exposure that digital cameras allow. By chimping after the
first shot, you can make some quick adjustments based on what the results. Of
course, familiarity with your exposure options will make it easier (and faster)
to achieve the "just right" image.
You can see from
this enlarged section that the shadow side of the face was filled enough to
bring out the detail, but the highlight side of the face is pleasingly
rendered. There are some other graphic elements in the image. My heroine is placed
close to the center of the frame, but not on it. The immediate background is
the shadow side of the Mansion, which helps bring some separation for her face.
Her protagonist at camera left helped to frame the image, and his gaze brought
the viewer's attention to my main subject. This wasn't as compelling (or
attractive) an image as my first choice, but served as a good example of the
fluid approach to exposure that digital cameras allow. By chimping after the
first shot, you can make some quick adjustments based on what the results. Of
course, familiarity with your exposure options will make it easier (and faster)
to achieve the "just right" image.While I have been a strong proponent of iTTL flash metering, this is the first time I combined automated flash exposure with automated ambient exposure. I can accept this abdication of exposure responsibility by remembering that I still have control over my highlights and shadows. Shadows can be controlled by using the flash exposure compensation, the highlights controlled by exposure compensation on the body. By starting off underexposed on both controls, I can get satisfactory results (usually) on the first shot, and with some minor adjustments, a much improved second one.
Life just got
better.


No comments:
Post a Comment