Monday, May 29, 2017

Carnaval 2017

Photo #1

Carnaval 2017 in San Francisco's Mission District is still a go-to event for me, even though I find myself inured to the floats, the bands, and the hustle. These days, I treat the event like a full dress rehearsal for the assignment that will one day produce the Pulitzer-winning image. Case in point: Photo #1 was total accident, taken from across the street. I saw the two "happy faces" making their way to their starting point, and the parade spectator gave me a very spontaneous smile. Alas, not prize worthy.

Point Of Clarification: I'm in the staging areas located just behind the parade's "starting line". I was allowed as a working member of a recognized media outlet. No spectators were inconvenienced in the making of these photographs.

Photo #2

The Equipment: In keeping with my "ready for anything" mindset, I brought three camera bodies. First, my go-to Fuji X-T2 with a 10-24 F 4.0 lens, and a Fuji T1 with a 50-200mm zoom lens. The middle ground would be covered by the third camera. a X100S with a wide angle adapter, giving me a full-synchronized 28mm-equivalent lens, which becomes a 35mm-equivalent lens when the adapter is removed. Photo #2 was made with the X-T2 / Wide Angle combination, with flash.

Photo #3

I decided that all flash photos would be made with the speedlight either hand held, or mounted on a monopod. Photo #3 (and Photo #2) were made with a Fuji X-500 flash, powered boosted with a dedicated Fuji accessory battery pack, and triggered using a third-party Canon compatible flash cable. By decreasing the flash output and under-exposing the ambient exposure, I was able to add some sense of depth by creating shadows without overexposing the highlights. You can see the hint of a shadow below my subject's nose and chin.

Photo #4

Working Up Close: The nice thing about Carnaval is the participants know that you'll be photographing them, and considering their outfits, expect of the attention. Last minute applications of makeup (Photo #4) were frequent, along with costume adjustments and impromptu practice sessions.

While not obvious, this is a flash-enhanced photo. Even on overcast days, a bit of flash helps to fill the shadows and add a bit of sparkle.

Photo #5

The general mood was quite festive, and working in this environment was easy if you approached your subjects with a smile and some complimentary words. Just smiling and bringing may camera into position prompted this friendly wave (Photo #5).

Photo #6
Selfie City: Getting a selfie with a group of young ladies seemed to be the big thing, and the prospect obviously proved irresistible to this young man (Photo #6).

Photo #7


Gelled Flash: I was anxious to experiment with a radio-triggered SB-80DX speedlight in the aperture controlled auto exposure mode. Unfortunately, I mistakenly brought an SB-80DX with a CTO gel already taped in place. I didn't notice my error until I attached a radio flash trigger. Knowing that Photoshop could minimize the color shift, I left it in place, but vowed to carry it only when accompanied by a second flash that isn't gelled. In Photo #7, you can see the warm glow on my subjects, courtesy of the gelled speedlight. I was surprised by how easy it was to accept the warm tint the gel provided.

David Hobby mentioned that he routinely taped a 1/4 CTO gel (less orange) just to give his subjects a "glow". I may start doing that.

Photo #8
Costumes: Costumes can be fun and culturally significant. Here dancers are dressed as Central American folk figures (Photo #8). The long shots were made with a Fuji T-1 and a 50-200mm zoom lens.

Photo #9
I was first drawn to the colorful feather headdress (Aztec, I think) when I noticed this dancer's blue eyes, a bit of a surprise (Photo #9). Again, I used the long-lensed Fuji.

Photo #10
As you can see, the costumes can get very elaborate (Photo #10). Thankfully, there was very little wind, which must have made it easier for the dancers.

Photo #11
Kids. Spend some time photographing kids. Their expressions change constantly, and you have to pay close attention if you want to keep them in focus and properly framed. After a while, you can learn to interpret their body language, and get a sense of when they are about to do something unusual, or change their expression (Photo #11).
 
Photo #12
Changing Viewpoint: I like to shoot kids from their eye level.  It gives you a variety of backgrounds, reflecting the world from their perspective. Perhaps this young lady is feeling a little lost, surrounded as she is by belt buckles and bare midriffs (Photo #12). Getting hard on the knees, though. I actually saw one photographer wearing knee pads like a skateboarder. Now that's dedication.

Photo #13
I see in this photo (Photo #13) a study in perfection, both in her appearance, and in her expectations. Her expression is one of total concentration as she begins to march, and to dance, in time with the rhythms set by the drummers of her troupe.

Photo #14
Little People, Surrounded By Big People: This young man seemed to be concentrating on remembering the dance steps he'll need to perform when the troupe starts marching, perhaps comparing his actions with those of the more experienced adults (Photo #14). I had set the beam angle of my flash to a setting narrower than the acceptance angle of my lens, allowing me to concentrate the light on the more distant subject (the boy) and feathering the edges to prevent burning out the closer adults on the left an right.
 
Photo #15
Taking A Break: When you're a stilt walker, where can you sit when you need to relax? These kids found that a rather tall pickup truck is just the right height, as you can see by the youngster at the right (Photo #15).

Carnaval has always been a family event. Strollers with costumed children are common along the parade route. Perhaps this mother and daughter will be dancing together in a future Carnaval, and hopefully, I will be there to capture the wonder, and excitement, the parade will bring.

Sunday, May 21, 2017

Flash On An Overcast Day - Second Harvest Food Drive

1/250 second, F 6.4, ISO 200
First Some Flash Fundamental: When shooting outdoors, you should remember that flash can be used either as key light, or fill light.
  • Key Light: Casts the primary shadow on the subject. Its position determines the orientation of the shadow on the subject's face,while the quality (soft or hard) plus the light-to-subject distance determines the quality of the shadow's edge.
  • Fill Light: Ideally, it casts no shadow of its own, so its proximity to the lens axis is important. It needs to be balanced with the ambient key light to prevent overexposed (blown) highlights.
Lighting: Even though this shot could have been made with ambient light, I prefer the saturation that a flash provides. Flash provides the shadows, since those provided by the flat ambient lighting would be much less pronounced. A single flash, mounted on a 8' tall lightstand, gave me the off lens axis distance to give these eight faces three visible dimensions.

Staged or Candid? One must remember that when photographing any First Responders, your photo shoot could end abruptly should a local crisis arise. Therefore, you really can't count on getting your subjects too far off track should an emergency come up. The good folks at the station told me they'd roll a more "photogenic" engine into the back lot, which they did. Since the sky was overcast and I had plenty of flash power available, I had them park it so that it could be easily deployed if necessary. After that, it was a simple matter to move the food barrels, open the doors, hand out the foodstuffs, and ask for a smile. Shooting done in just a few minutes. I purposely chose to shoot from a slightly lower perspective so that the emptiness of the barrels wouldn't be obvious.

Identifying Subjects: Normally, I would simply photograph my subjects Identification Cards/Badges for my caption and not give it a second thought. However, when photographing subjects in uniform, be sure to include their faces, since the color of their utility uniform was exactly the same. I ultimately figured out who was who, but just to be safe, requested confirmation from the event publicist.

If your a head counter, you'll notice that my composite only shows six heads. I did this just to make the point, as I had business cards for the missing two.

Per the Journal's policy on the pre-release of any photos taken under their auspices, I normally create a variation of the final image, with the words Not For Publication prominently printed across the face. Certainly not as subtle as a watermark!

Was Flash Necessary? Sometimes I ask myself that very question as I am always reminded of the old saying, "When you're a hammer, everything looks like a nail". I believe that without a flash on an overcast day, the faces lose all sense of contour. Here, the flash qualifies as a Key Light, as it creates is own shadow, as you can see how clearly defined everybody's chin line is. And while it can produce those distracting "hot spots", like the one on the open fire truck door, the "snap" of a properly exposed specular highlight produces a more true-to-life rendering, similar to what we might see under direct sunlight.

And nobody's squinting!

Sunday, May 14, 2017

Up Side What? Shooting Inverted


Crazy Tip Of The Day: When photographing large groups, I suggested that you photograph the subject's name badge to simplify caption writing. This insures that you'll match the proper name to the proper face.

In this venue, I had an extra camera I could use for the name badge photos, and thought I could get away with using the built-in flash for the purpose. As it turned out, the flash wasn't tall enough to avoid creating a shadow with the lens I was using. You can see that the name badge is underexposed and difficult t read. If I had a fourth speedlight (I had committed two to my shoot-through umbrella and one to serve as the commander), it would have solved the problem. Needless to say, I didn't have a spare, so it was use the pop-up, or re-configuring the commander to serves as a conventional TTL flash.

Instead, I turned the camera upside down and shot again. The shadow is still cast on the bottom of the frame, but now the name badge is fully lit.

It take a few moments to get the feel of an inverted camera, but as a quick dodge, the technique is worth remembering.

Sunday, May 7, 2017

On-Camera Flash Modification Options-The Black Foamie Thing

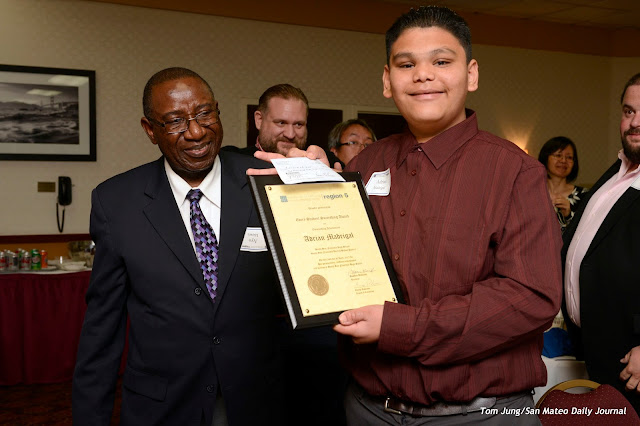
Photo #1: 1/125, F 6.3, ISO 800, Cloudy White Balance
The Black Foamie Thing is not really a light modifier because the quality of light is totally dependent on the presence of a suitable surface to bounce the light from your flash. The BFT does help to direct light away from areas you don't want lit. Also, it acts as a blinder to minimize light spill onto unsuspecting bystanders when shooting from crowded locations.

For this shot (Photo #1), I simply aimed the speedlight at the ceiling behind me. The light must now travel twice as far as it would if the speedlight was pointing directly at my subjects. This brings the relative distances between my subjects and the background spectators closer to each other, lessening the effects of light falloff. Trust me.
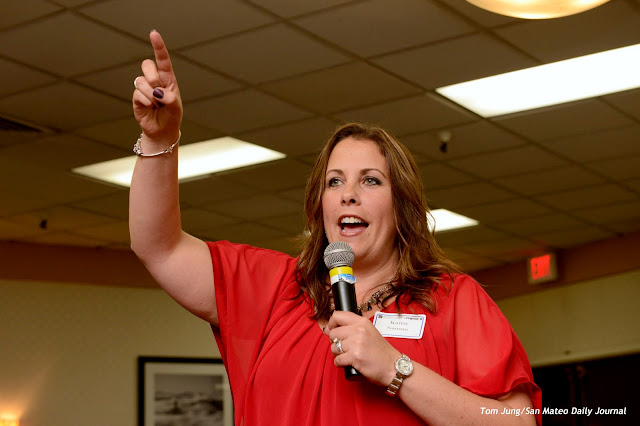

Photo #2: 1/125, F 6.3, ISO 1600, Cloudy White Balance
Low Angles: When trying to get "the" photo of an animated subject, I'll often go to a longer lens used at a greater distance. Here, I upped the ISO by a stop to improve the exposure. You can see from the shadows on my subject's arms that the light is coming from camera left, from high above (Photo #2). This long distance bounce flash gives the shooter an opportunity to create a soft but directional light for the photo, as it did here. The speedlight's head was rotated 135 degrees to the left.

Color Contamination: Here's something I don't often see: Color Contamination from the subject's clothing. You can see traces of red on my subject's arms and neck, most likely from her blouse. I don't think anything could be done to prevent his.
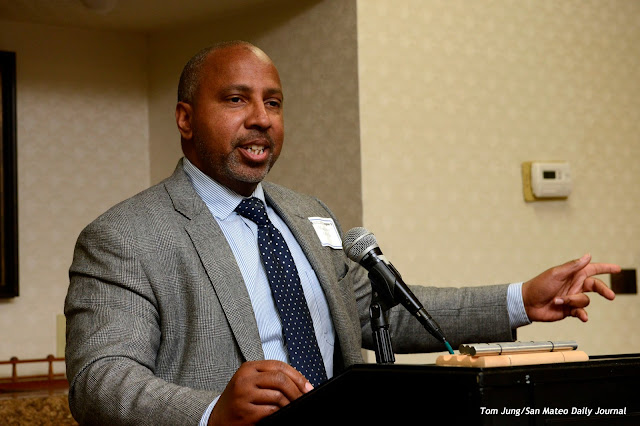

Photo #3: 1/125, F 6.3, ISO 1600, Cloudy White Balance
For this shot (Photo #3), I rotated the head 135 degrees to camera right. The image follows the "light follows the nose" rule. I believe the bright highlight on my subject's forehead came for an overhead accent light. For shots like this I prefer to use an SB-900 because I have a full 180 degree sweep to both the left and the right.
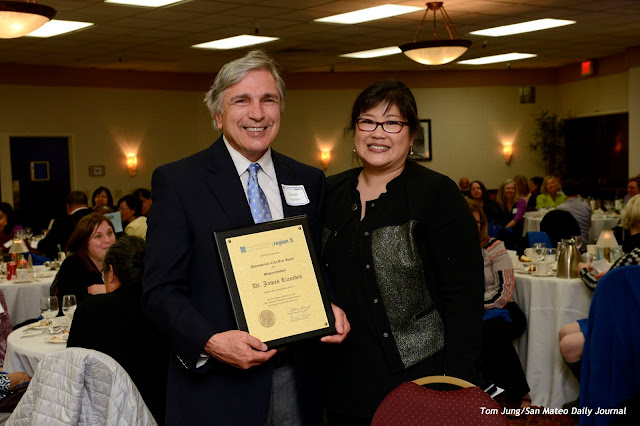
Photo #4: 1/125, F 6.3, ISO 1600, Cloudy White Balance
If memory serves, my back was near a wall which provided some extra light to help the shadow detail (Photo #4).  It's best to have a wall behind you when using this backward bounce technique so you can make use of all the light from your flash.
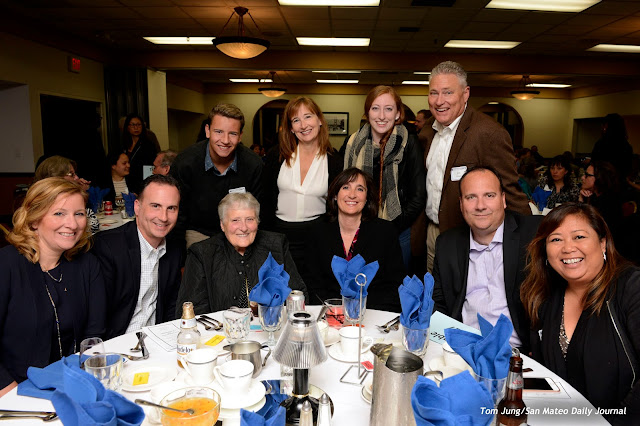
Photo #5: 1/125, F 6.3, ISO 1600, Cloudy White Balance
Hail Mary! Shooting blindly over one's head has been called the "Hail Mary" shot, since photographers resort to this technique only only in times of desperation (sidebar photo). Accompanied by a continuous burst from a motor driven camera, it was the last ditch "spray and pray" attempt to get at least one usable image. It's not a pretty picture.

However, with the advent of Live View, one could actually get a pretty good idea of what was being included (or excluded) from the image frame when doing the HM. If your camera's LCD panel can tilt downward, there would be no reason why your composition couldn't be as tight and level as you would normally achieve from eye level. Very little cropping was required for this shot (Photo #5).

Hail Mary has some advantages. It forces your subject/s to pay attention to what's going on, since the camera is in an unexpected place. The upward tilt of the head lessens any extra chins hanging about.

Working Too Close To Your Subject: Occasionally there will be a problem with ceiling bounce. Here, the flash head was too perpendicular, resulting in a sort of light one might find from a skylight. Notice how my left subject's head is fairly level, the middle subject tilted downward, and the right hand subject tilt up. There wasn't quite enough light to properly light the middle subject, but I think the shot is somewhat saved by his almost impish grin.

The Take Away:
  • The Black Foamie Thing is not a light modifier in the truest sense. It's a light re-director, giving you the ability to control where your light is, and where it isn't. 
  • It works outdoors if you happen to be standing in front of a suitable bounce surface. Without a suitable bounce surface, it's useless.
  • It can give you a fighting chance at some decent ceiling bounce shots from across a room, so long as the BFT prevents the bounced light from showing up in your frame, where it could affect the TTL exposure.
 If for no other reason, you should keep on in your bag for when a long ceiling bounce is needed.

Normally events like this are centered around the podium. When it does, it gives the photographer a chance to "settle in", adjust exposures, and get the lighting just right. Unfortunately for me, this event featured a roving Master of Ceremonies who would go to the honorees rather than have them come to the podium. I know one of the honorees was having back problems, and by bringing the show directly to her table, it saved at least one person from having to struggle through the crowded banquet hall. It made for a true "run and gun" situation, resulting in some grabbed shots and some exposures that weren't perfectly dialed in.