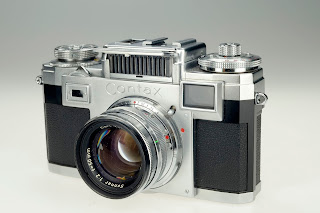
Painting With Flash is a technique that is well suited for photographing objects that are highly reflective, such as the Contax. Done properly, the technique can create soft, non-specular highlights, incredible detail, and shadowless exposures similar to those you could achieve using a light tent, but with a much smaller investment in equipment. To make this shot, all you need are:
- A clean, flat surface for your subject to support your subject.,
- A camera capable of small shooting apertures (F16 or smaller),
- Two fast-recycling flashes,
- Light modifiers of your choice ,
- A steady tripod, and
- A dark room in which to work.
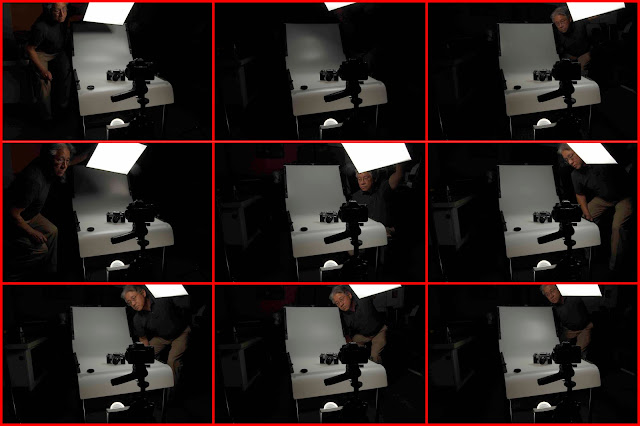
The Setup: This shot was an attempt to show you what's going on in the darkened workspace. In my left hand, you can see a speedlight with a small softbox, triggered by a remote trigger in my right hand (More on that later). On the floor, there is an optically triggered flash with a Gary Fong Cloud Dome aimed to direct light towards the foreground while lighting the scene from underneath. It's partially hidden by a book I used to prevent light spill into the camera mounted on the tripod. And yes, the plane of focus is on the tripod, which explains my out of focus-ness.
Next, I'll manually trip the camera shutter. I now have 20 seconds to position my key light, trigger it with the controller, and re-position the light about 8 inches from its current location, and trigger the flash again. I'll do this as many times as I can, which means about 15 pops if my key light flash is recycling quickly enough. Each time I trigger my main light, I am simultaneously triggering my foot light, so that after 15 pops, my foot light has given me the equivalent of a full power burst of light. And because I move the key light after each shot, the highlights grow, and flow, into each other, giving me the large, soft highlights I wanted in the first place.
 New be forewarned, the results are not always perfect the first time. But with a little practice, you'll start to get photos with plenty of fine detail in the shadows (if you have any) and no burnt out highlights.
If I had it to do over, I put a bit more light on Contax's right side, which is noticeably darker than the left. But overall, the normal glare-prone chrome finish glows more than sparkles, and there is lots of detail in the knurling of the control knobs.
They really don't make them like they used to!


No comments:
Post a Comment